
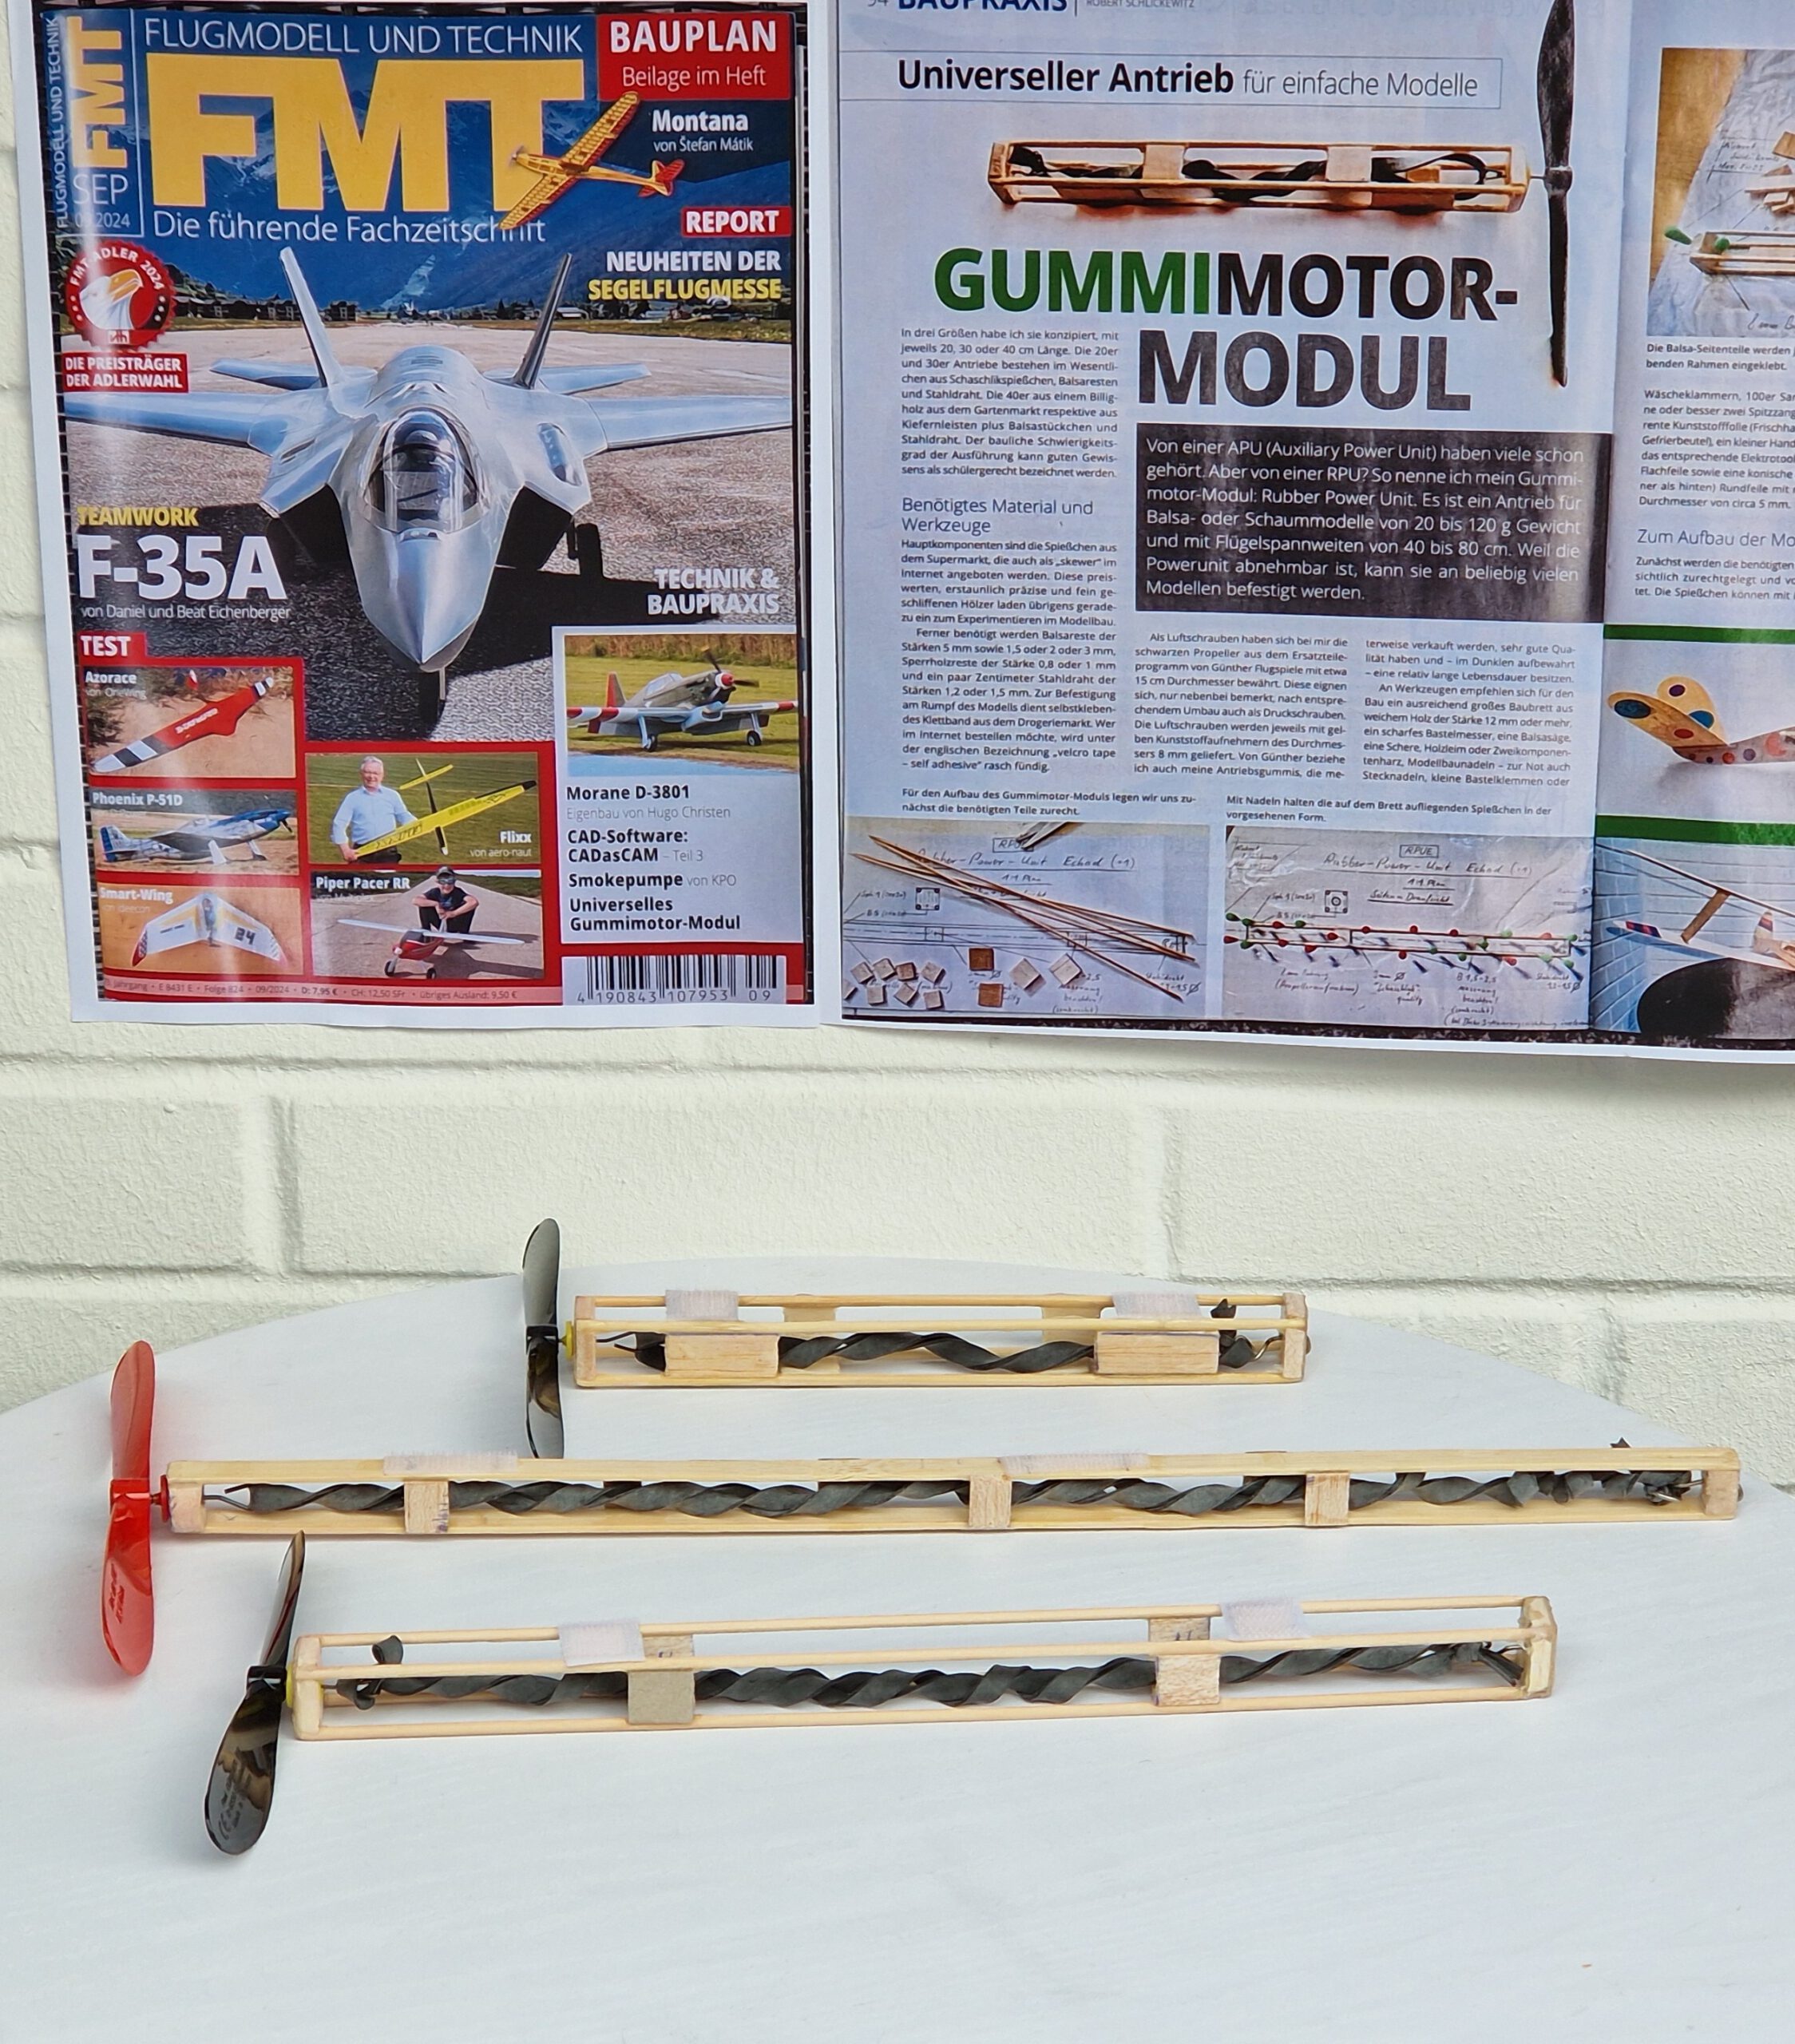
What is an RPU?
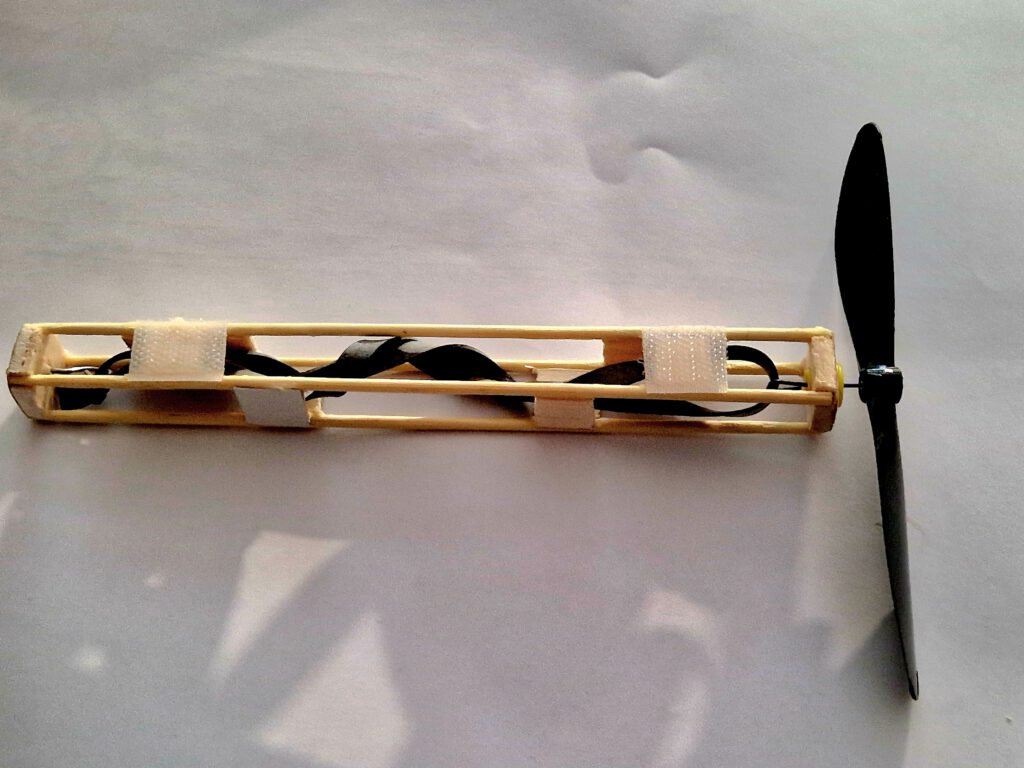
RPU stands for Rubber Power Unit — a compact and interchangeable propulsion module for model airplanes. Designed with simplicity and flexibility in mind, the RPU allows model builders to use one power unit across multiple balsa sheet models.
Key Features:
- Easy to build
- Few parts required
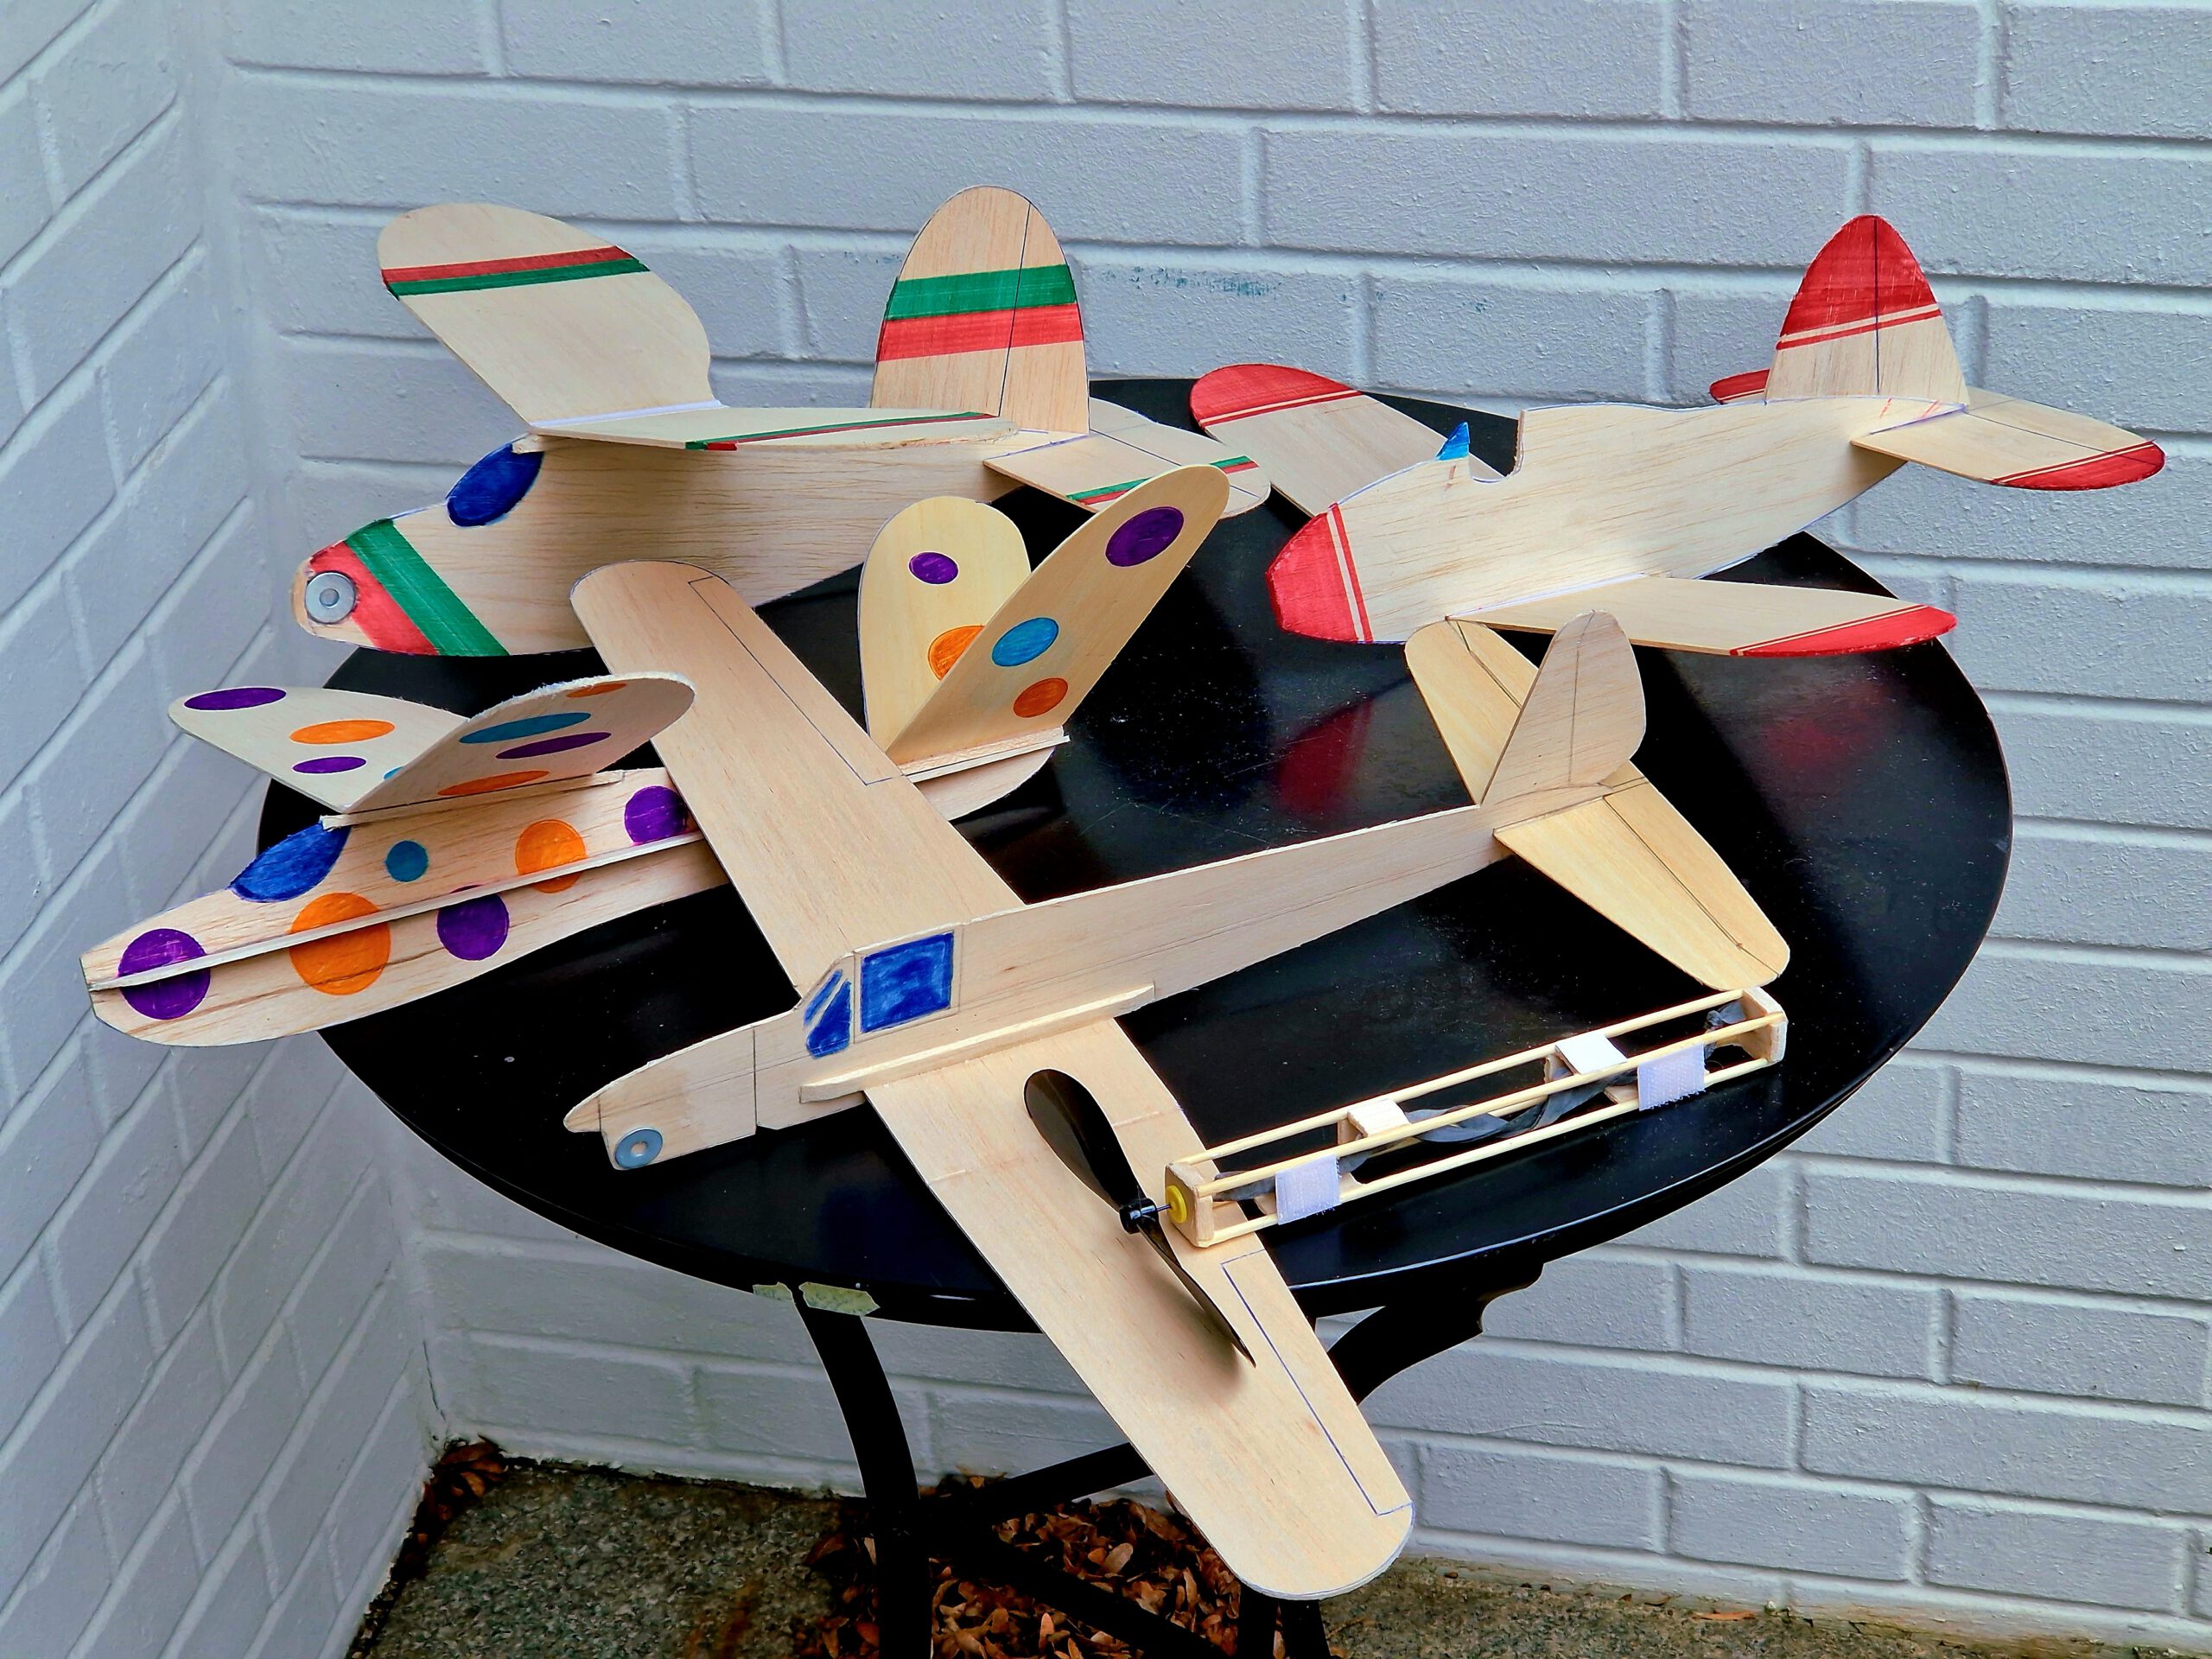
- Interchangeable across models
- Three available sizes (RPU 20, RPU 30, RPU 40)
- Attaches via Velcro tape
- Ideal for experimentation and quick model swaps
Materials:
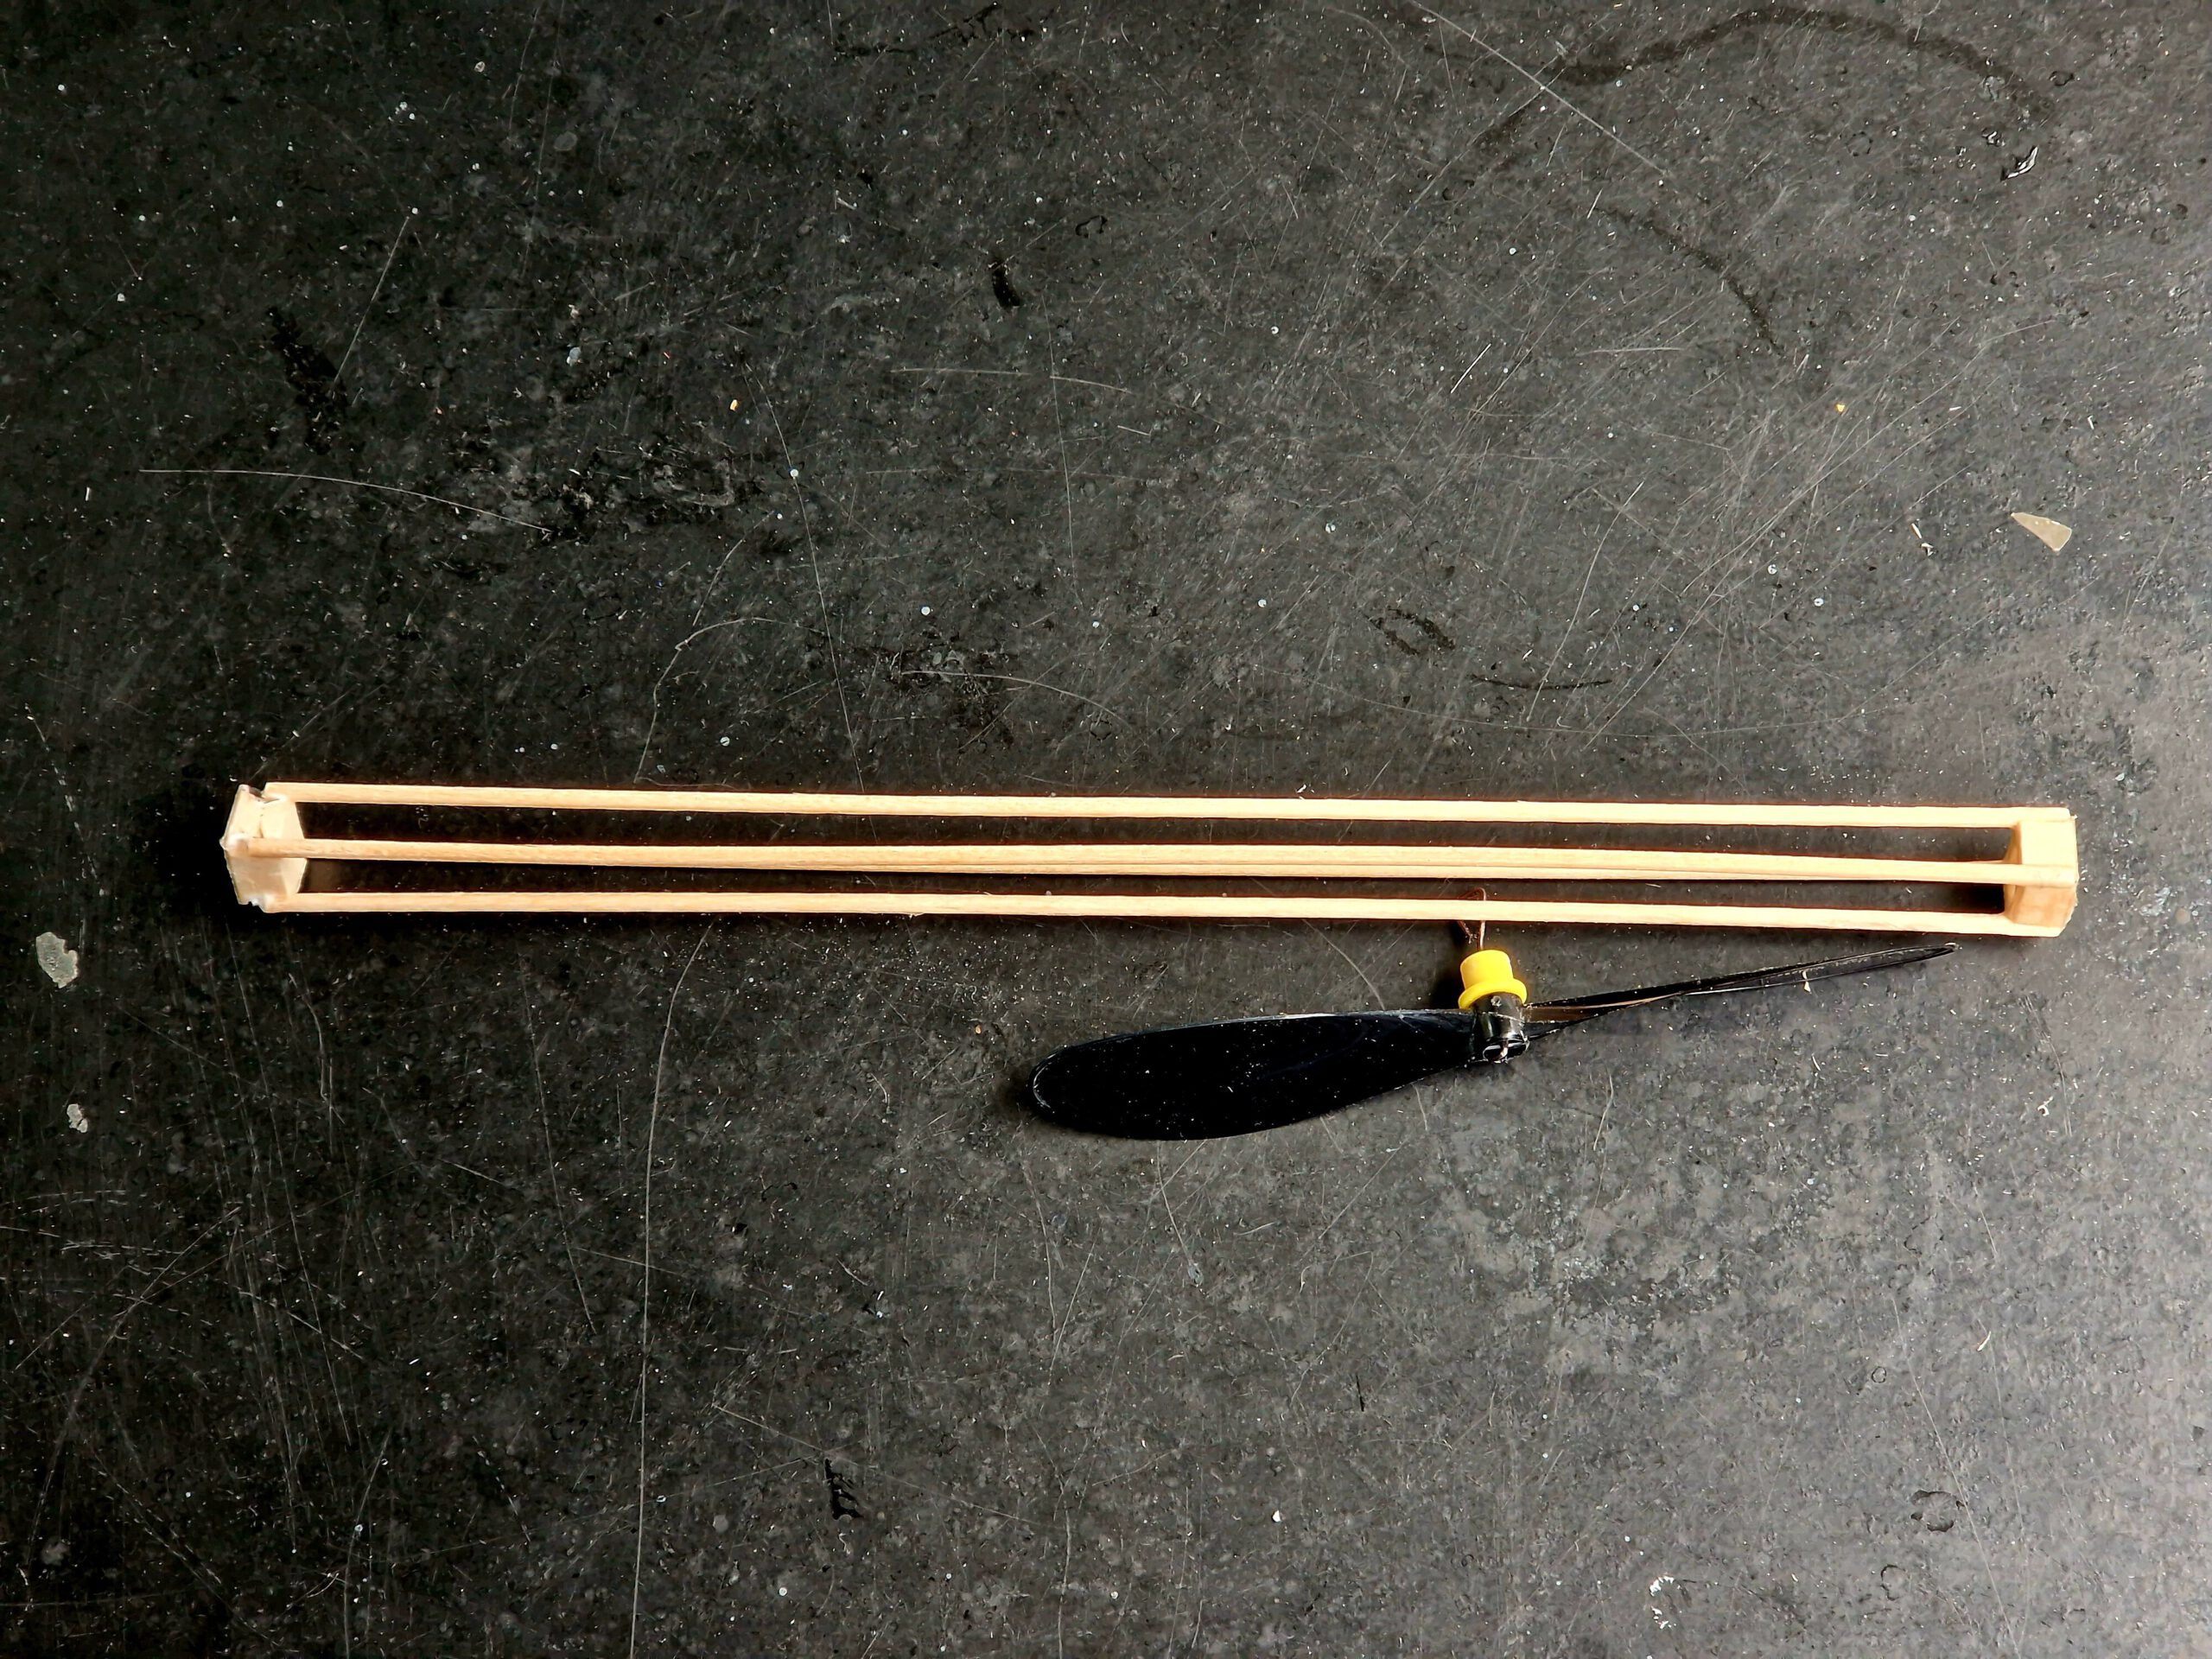
- Four barbecue skewer chopsticks (main structure)
- Scratch balsa and ply
- Hook from piano wire
- Brown or black rubber
- Commercial plastic airscrew
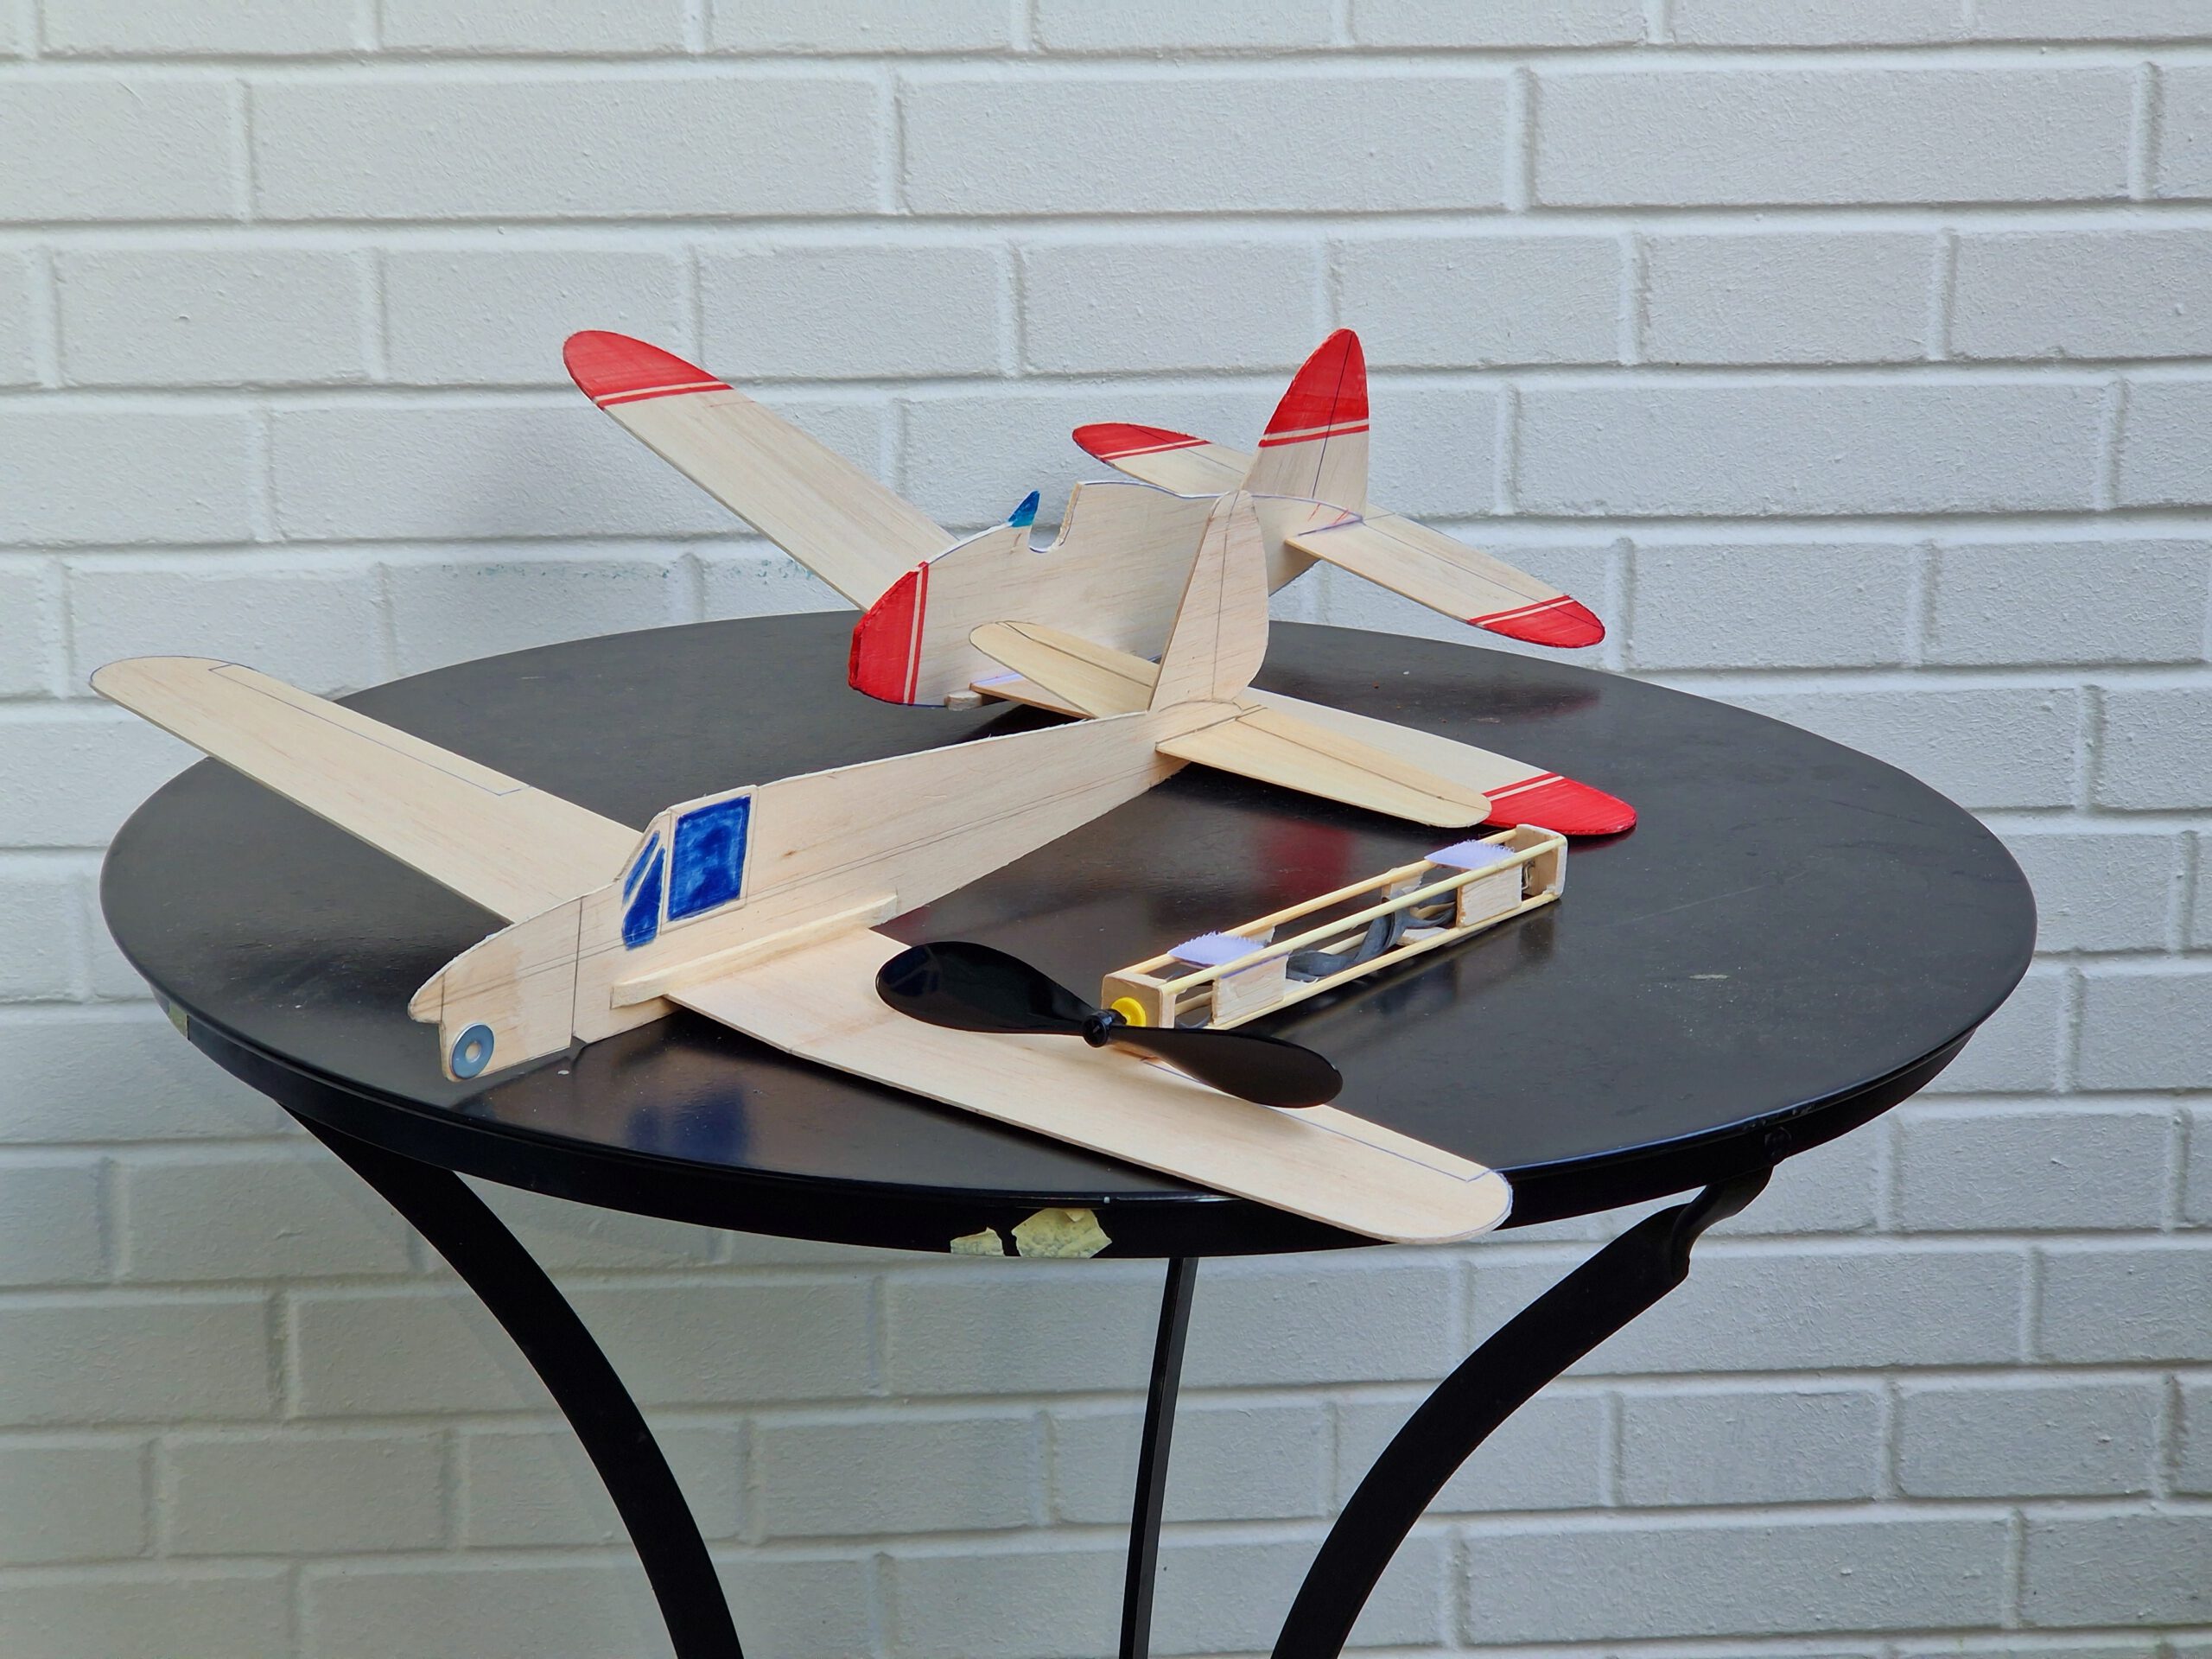
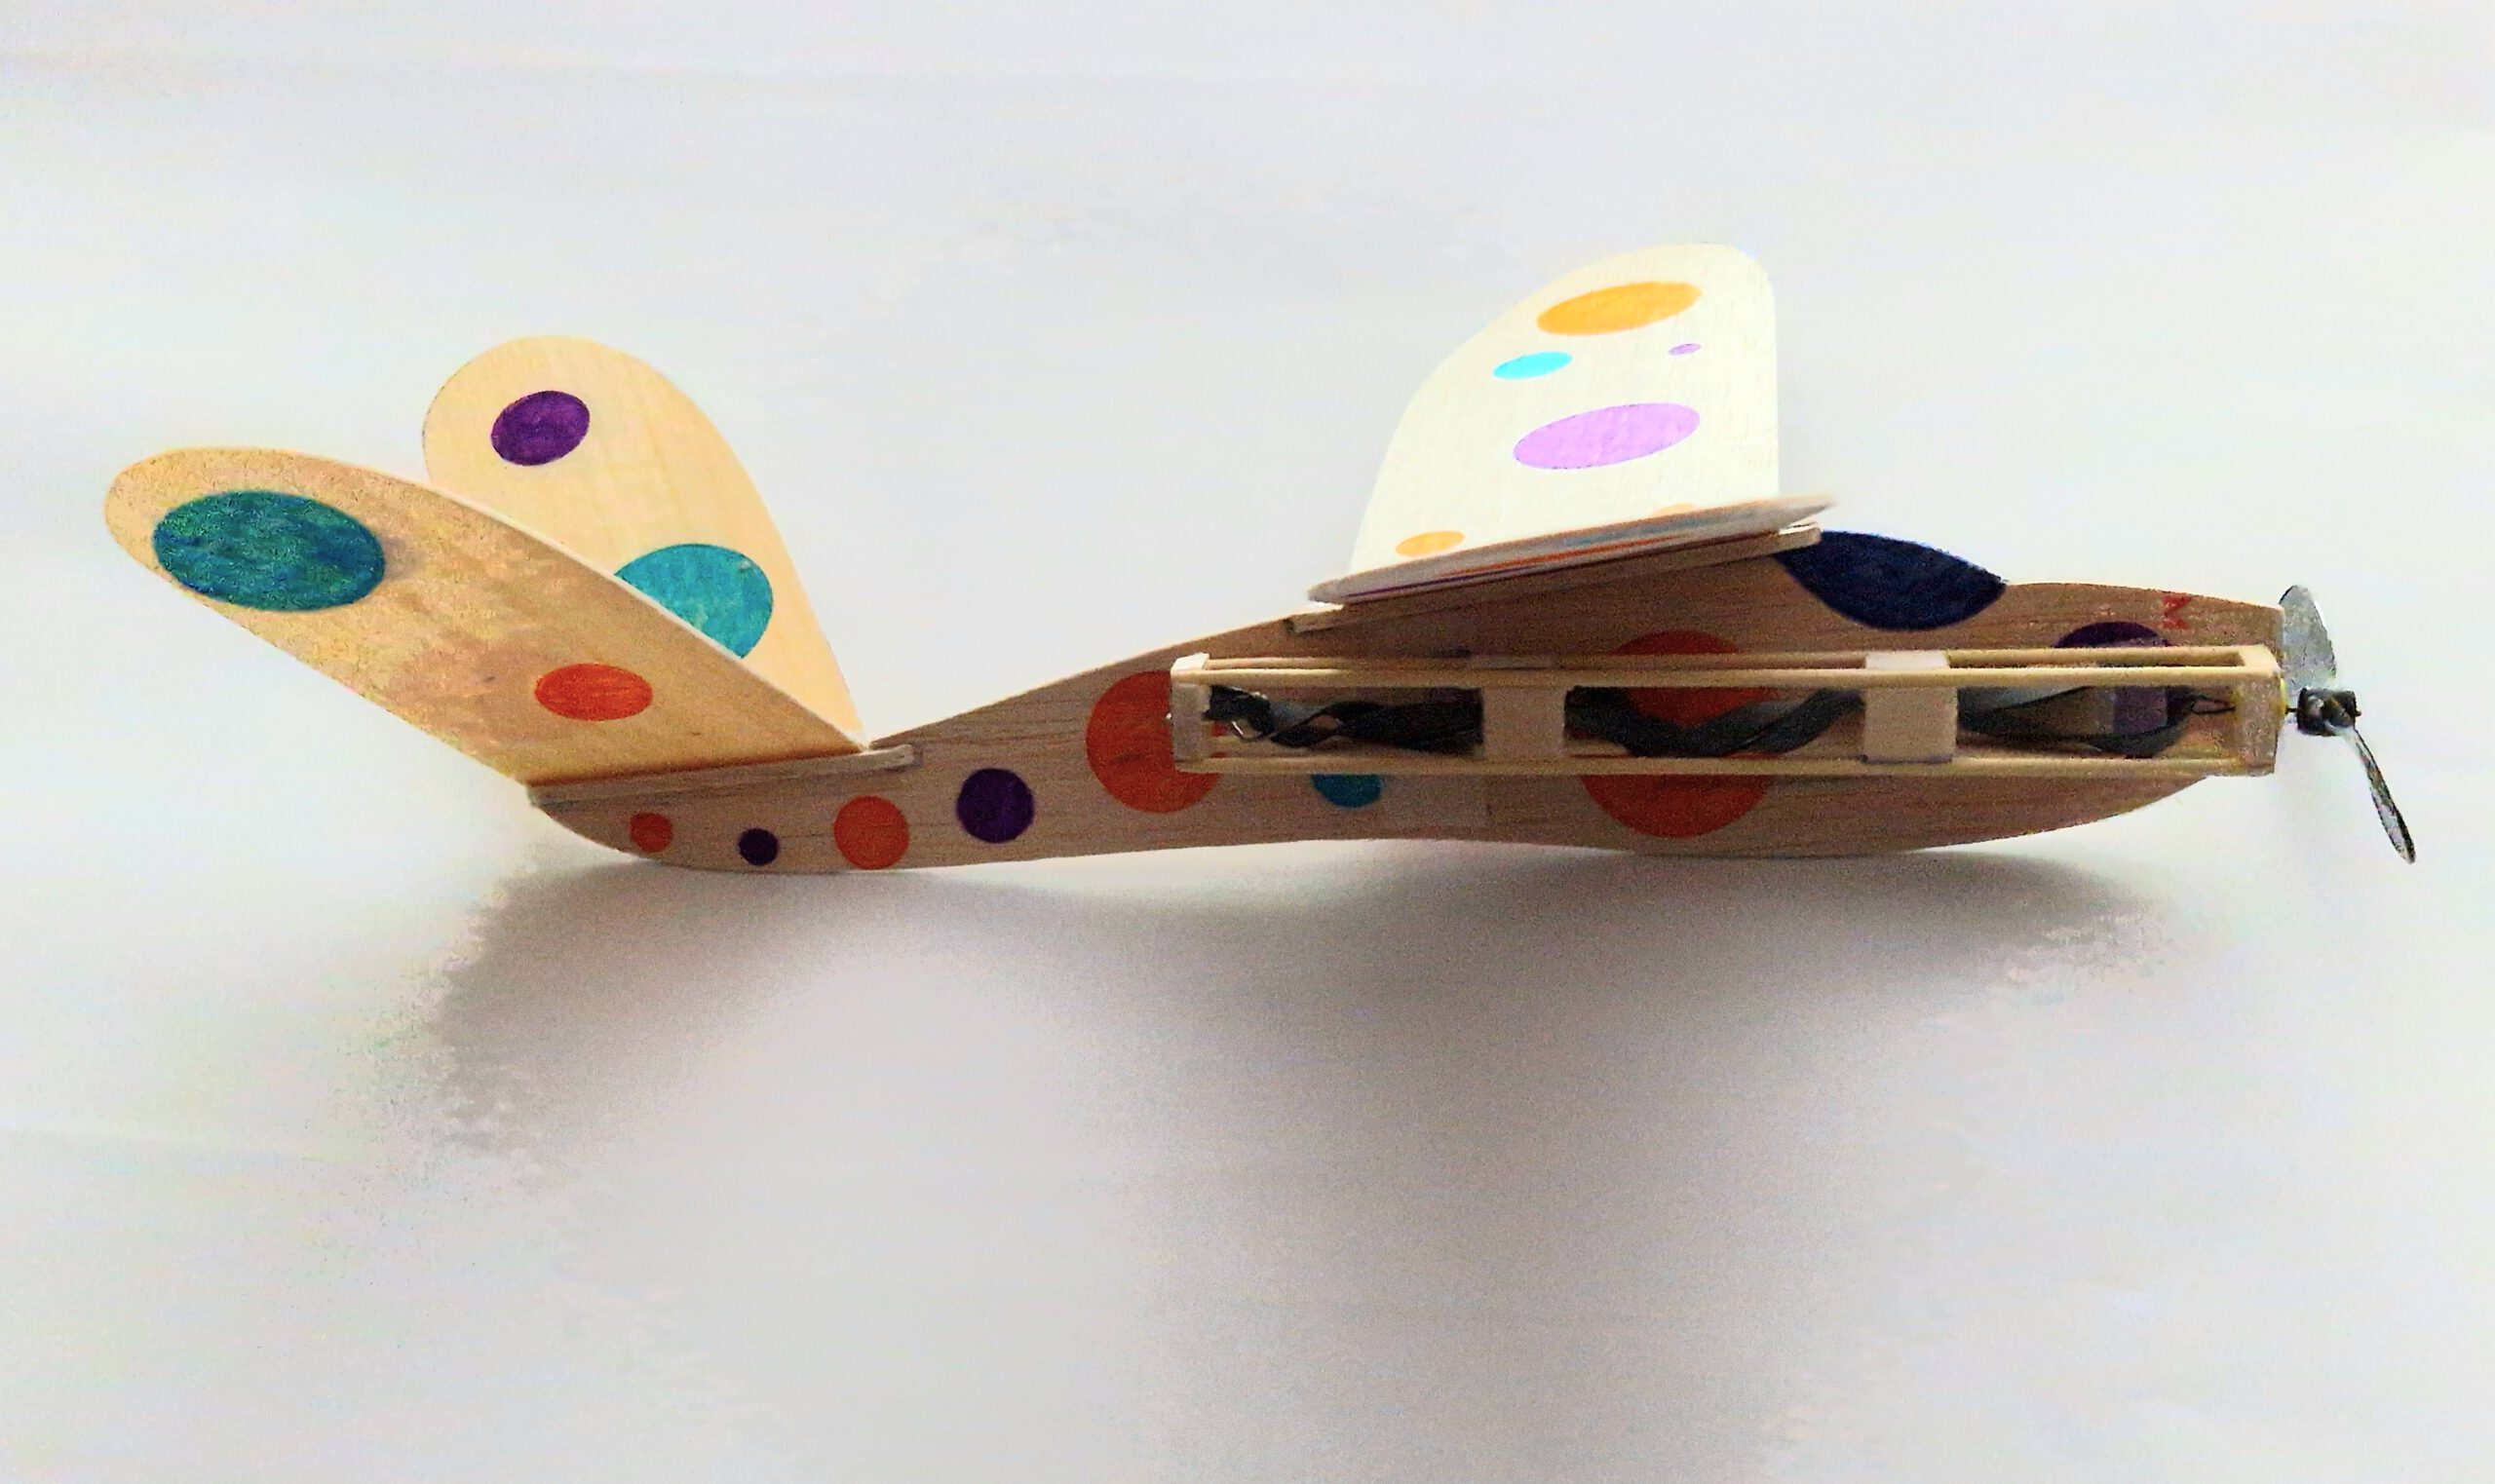
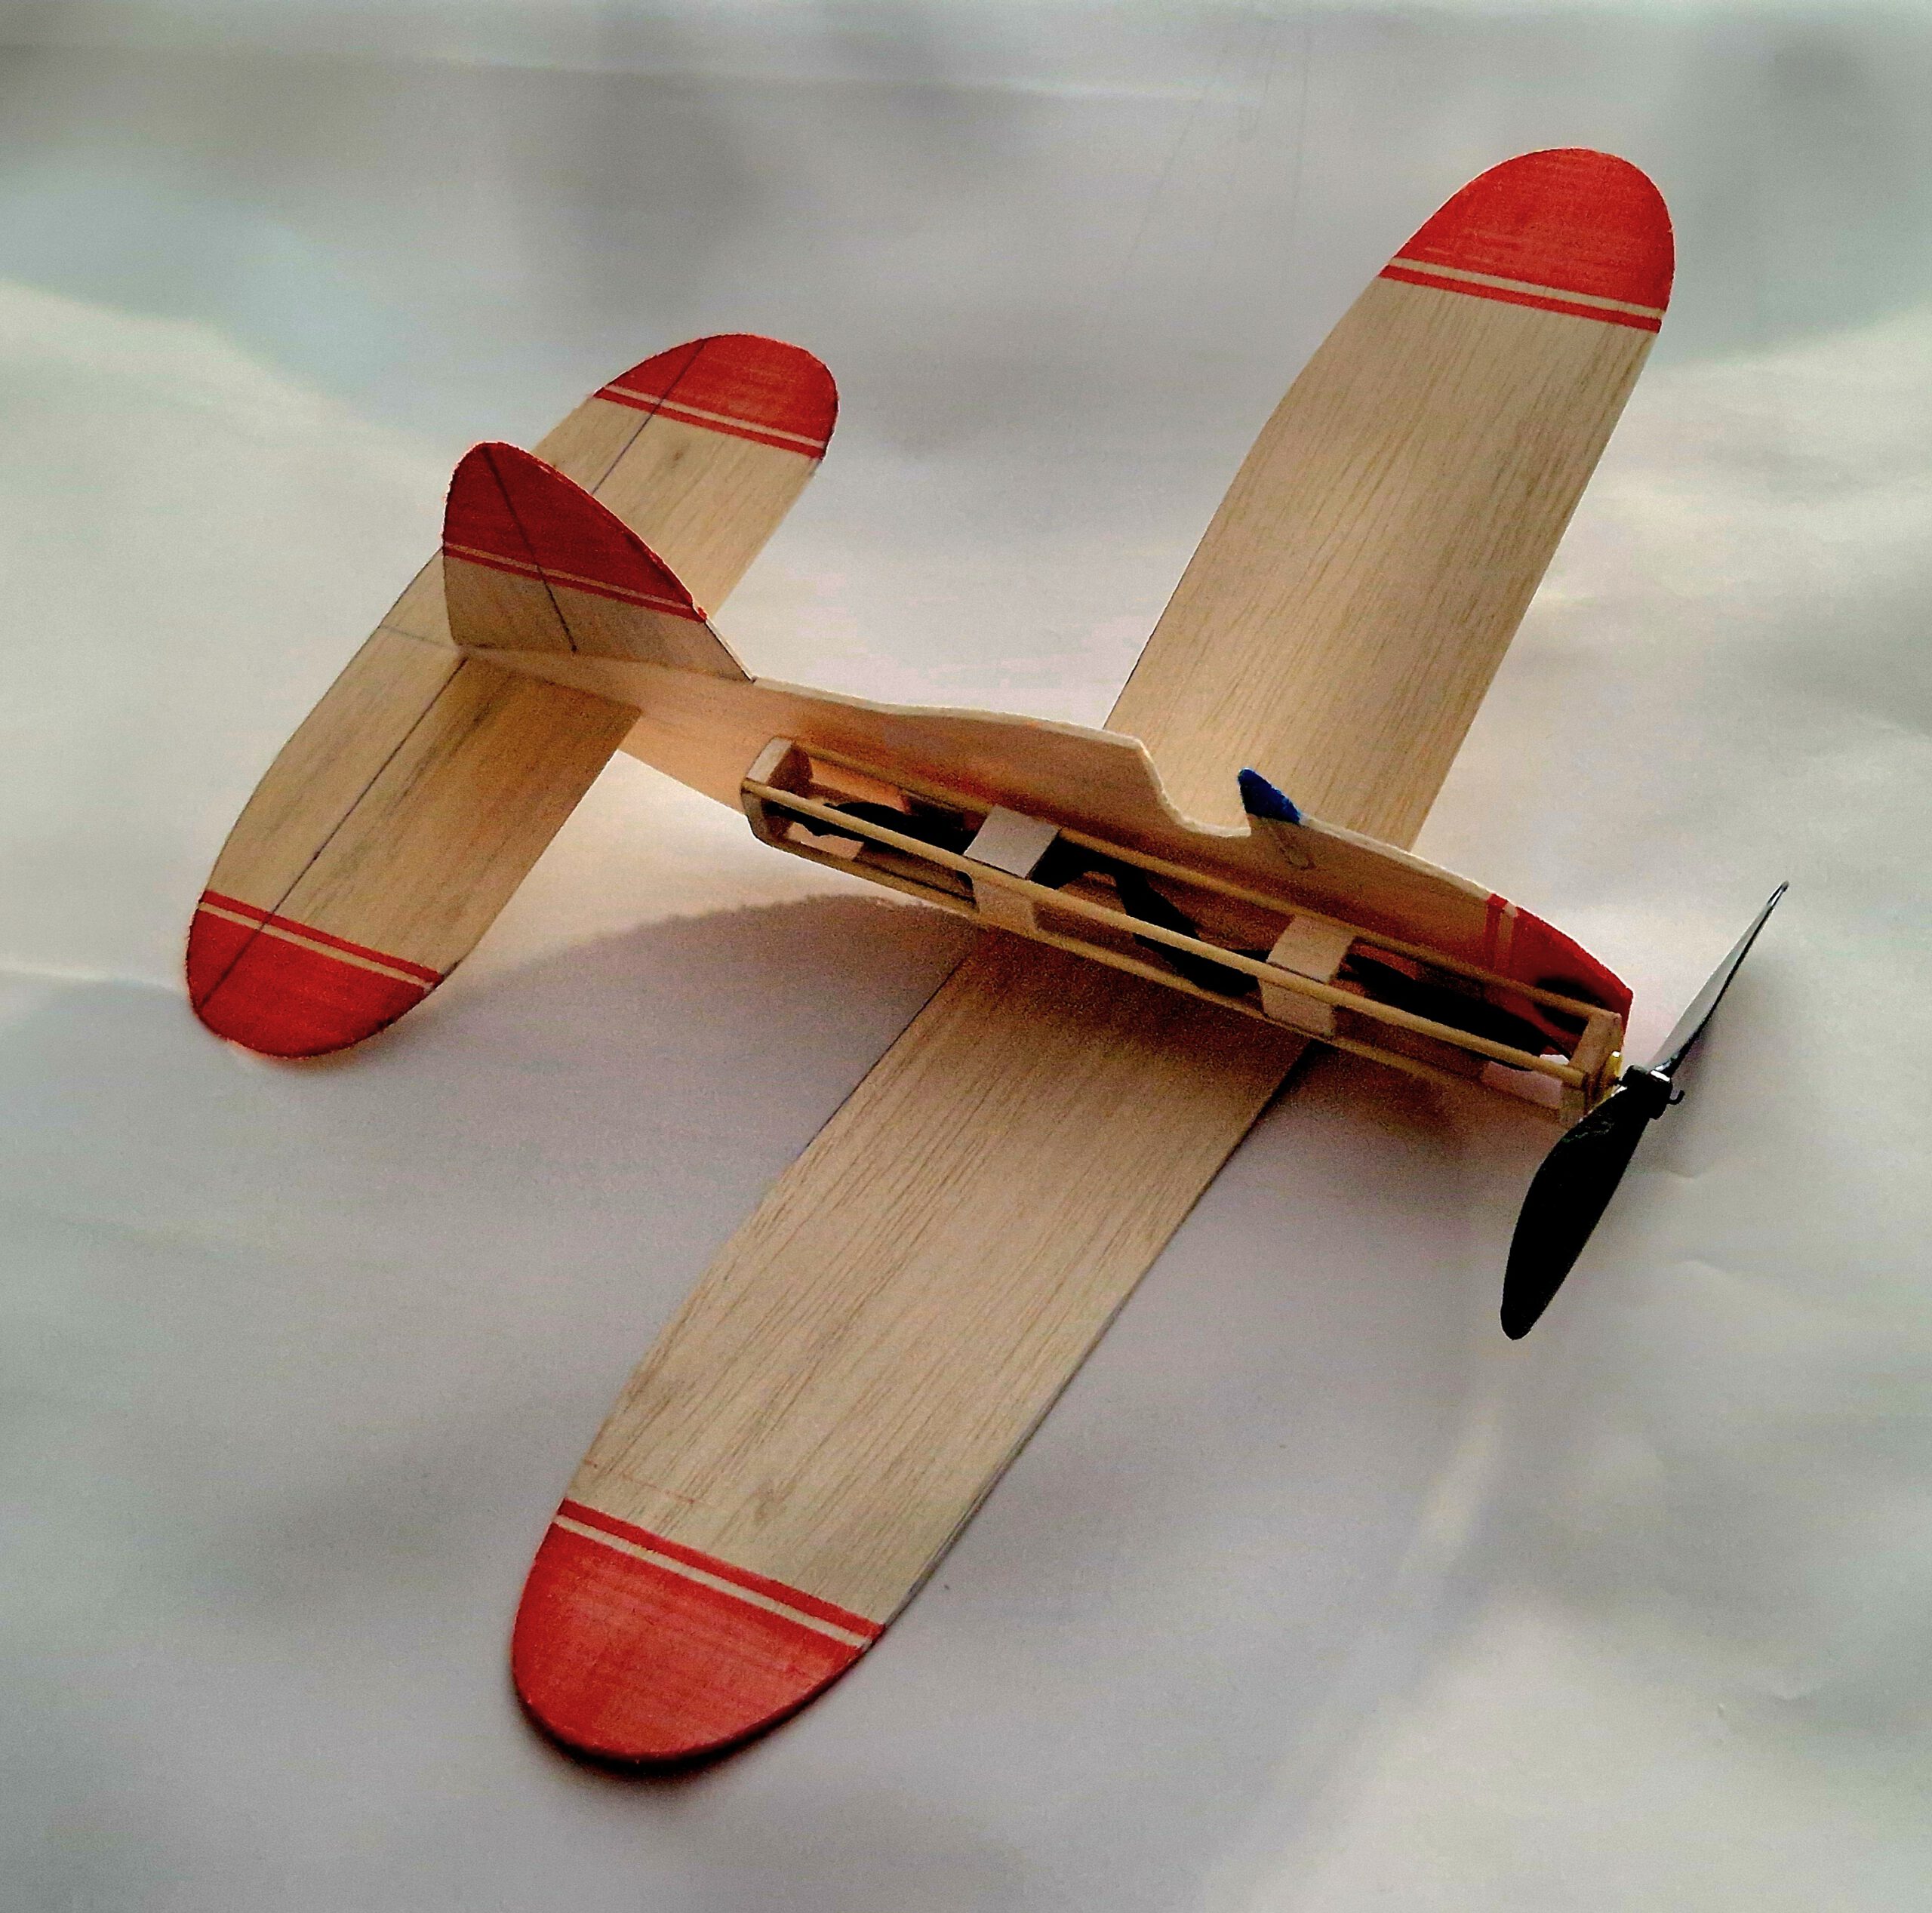
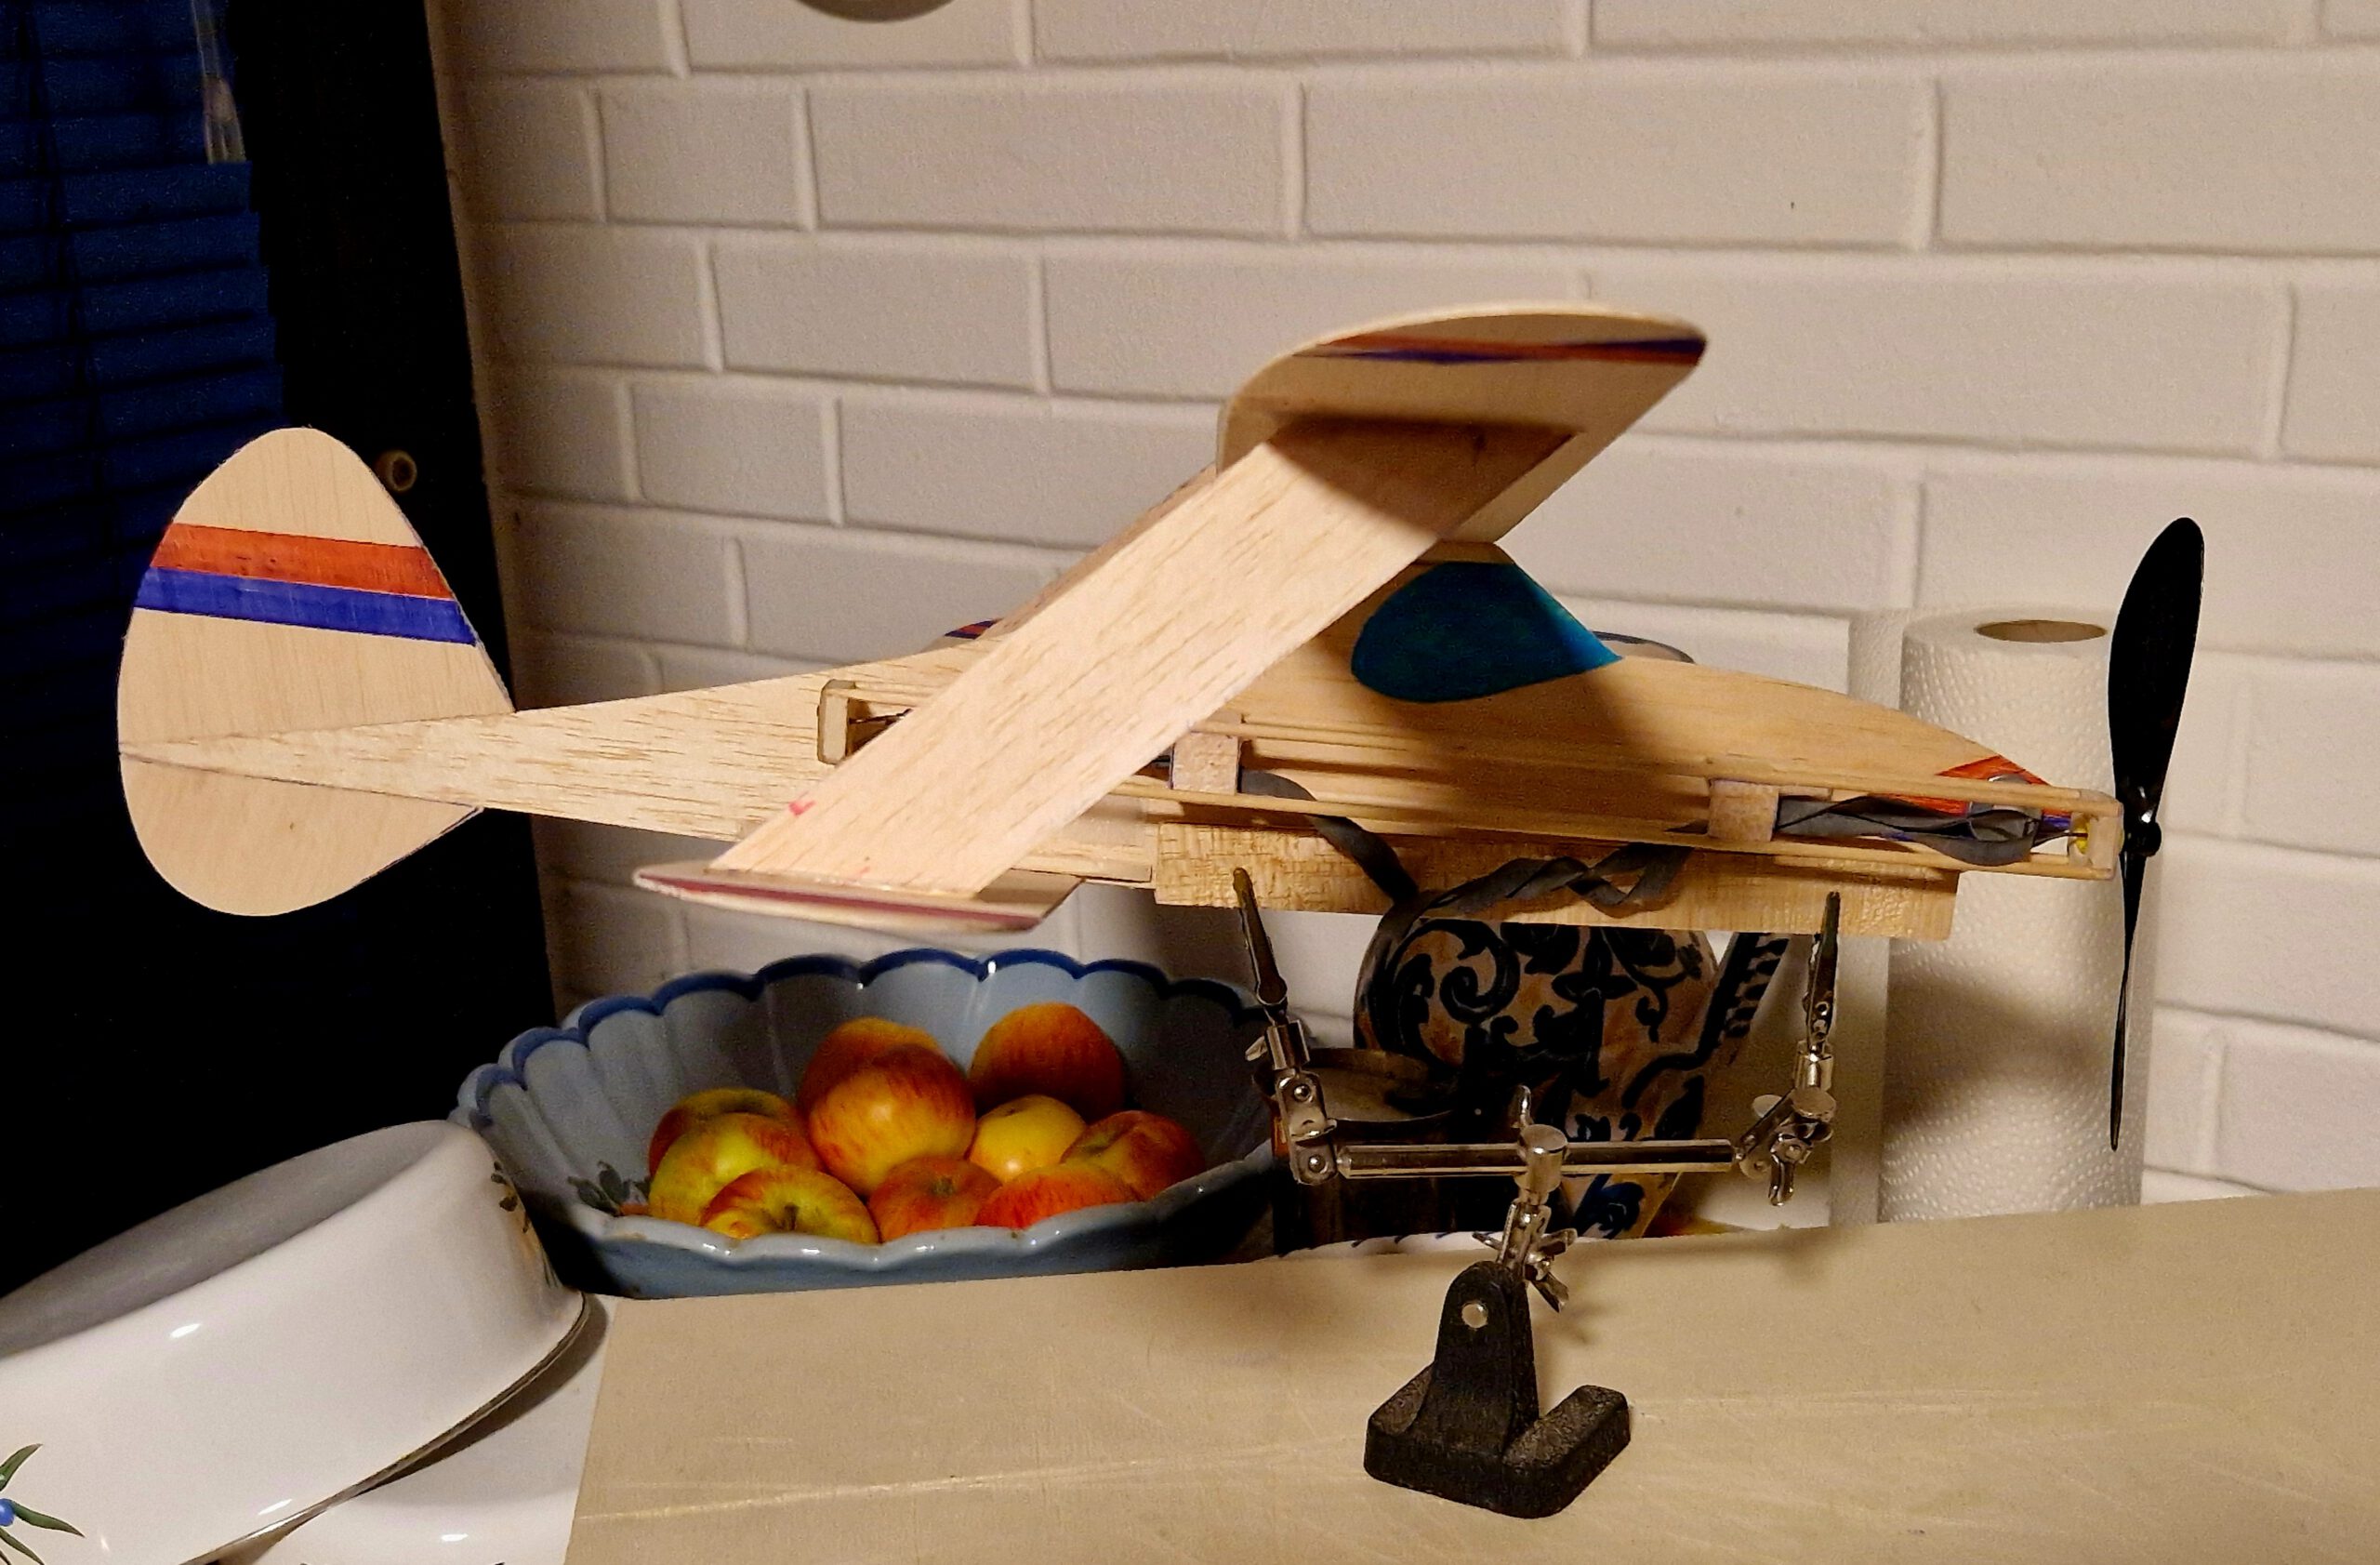
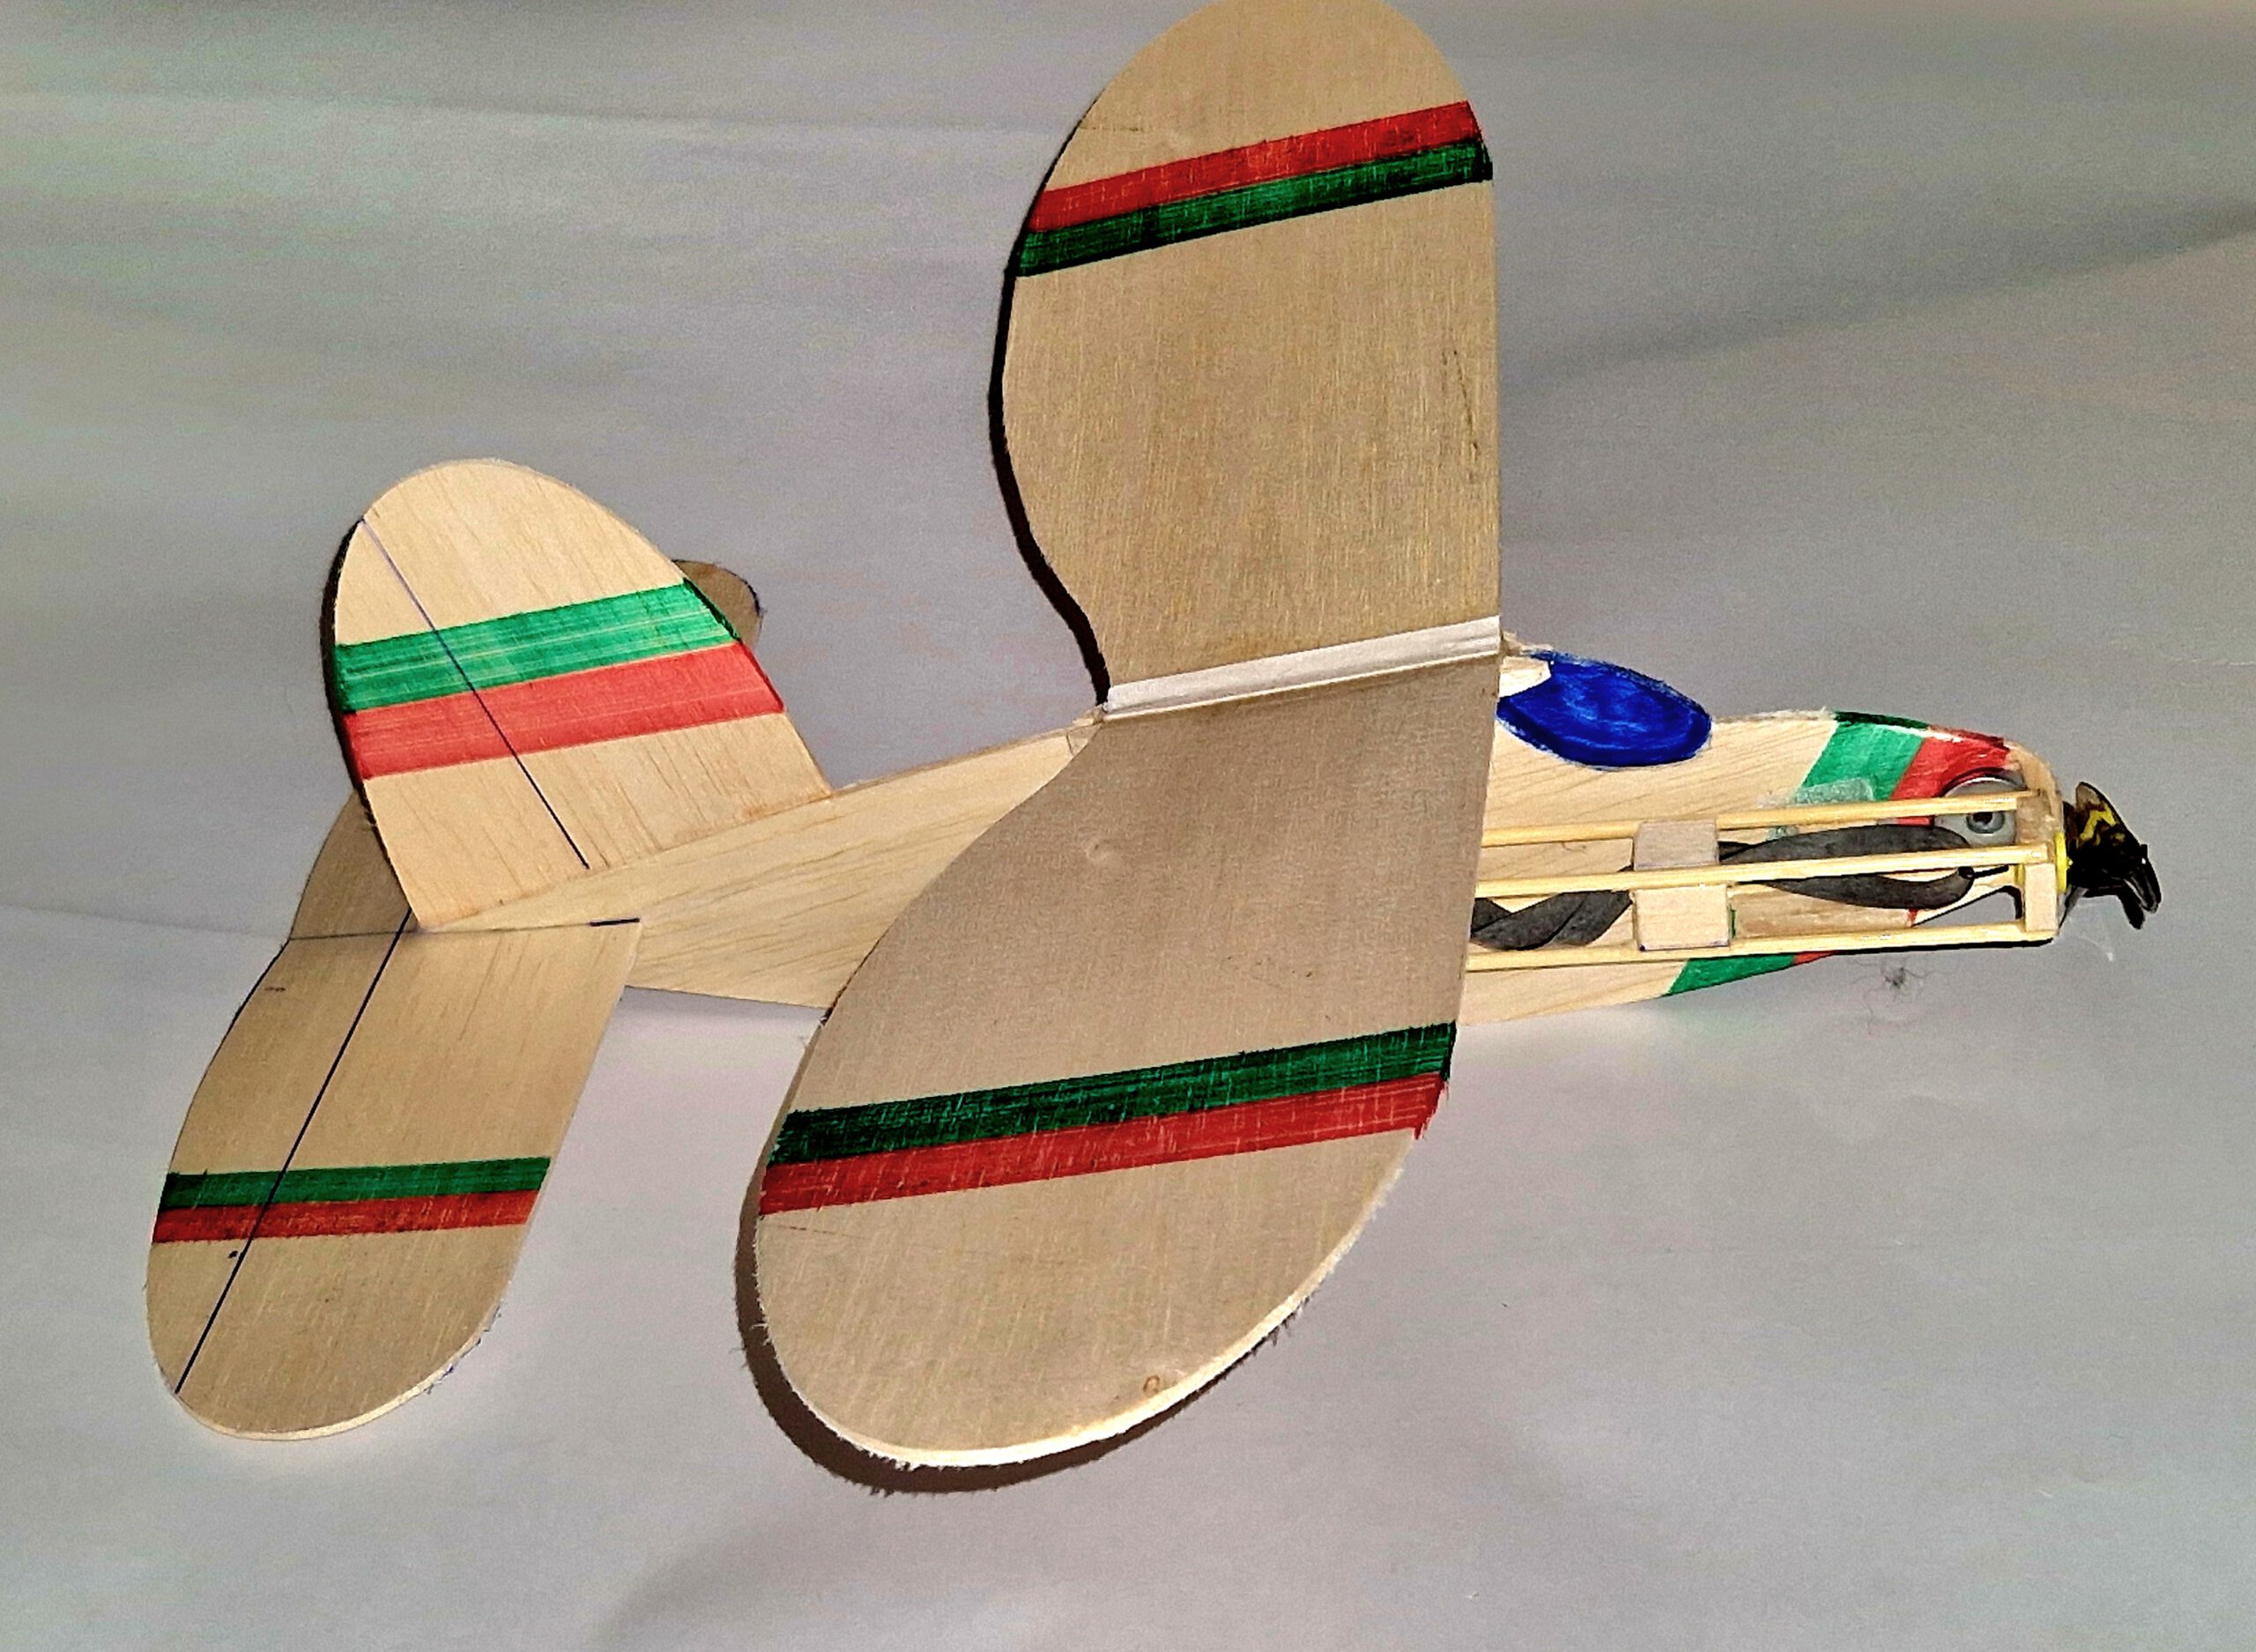
Practical Use: One RPU can power a variety of models. Attach it with Velcro to one aircraft, fly, remove, and attach it to the next. Though slightly asymmetrical like No-cal models, flight performance is comparable to built-in rubber motor models.
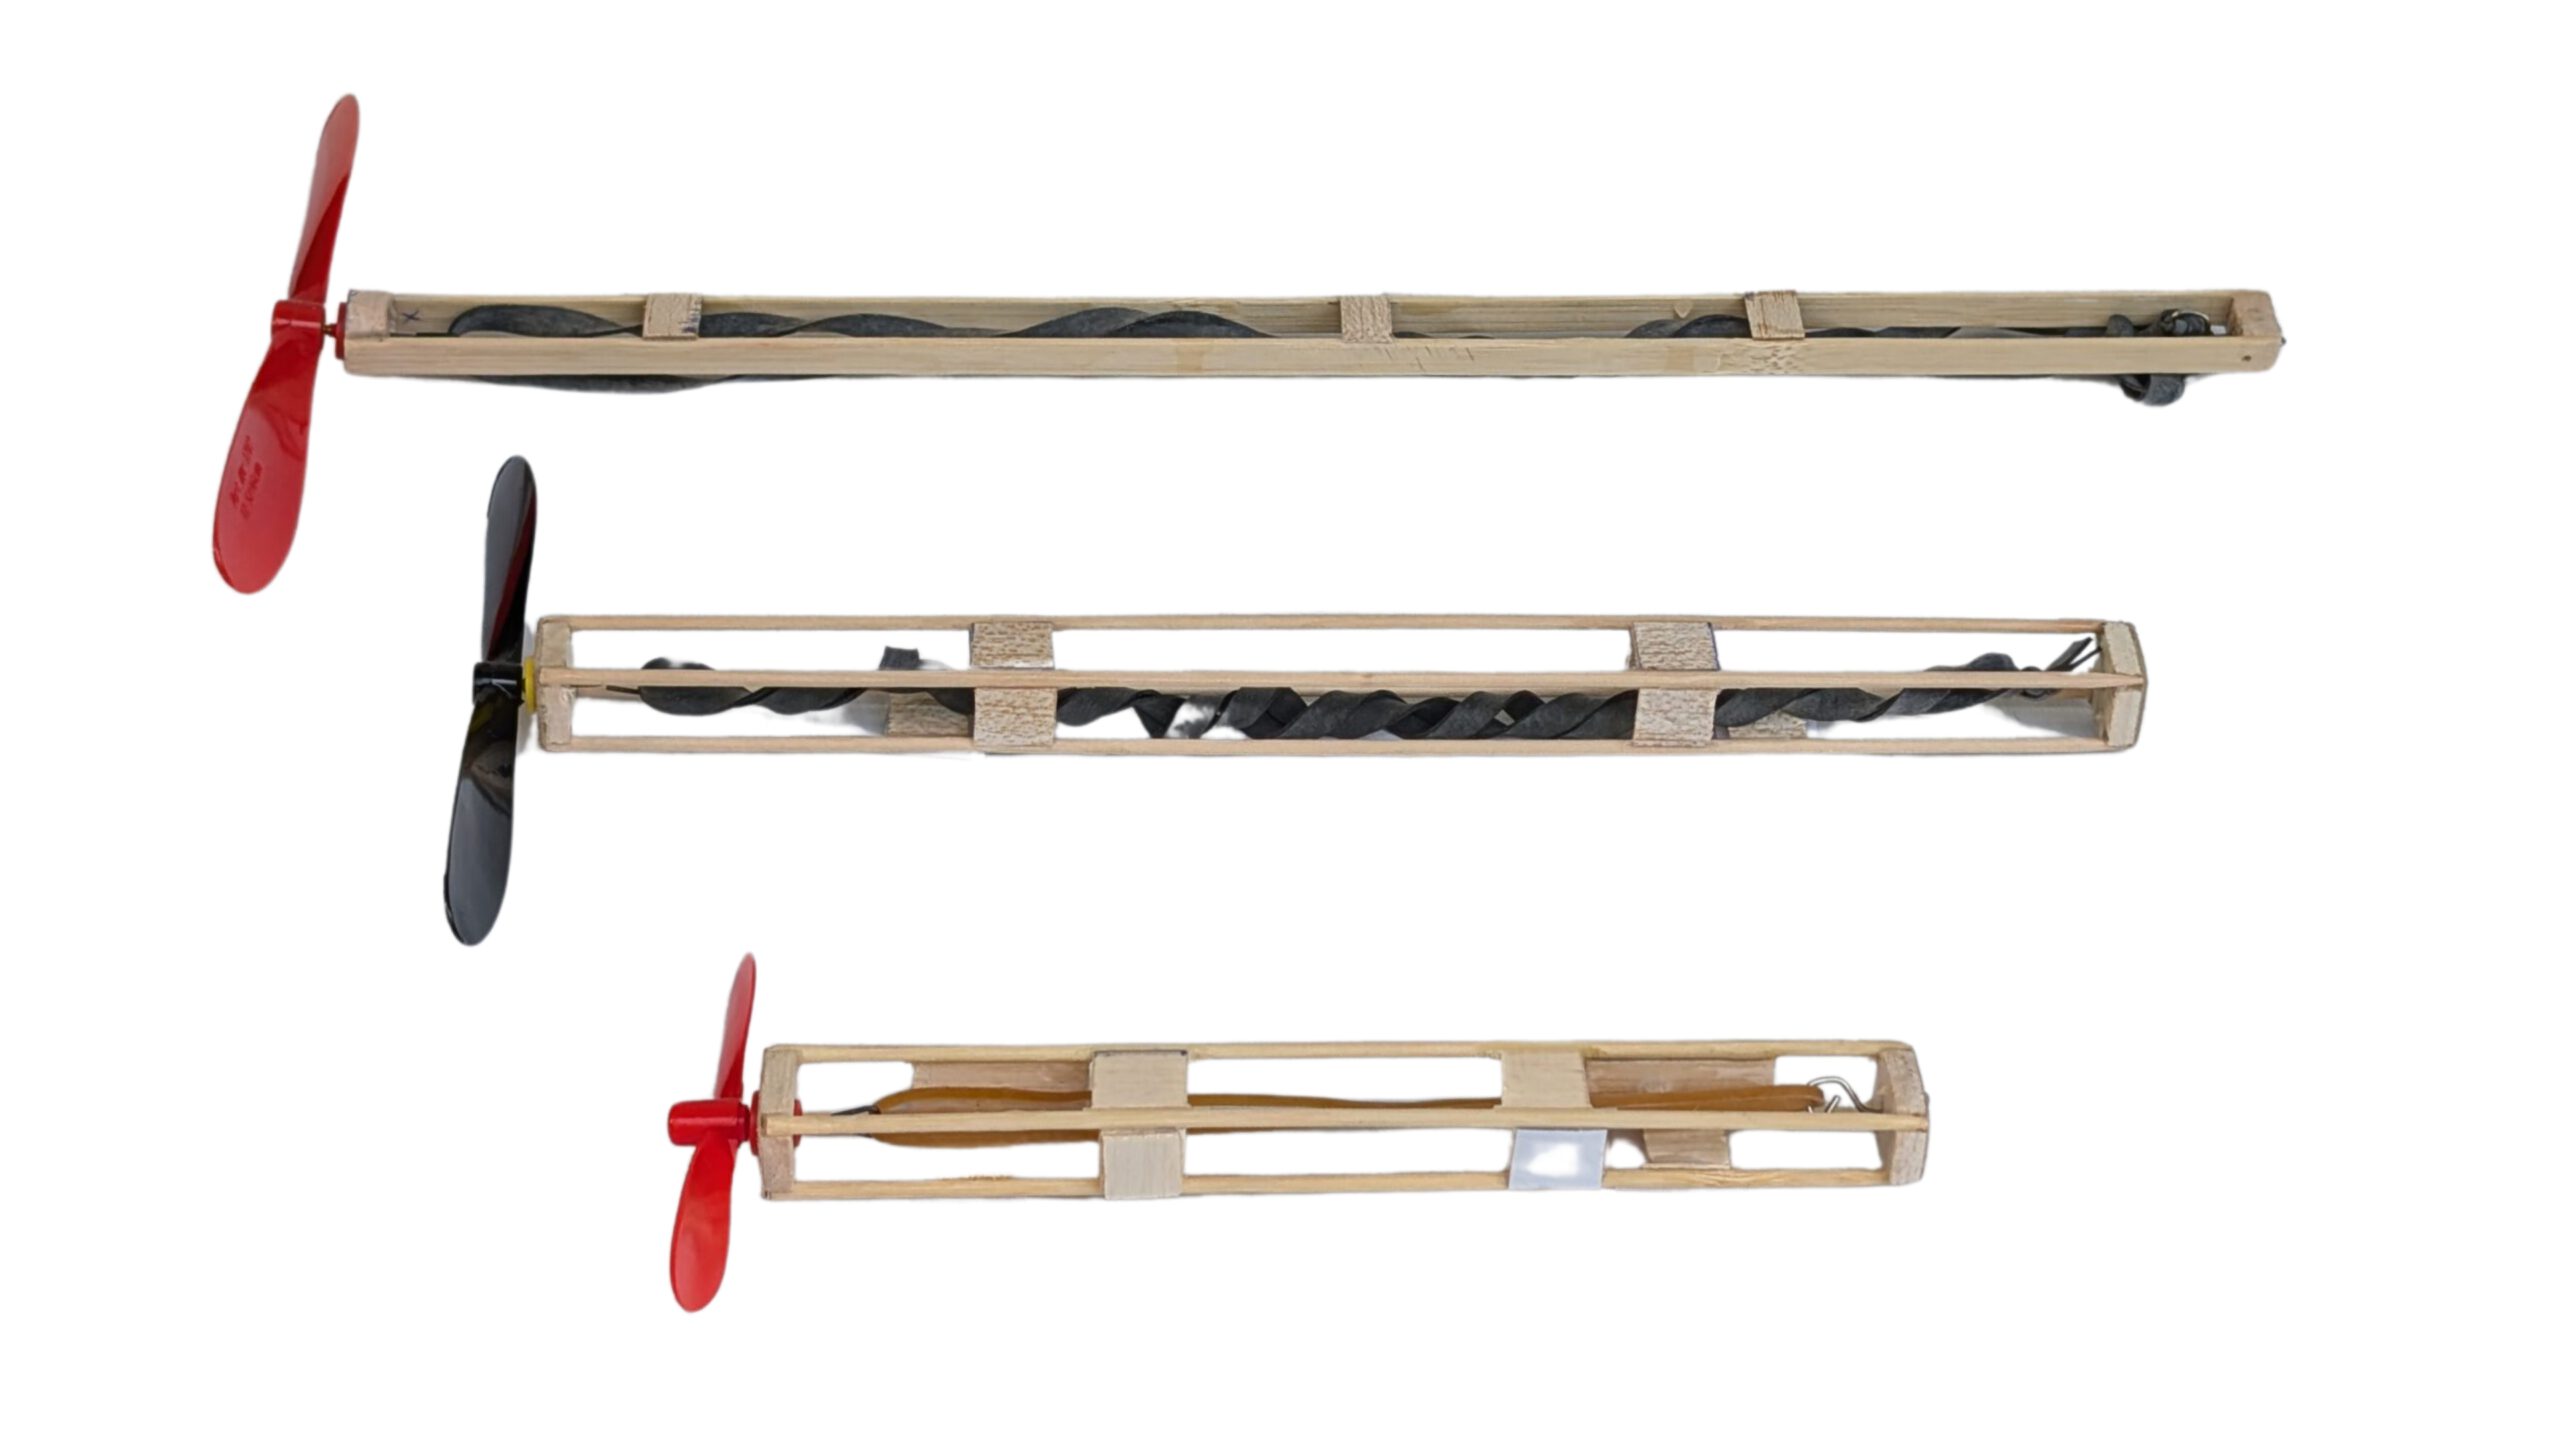
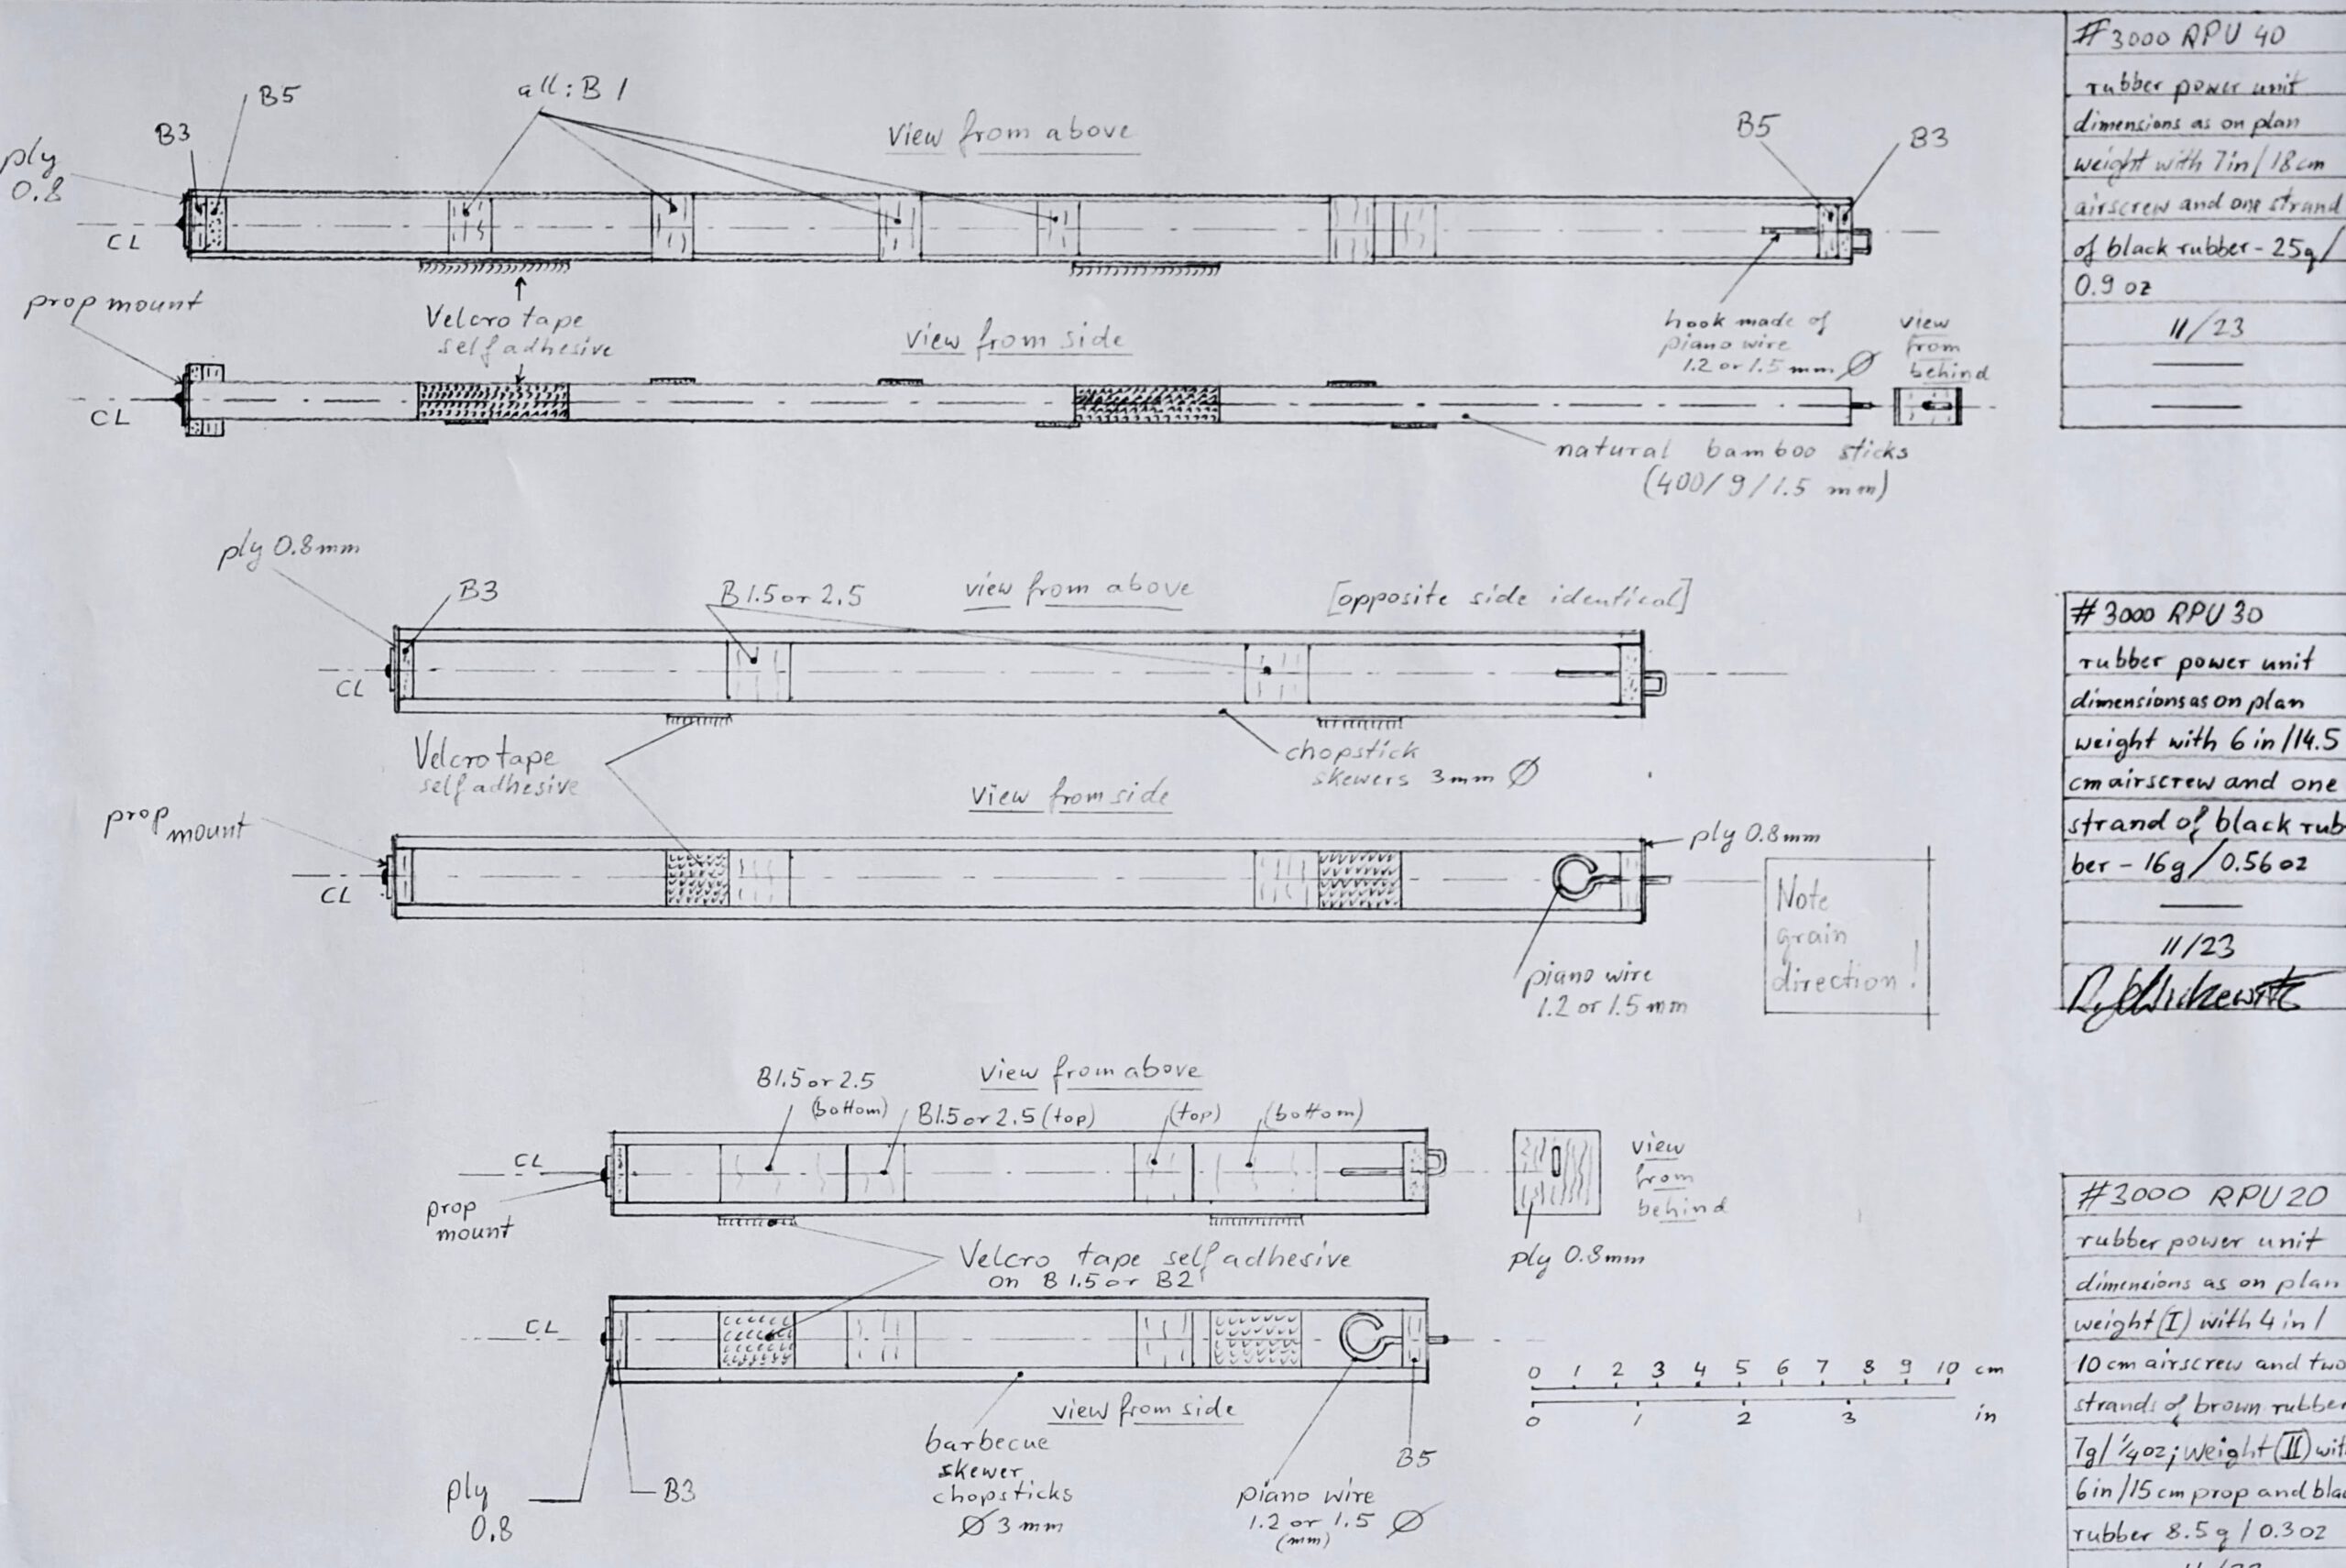
RPU Module Specifications
| Model | Length | Weight & Configuration |
|---|---|---|
| RPU 20 | 20 cm / 7.9 in | 7 g / ¼ oz (with 4 in prop + thin brown rubber) 8.5 g / 1/3 oz (with 6 in prop + ¼ in black rubber) |
| RPU 30 | 30 cm / 11.8 in | 16 g / 0.56 oz (with 6 in prop + ¼ in black rubber) |
| RPU 40 | 40 cm / 15.75 in | 25 g / 0.9 oz (with 7 in prop + ¼ in black rubber) |
Model Fit Guide:
- RPU 20 – For models with 30–40 cm (11.8–15.75 in) wingspan
- RPU 30 – For models with 40–60 cm (15.75–23.6 in) wingspan
- RPU 40 – For models up to 80 cm (31.5 in) wingspan
- Uses bamboo sticks (400 × 9 × 3 mm) instead of skewers


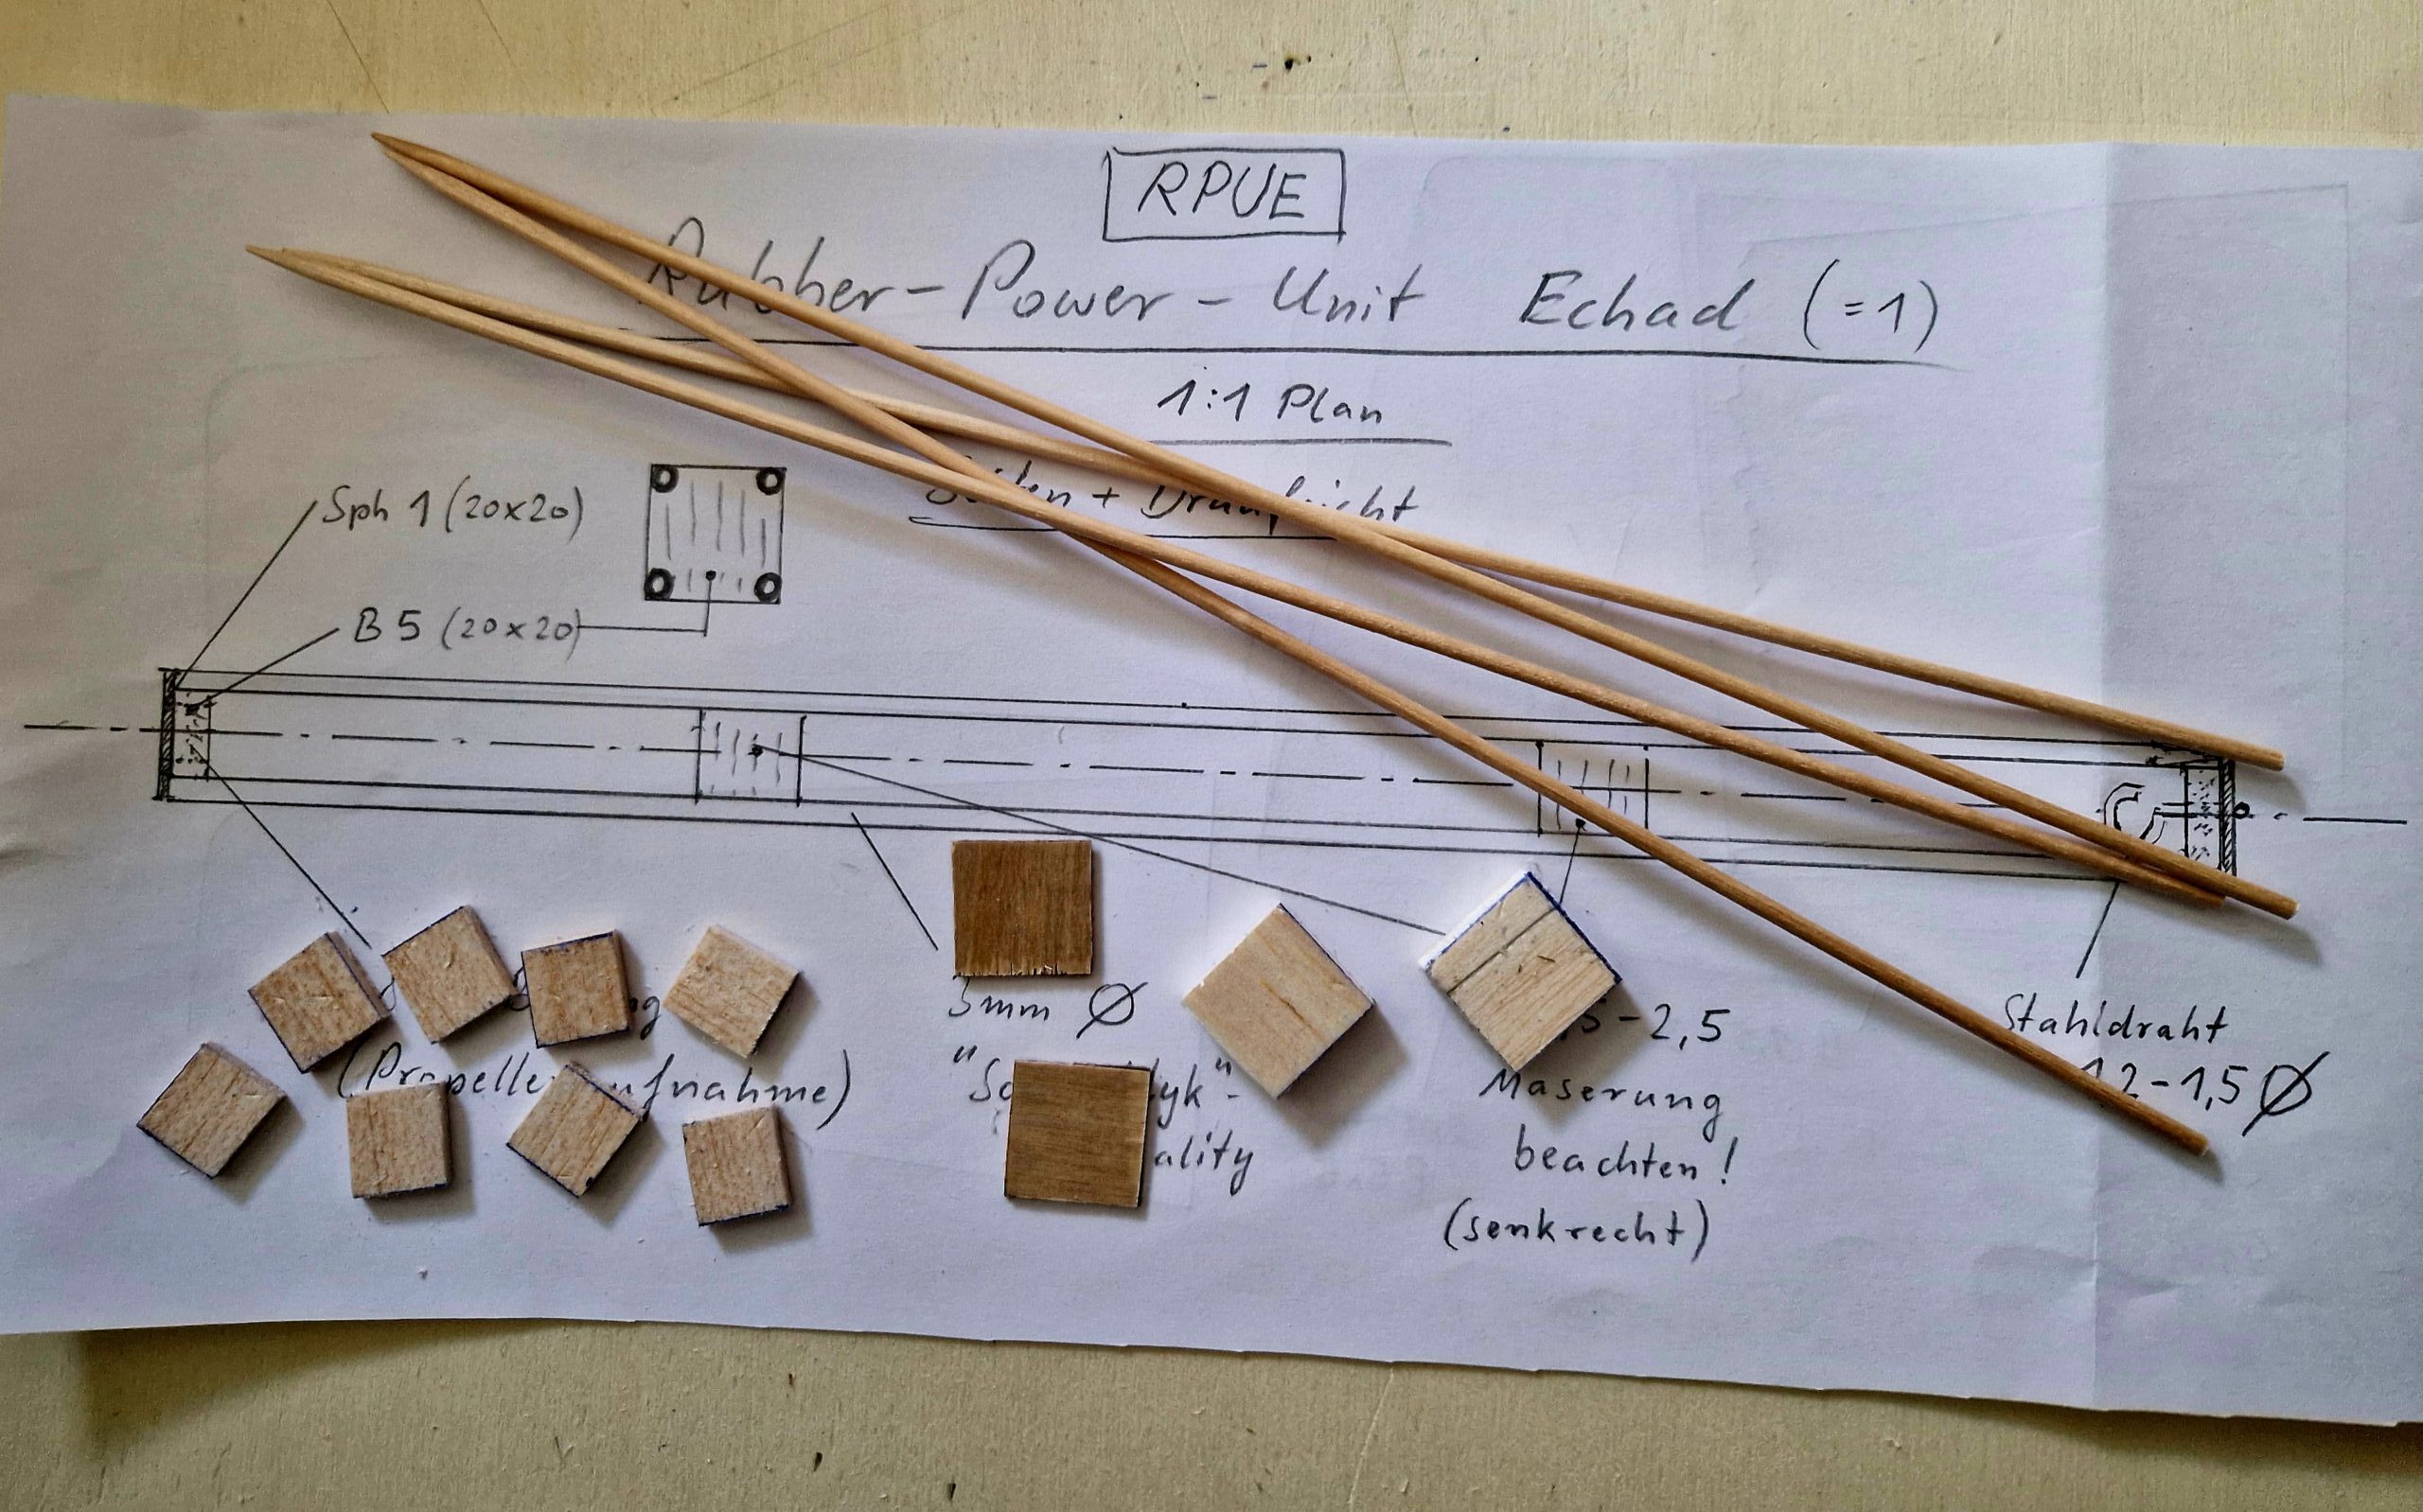
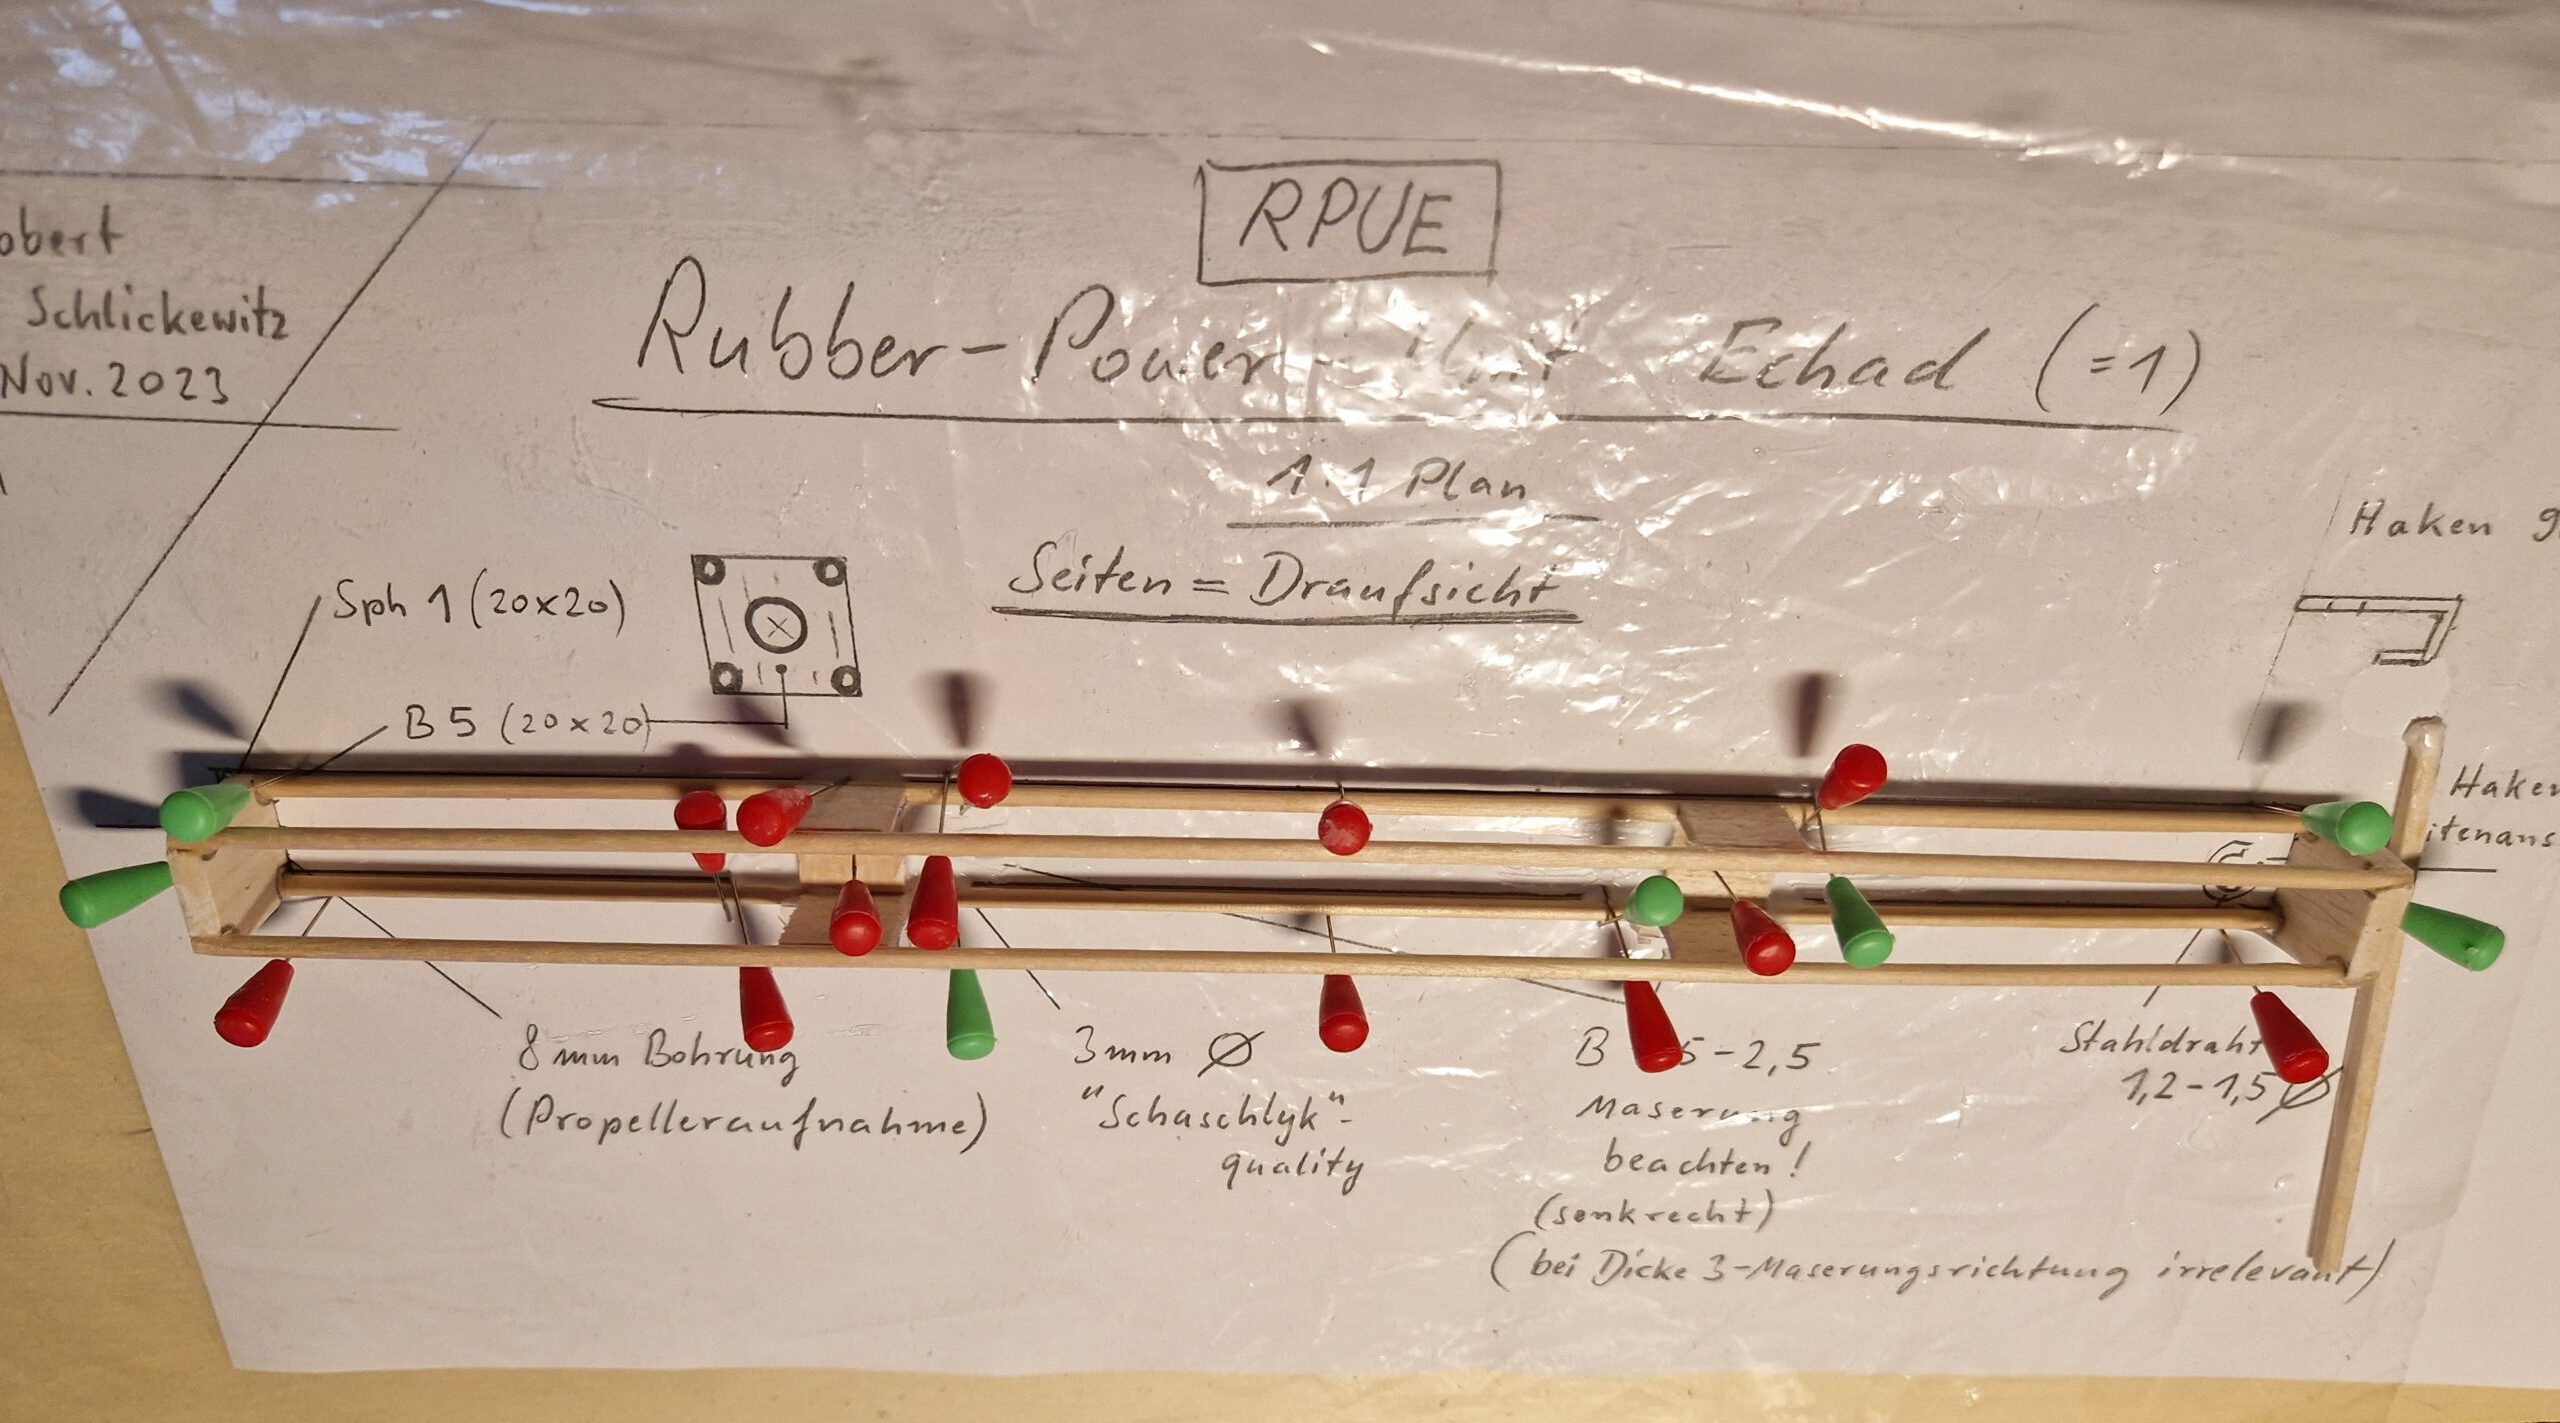
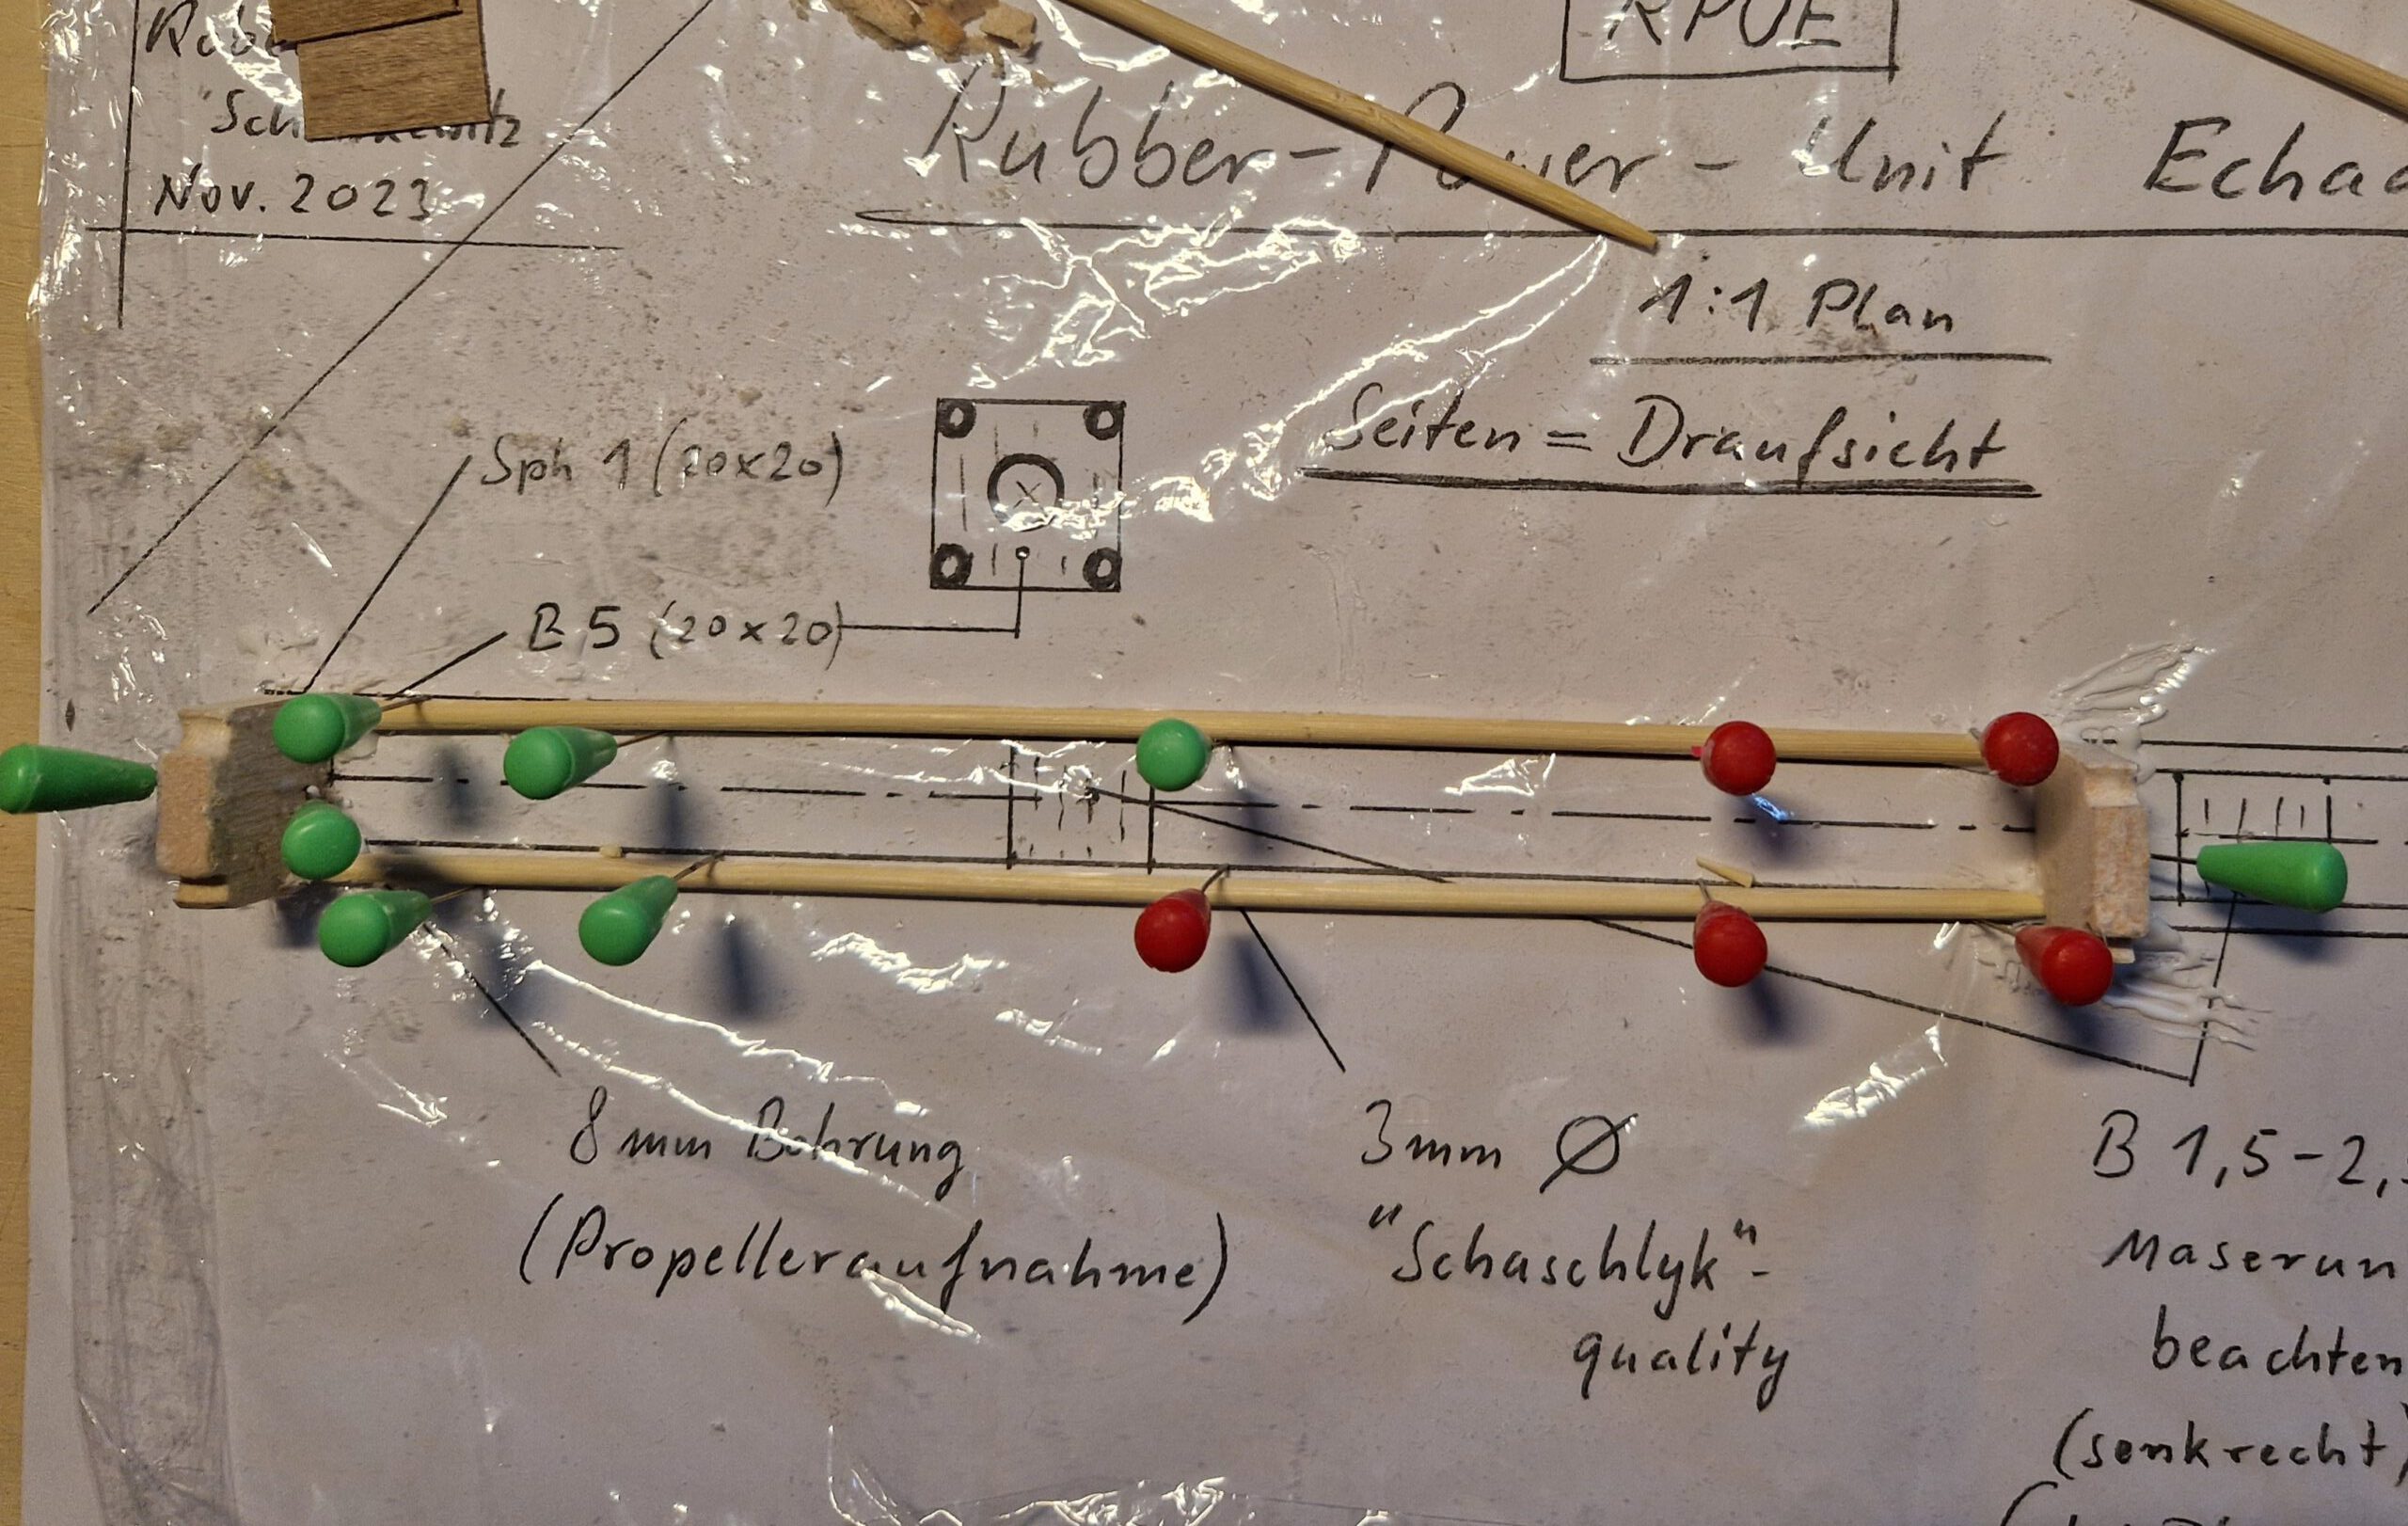
Building the RPU 20 and RPU 30 Units
Materials Needed
- Four barbecue skewers (20 or 30 cm long, 3 mm diameter)
- Scratch balsa: B 5 and B 3
- Scratch ply: 0.8 mm / 1/32 in
- Piano wire: 1.2 or 1.5 mm diameter
- Two self-adhesive Velcro tape pieces
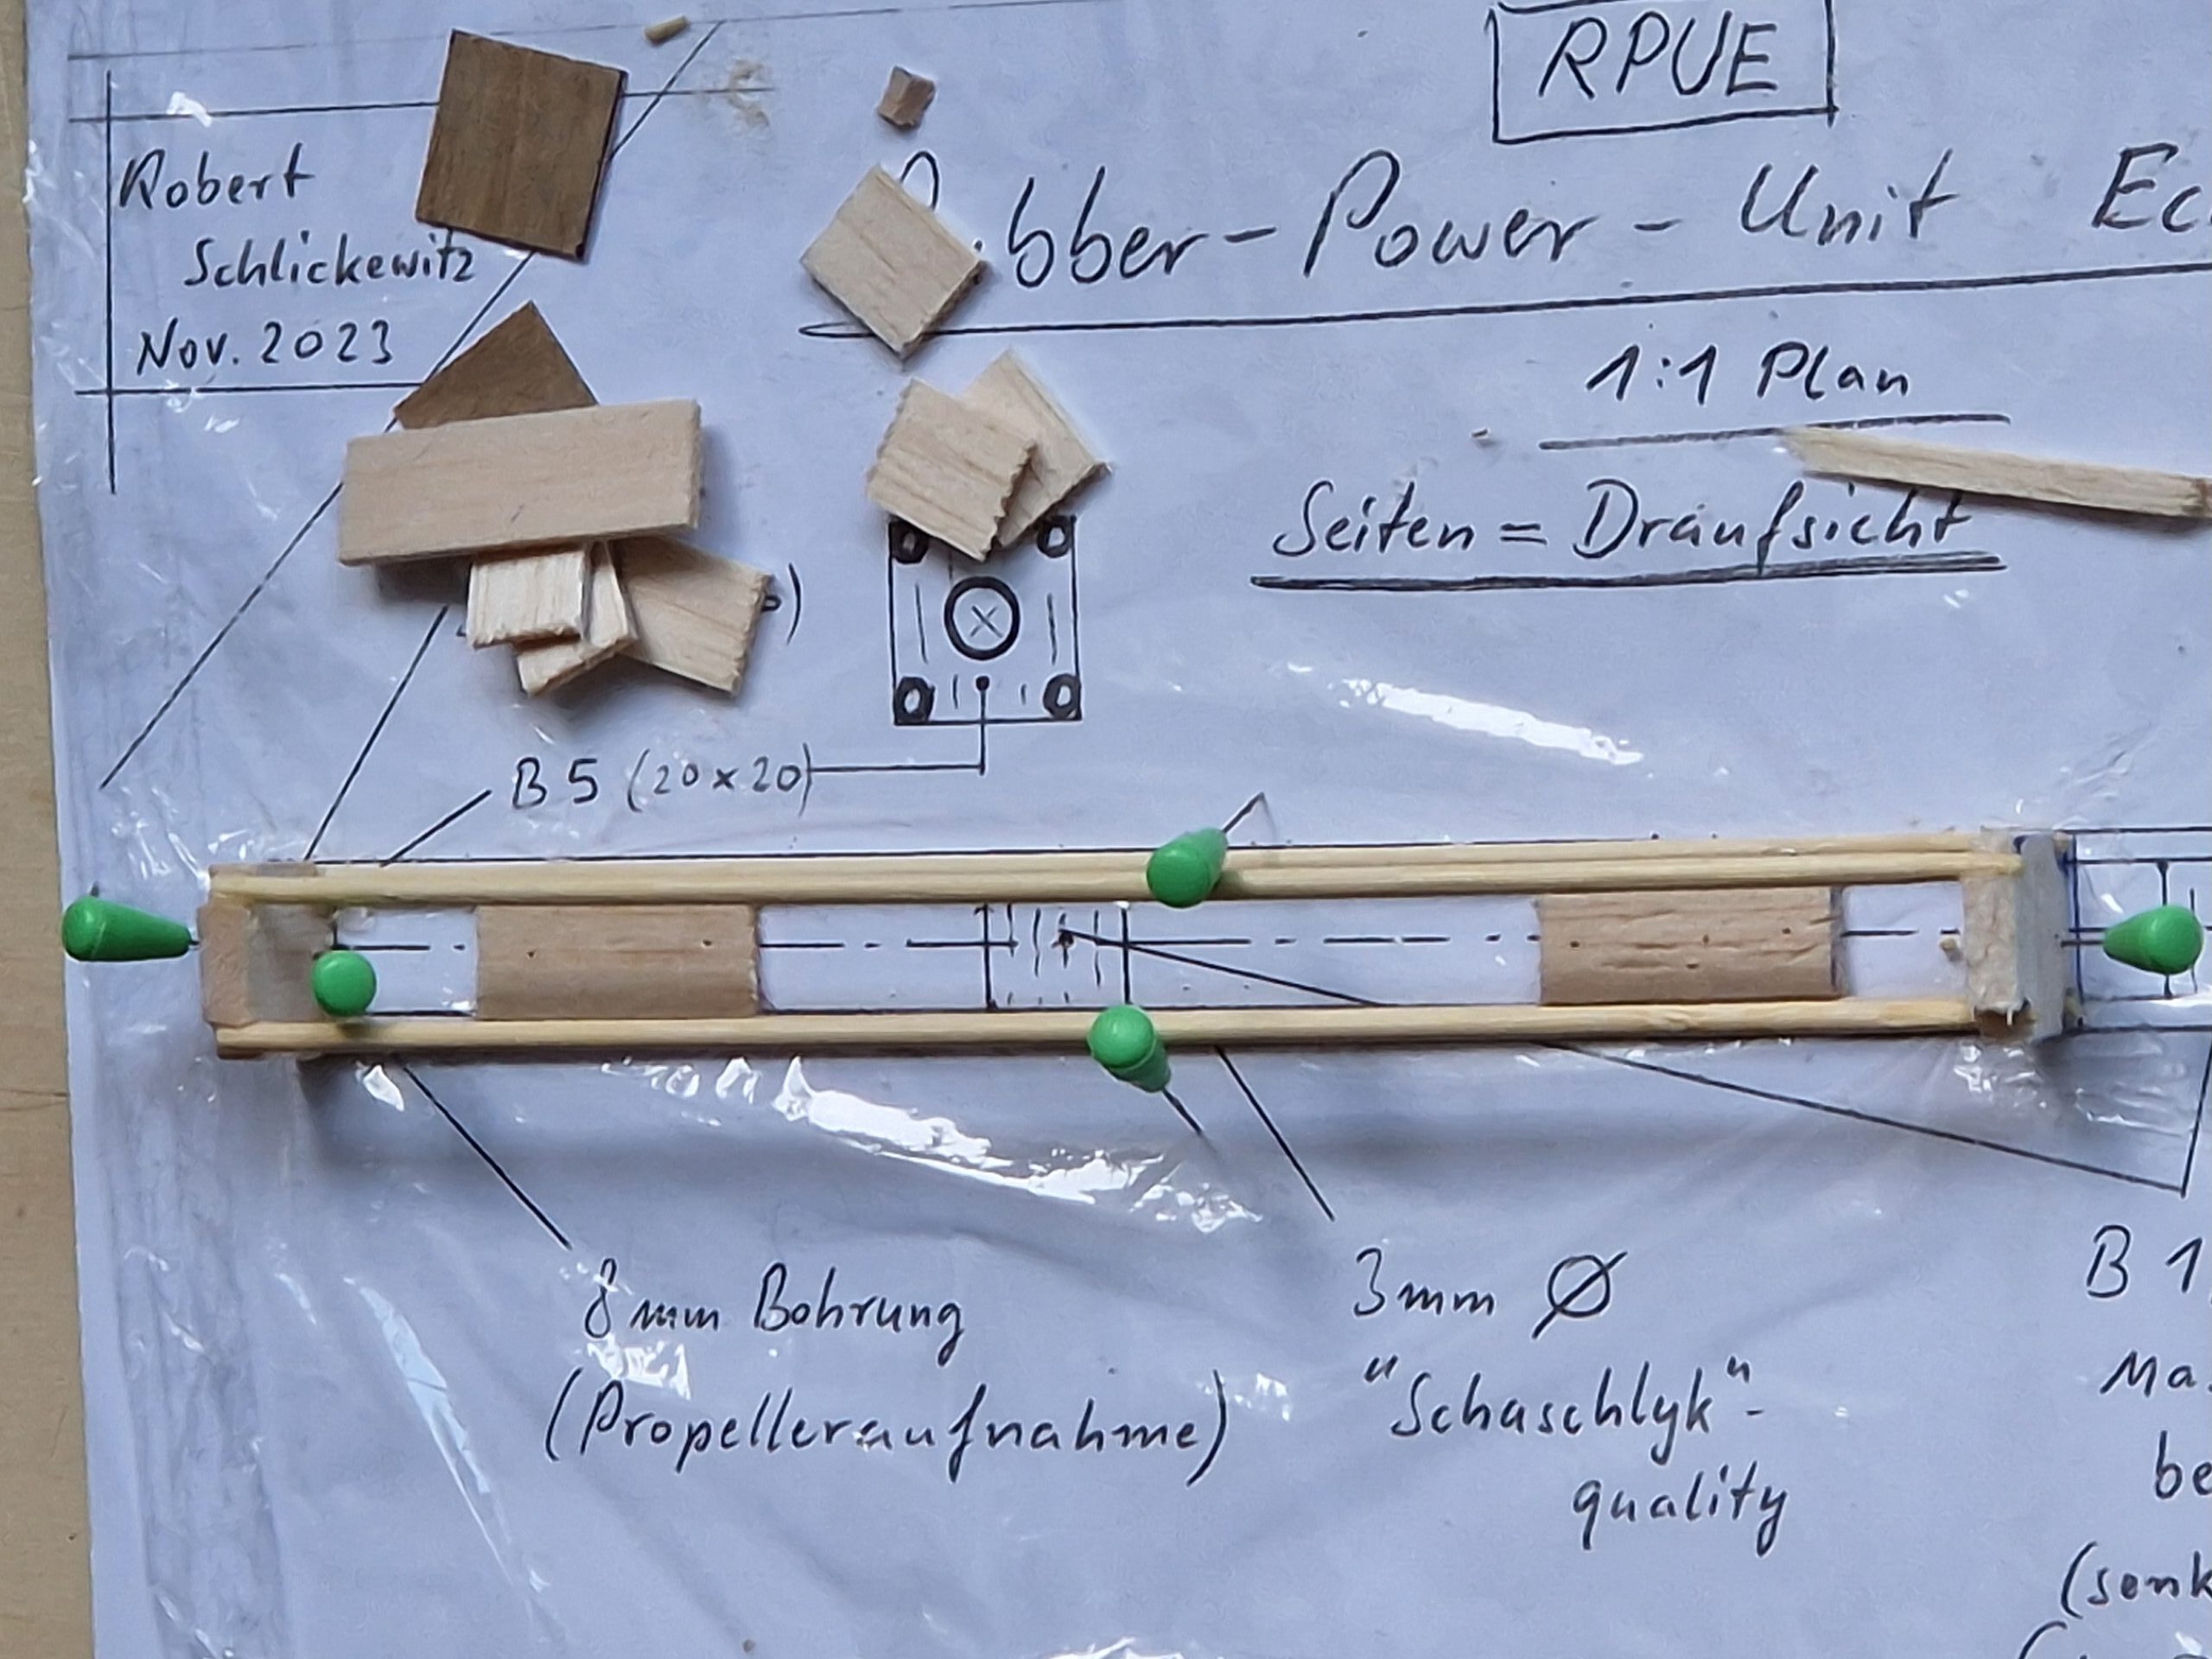
Assembly Instructions
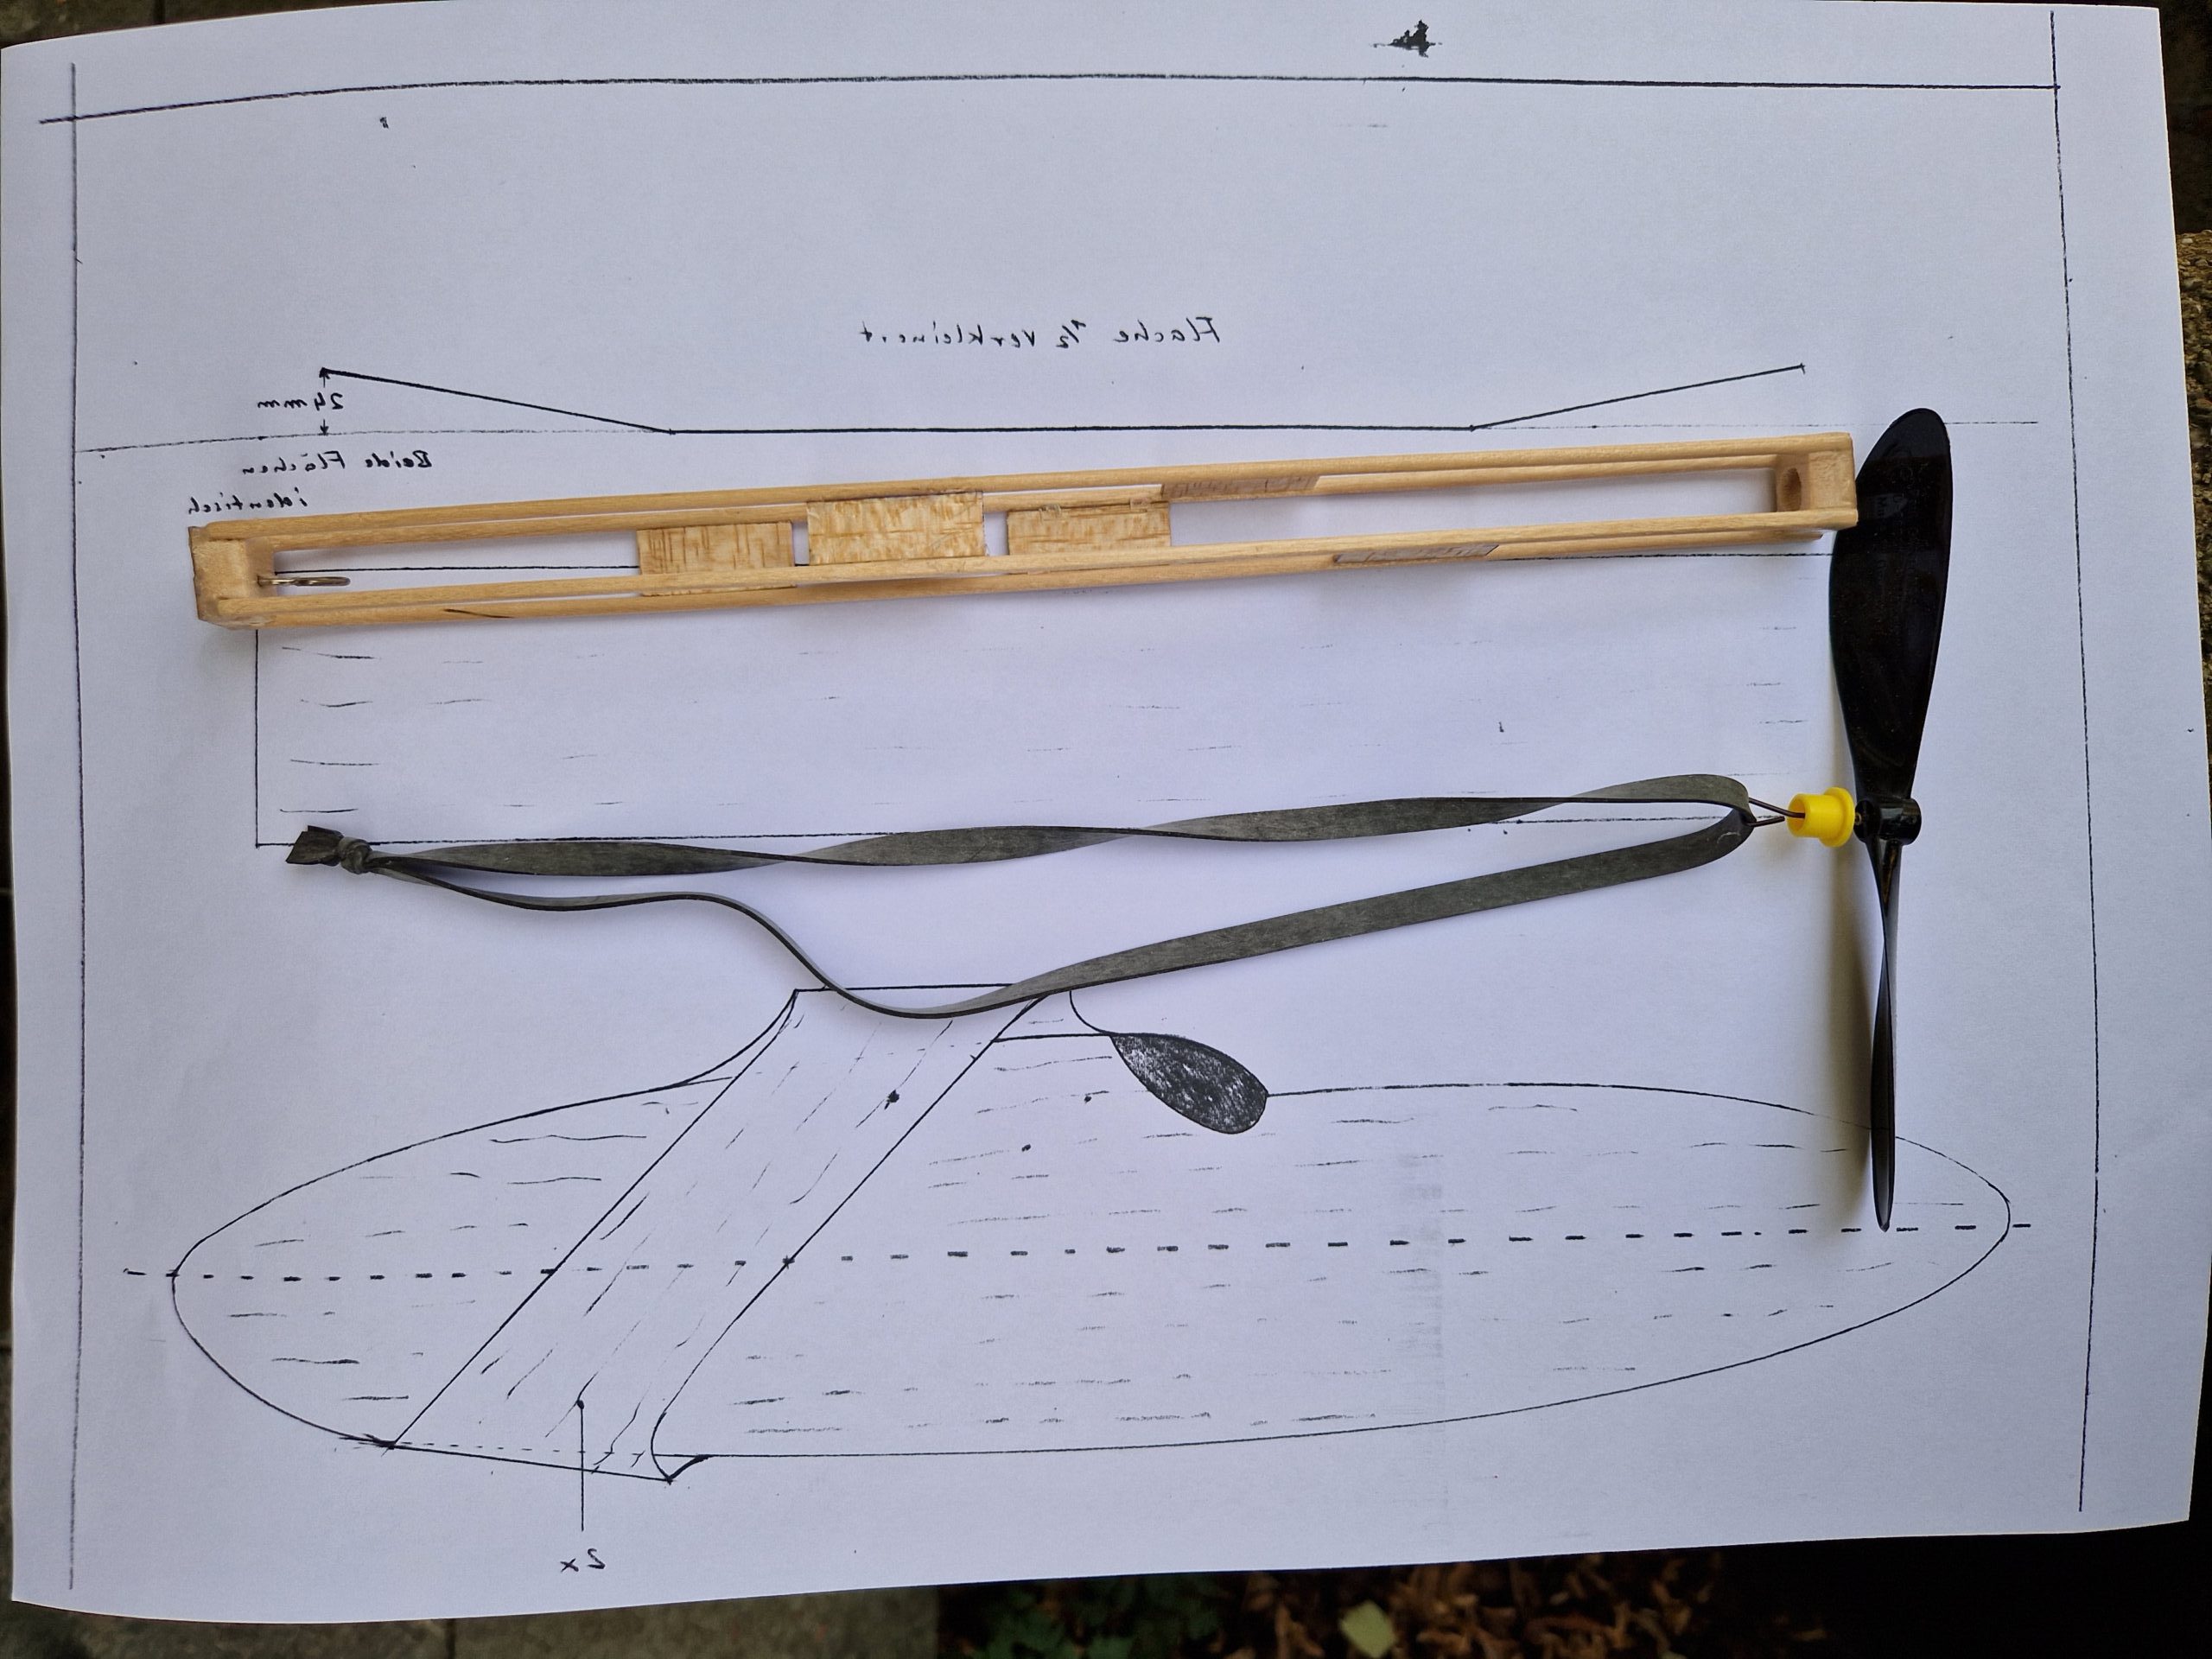
1. Cut and Prepare:
Cut out balsa and ply parts as shown in the plan. Sand all parts thoroughly.
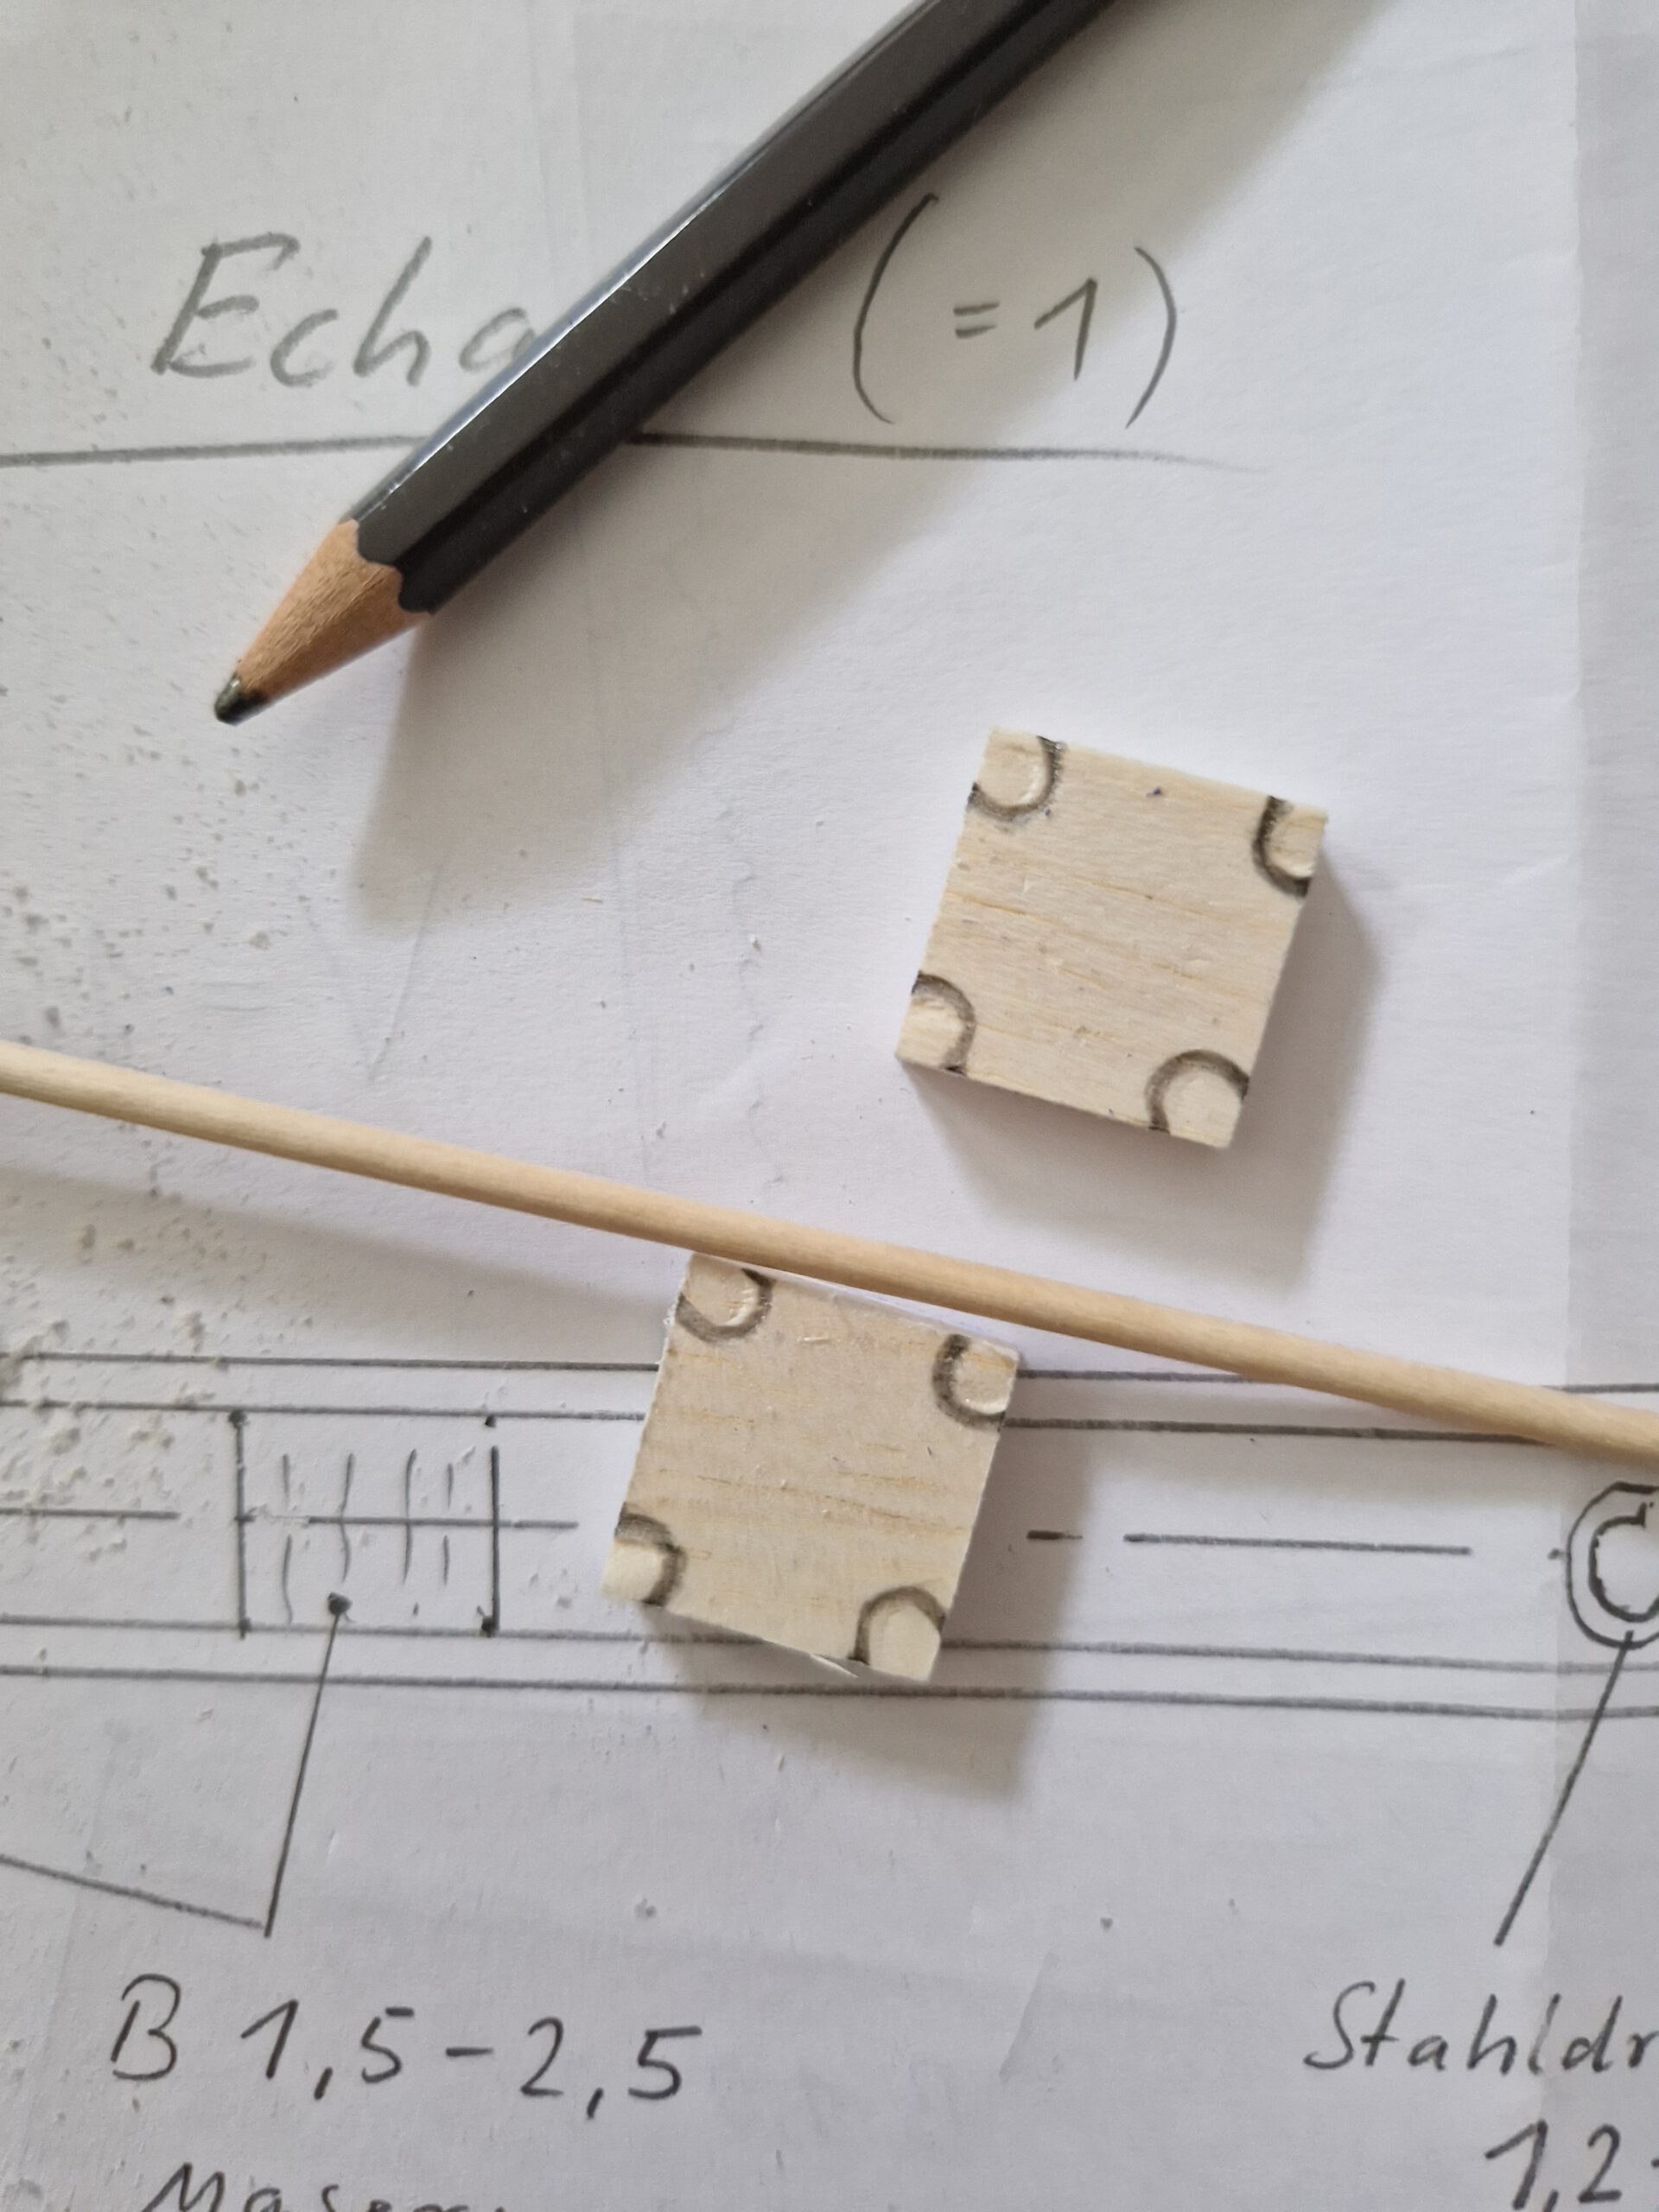
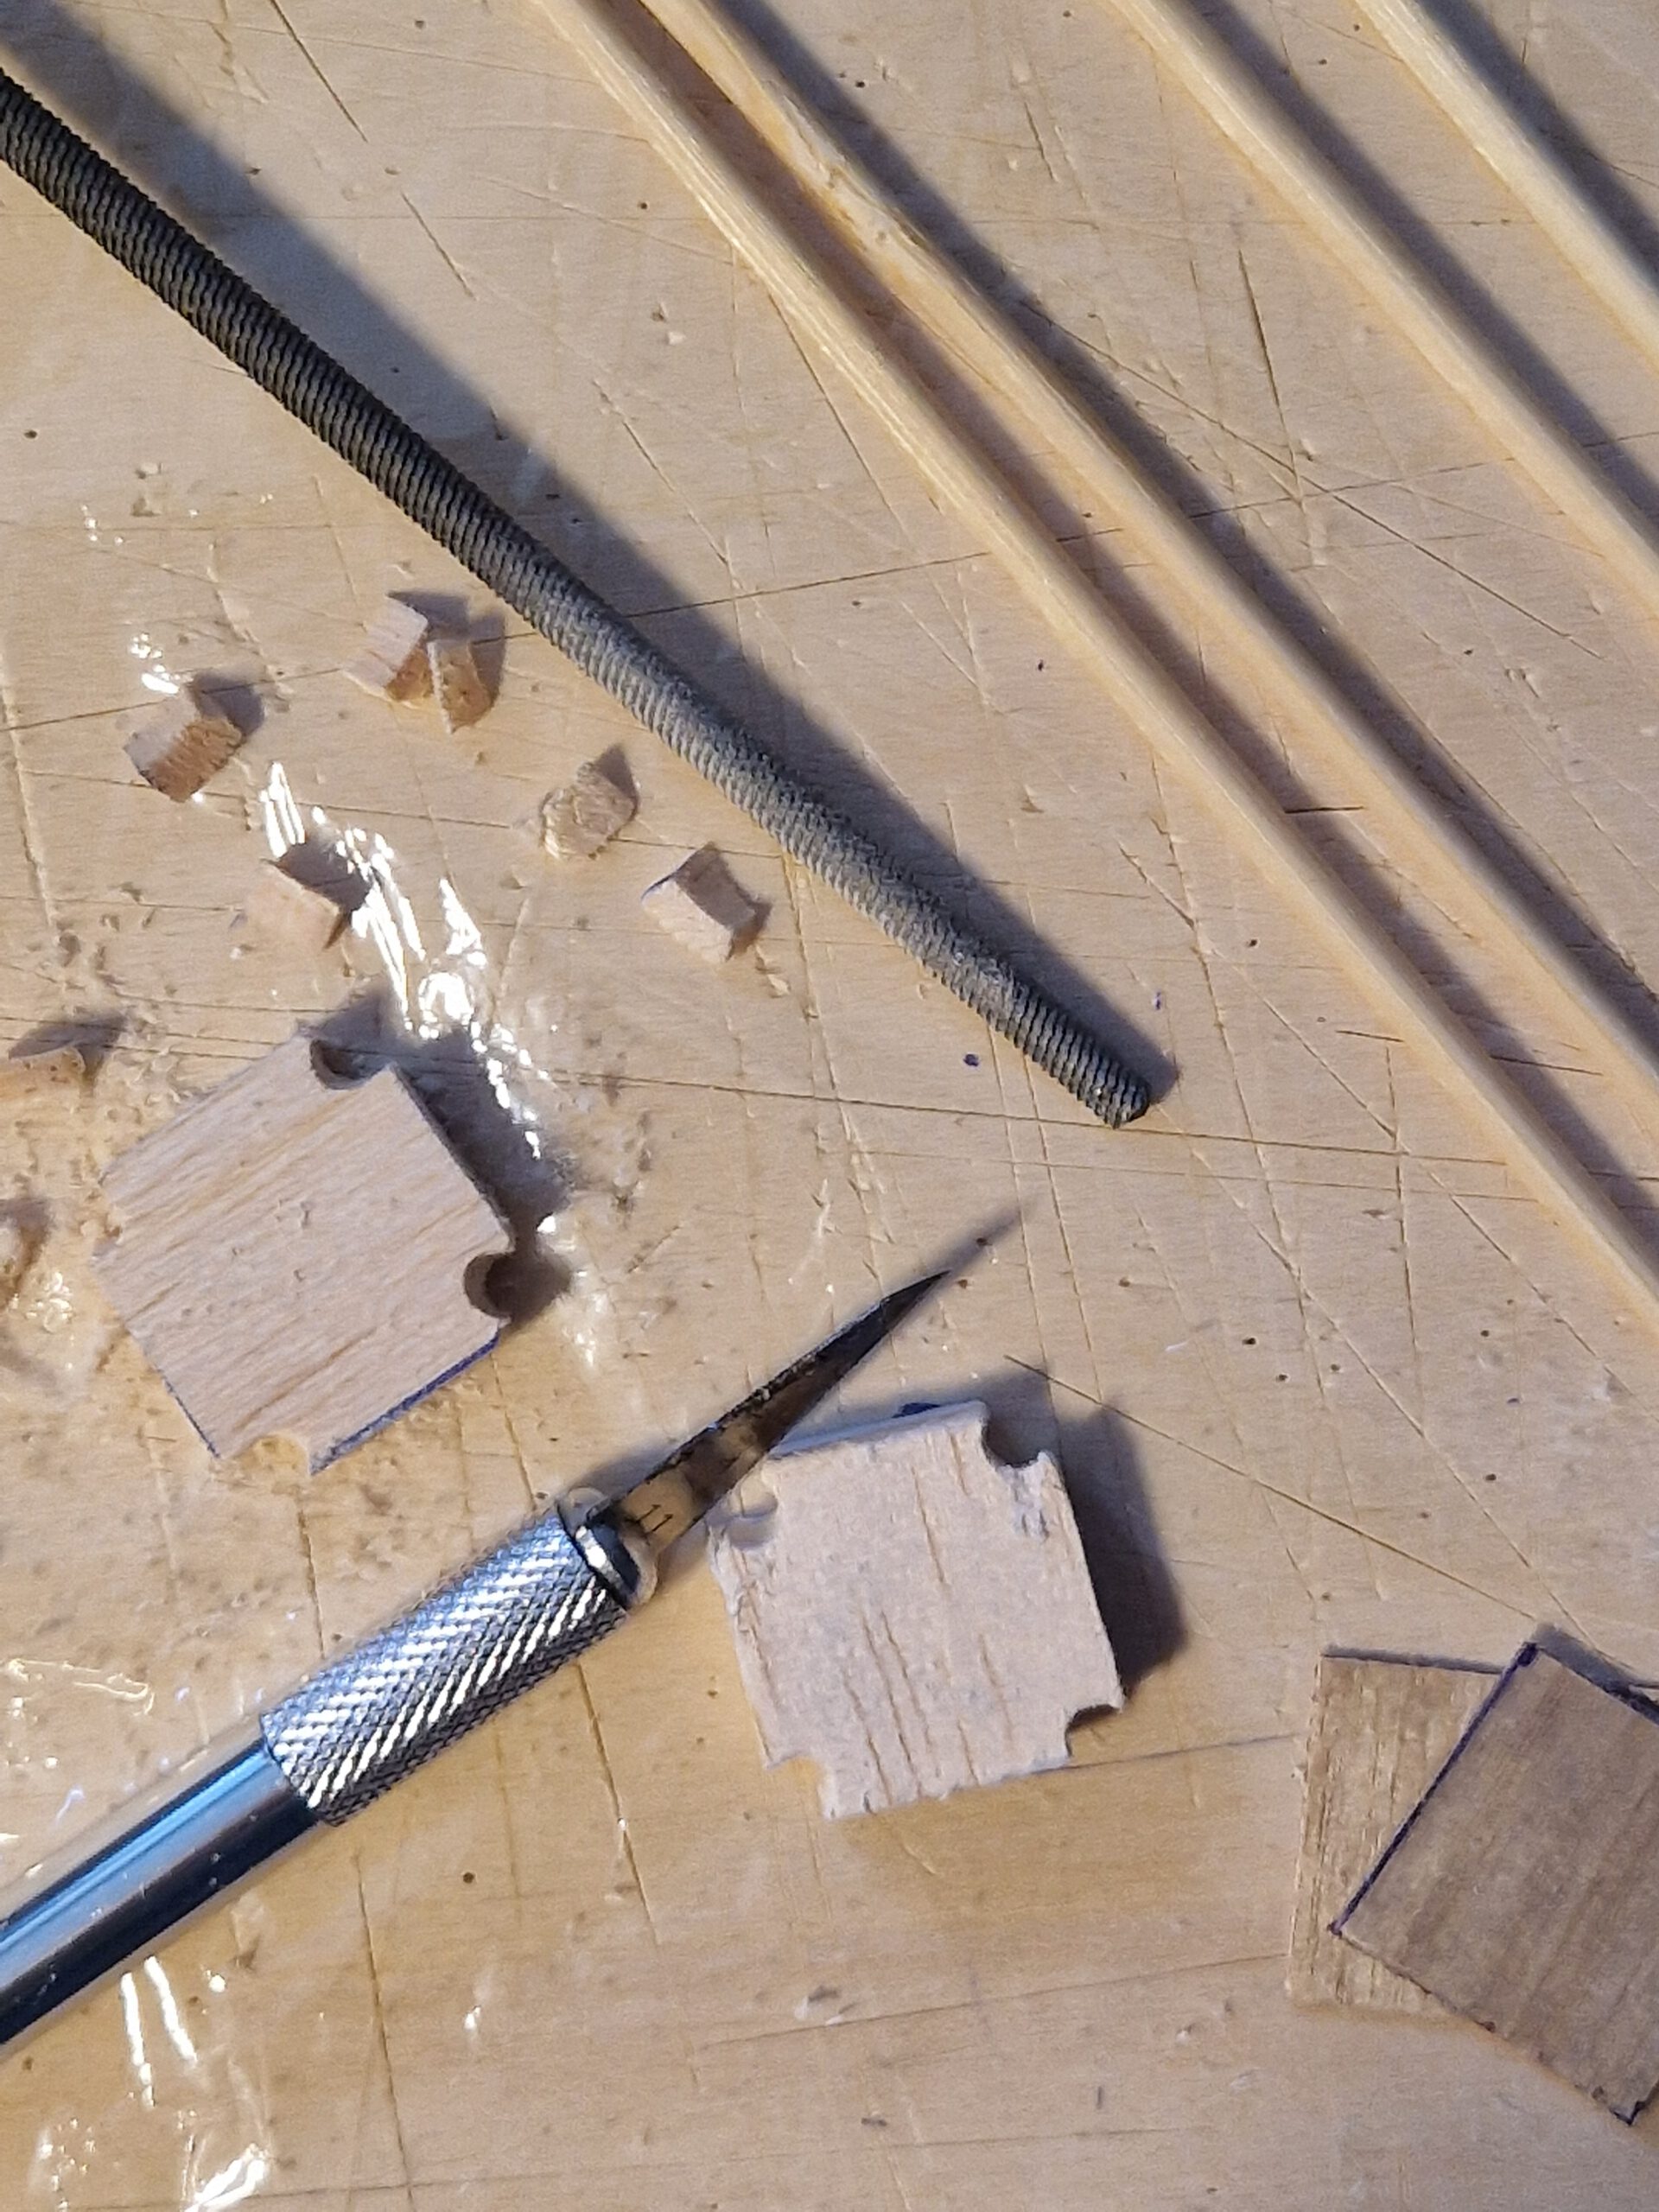
2. Mark and Cut:
Mark stick positions on both B 5 endplates. Cut and file openings accordingly.
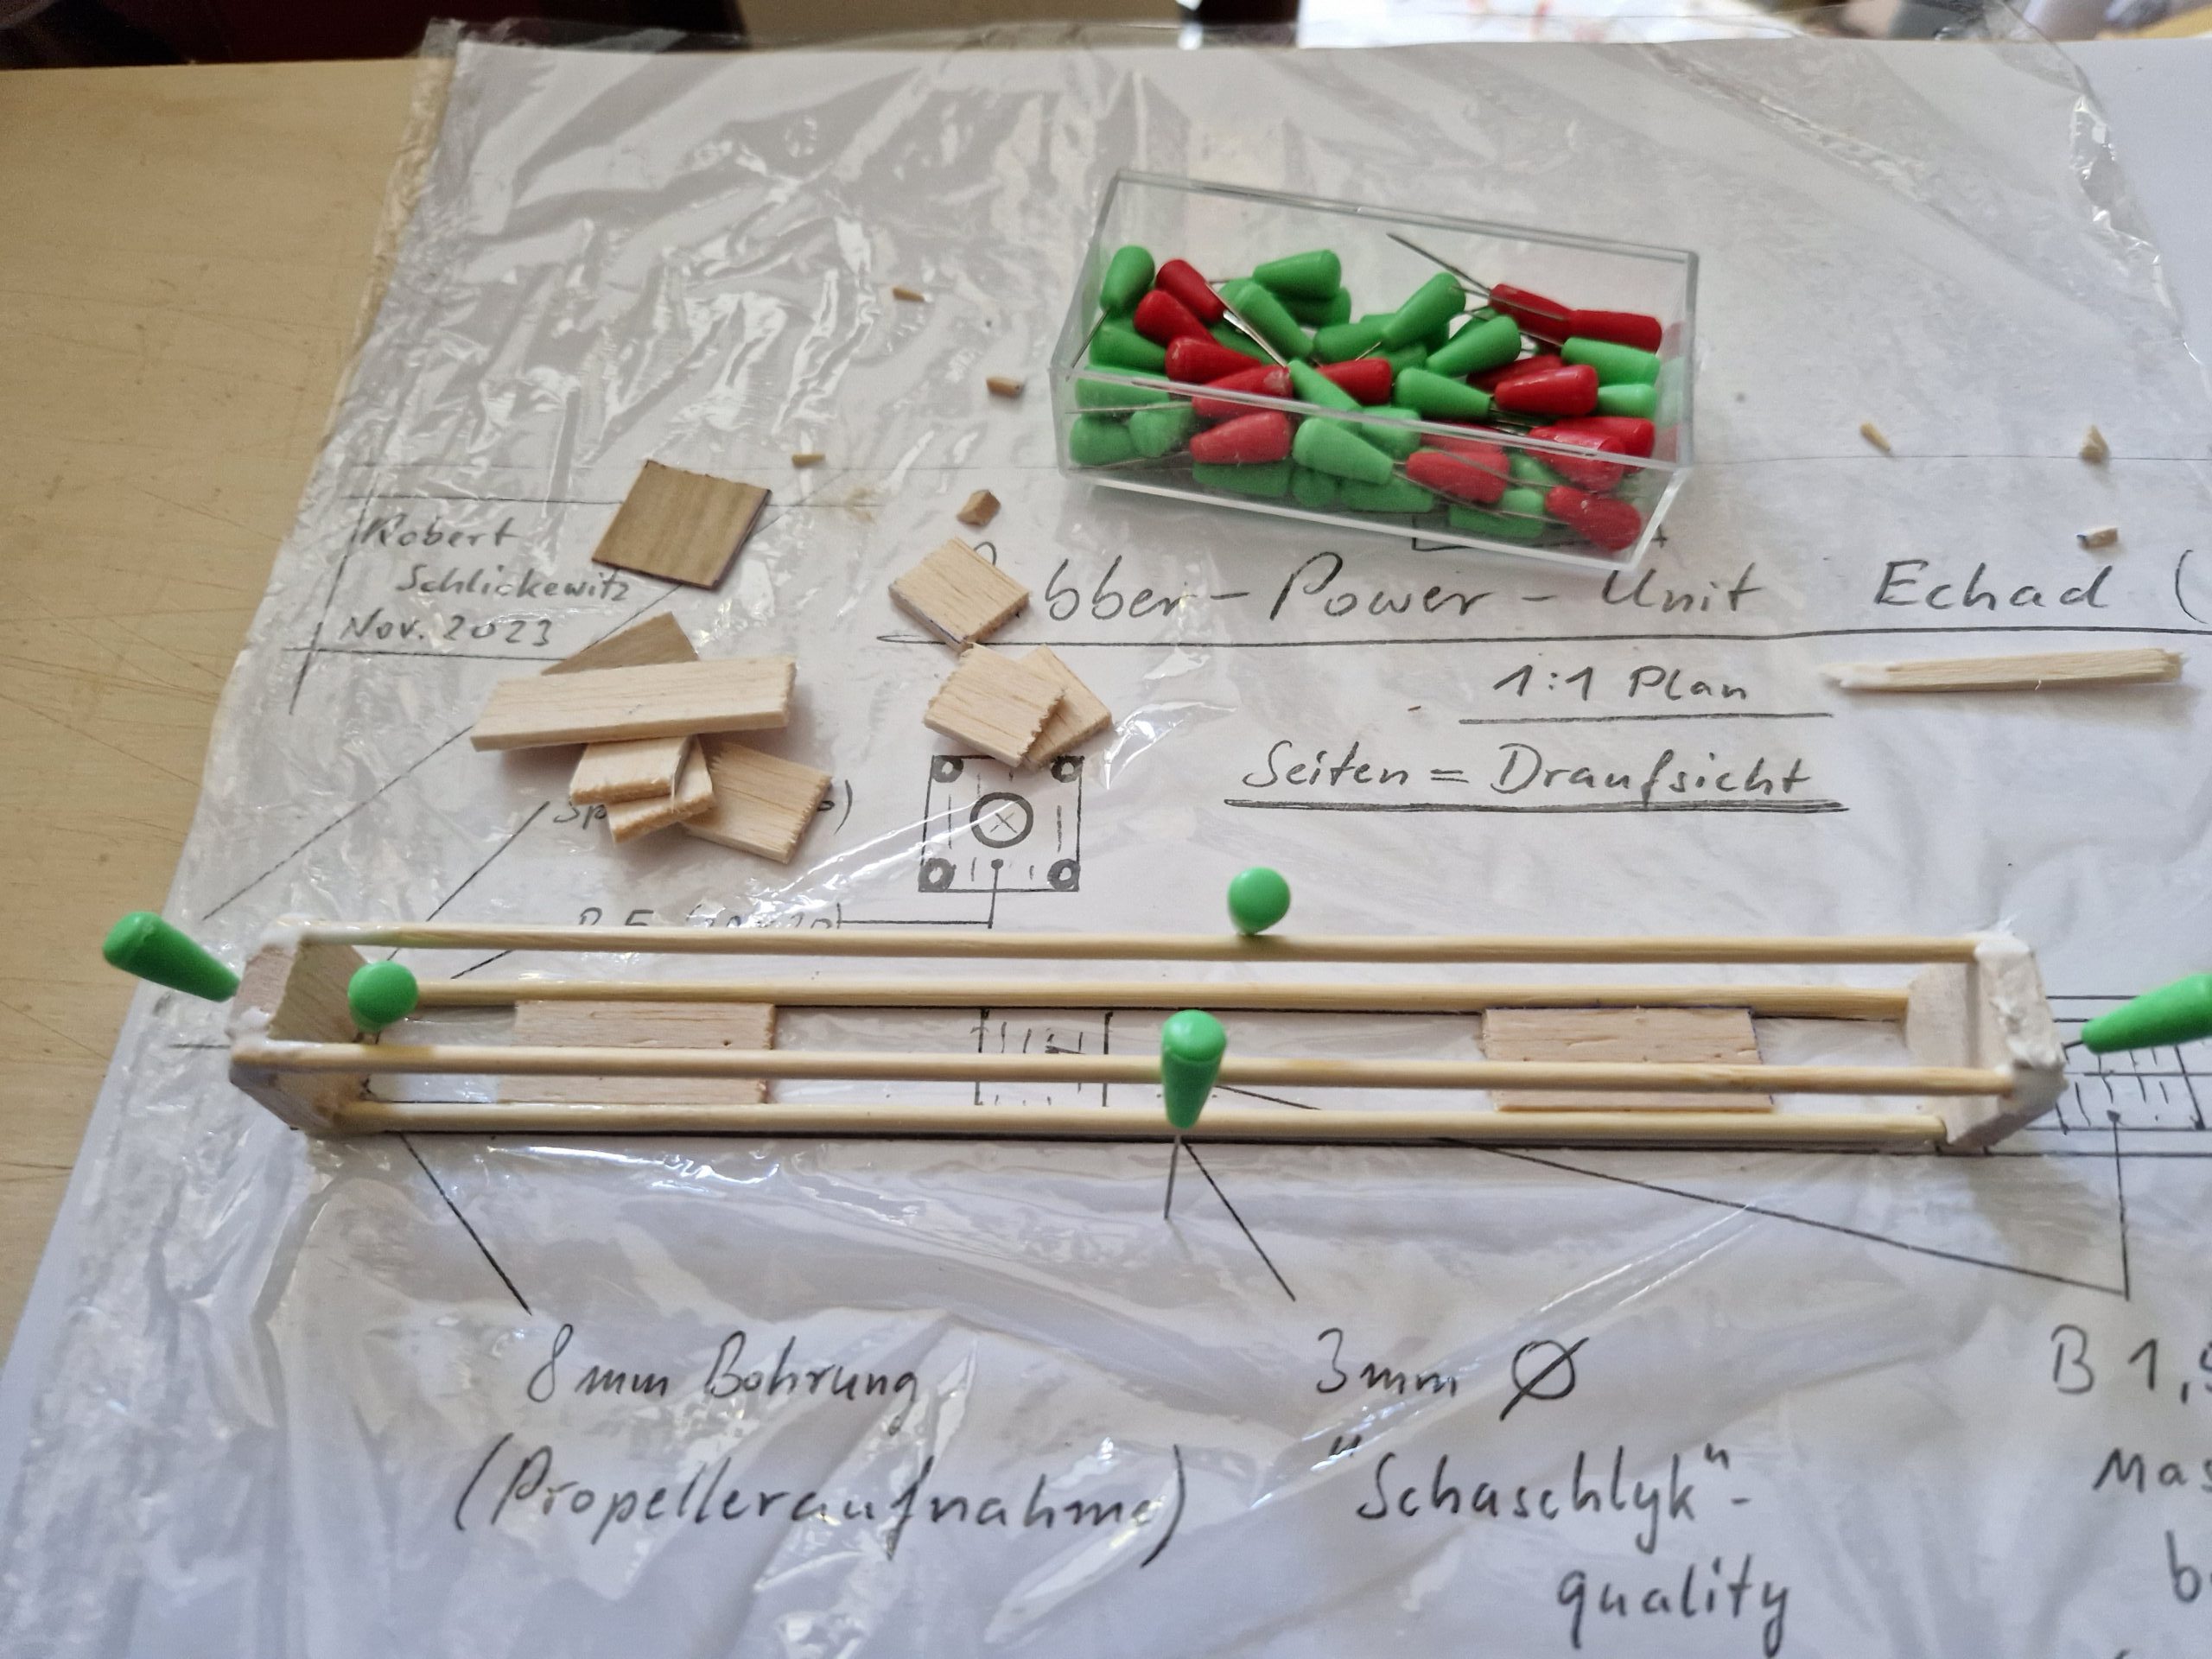
3. Base Frame:
Fix two skewers with needles to the plan. Cement two B 3 parts between them. Let dry.
4. Attach Endplates:
Cement B 5 endplates to stick ends. Ensure symmetry and a 90° angle. Let dry.
5. Top Sticks:
Insert upper skewers into the endplate slots and cement them. Let dry.
6. Reinforcement:
Remove from board. Rotate by 90°, cement two more B 3 parts. Repeat twice more for full structure.
7. Endplates Finish:
Sand B 5 endplates and cement 0.8 mm ply plates on them. Let dry and sand the entire module.
8. Wire Hook:
Drill holes. Bend wire to hook shape and insert. Bend second end into a U-shape using pliers. Cement well.
9. Prop Mount Slot:
Drill and file the opening for the propeller mount on the opposite end.
10. Velcro Attachment:
Choose a module side for fuselage attachment. Cement Velcro onto both interconnecting parts on that side.
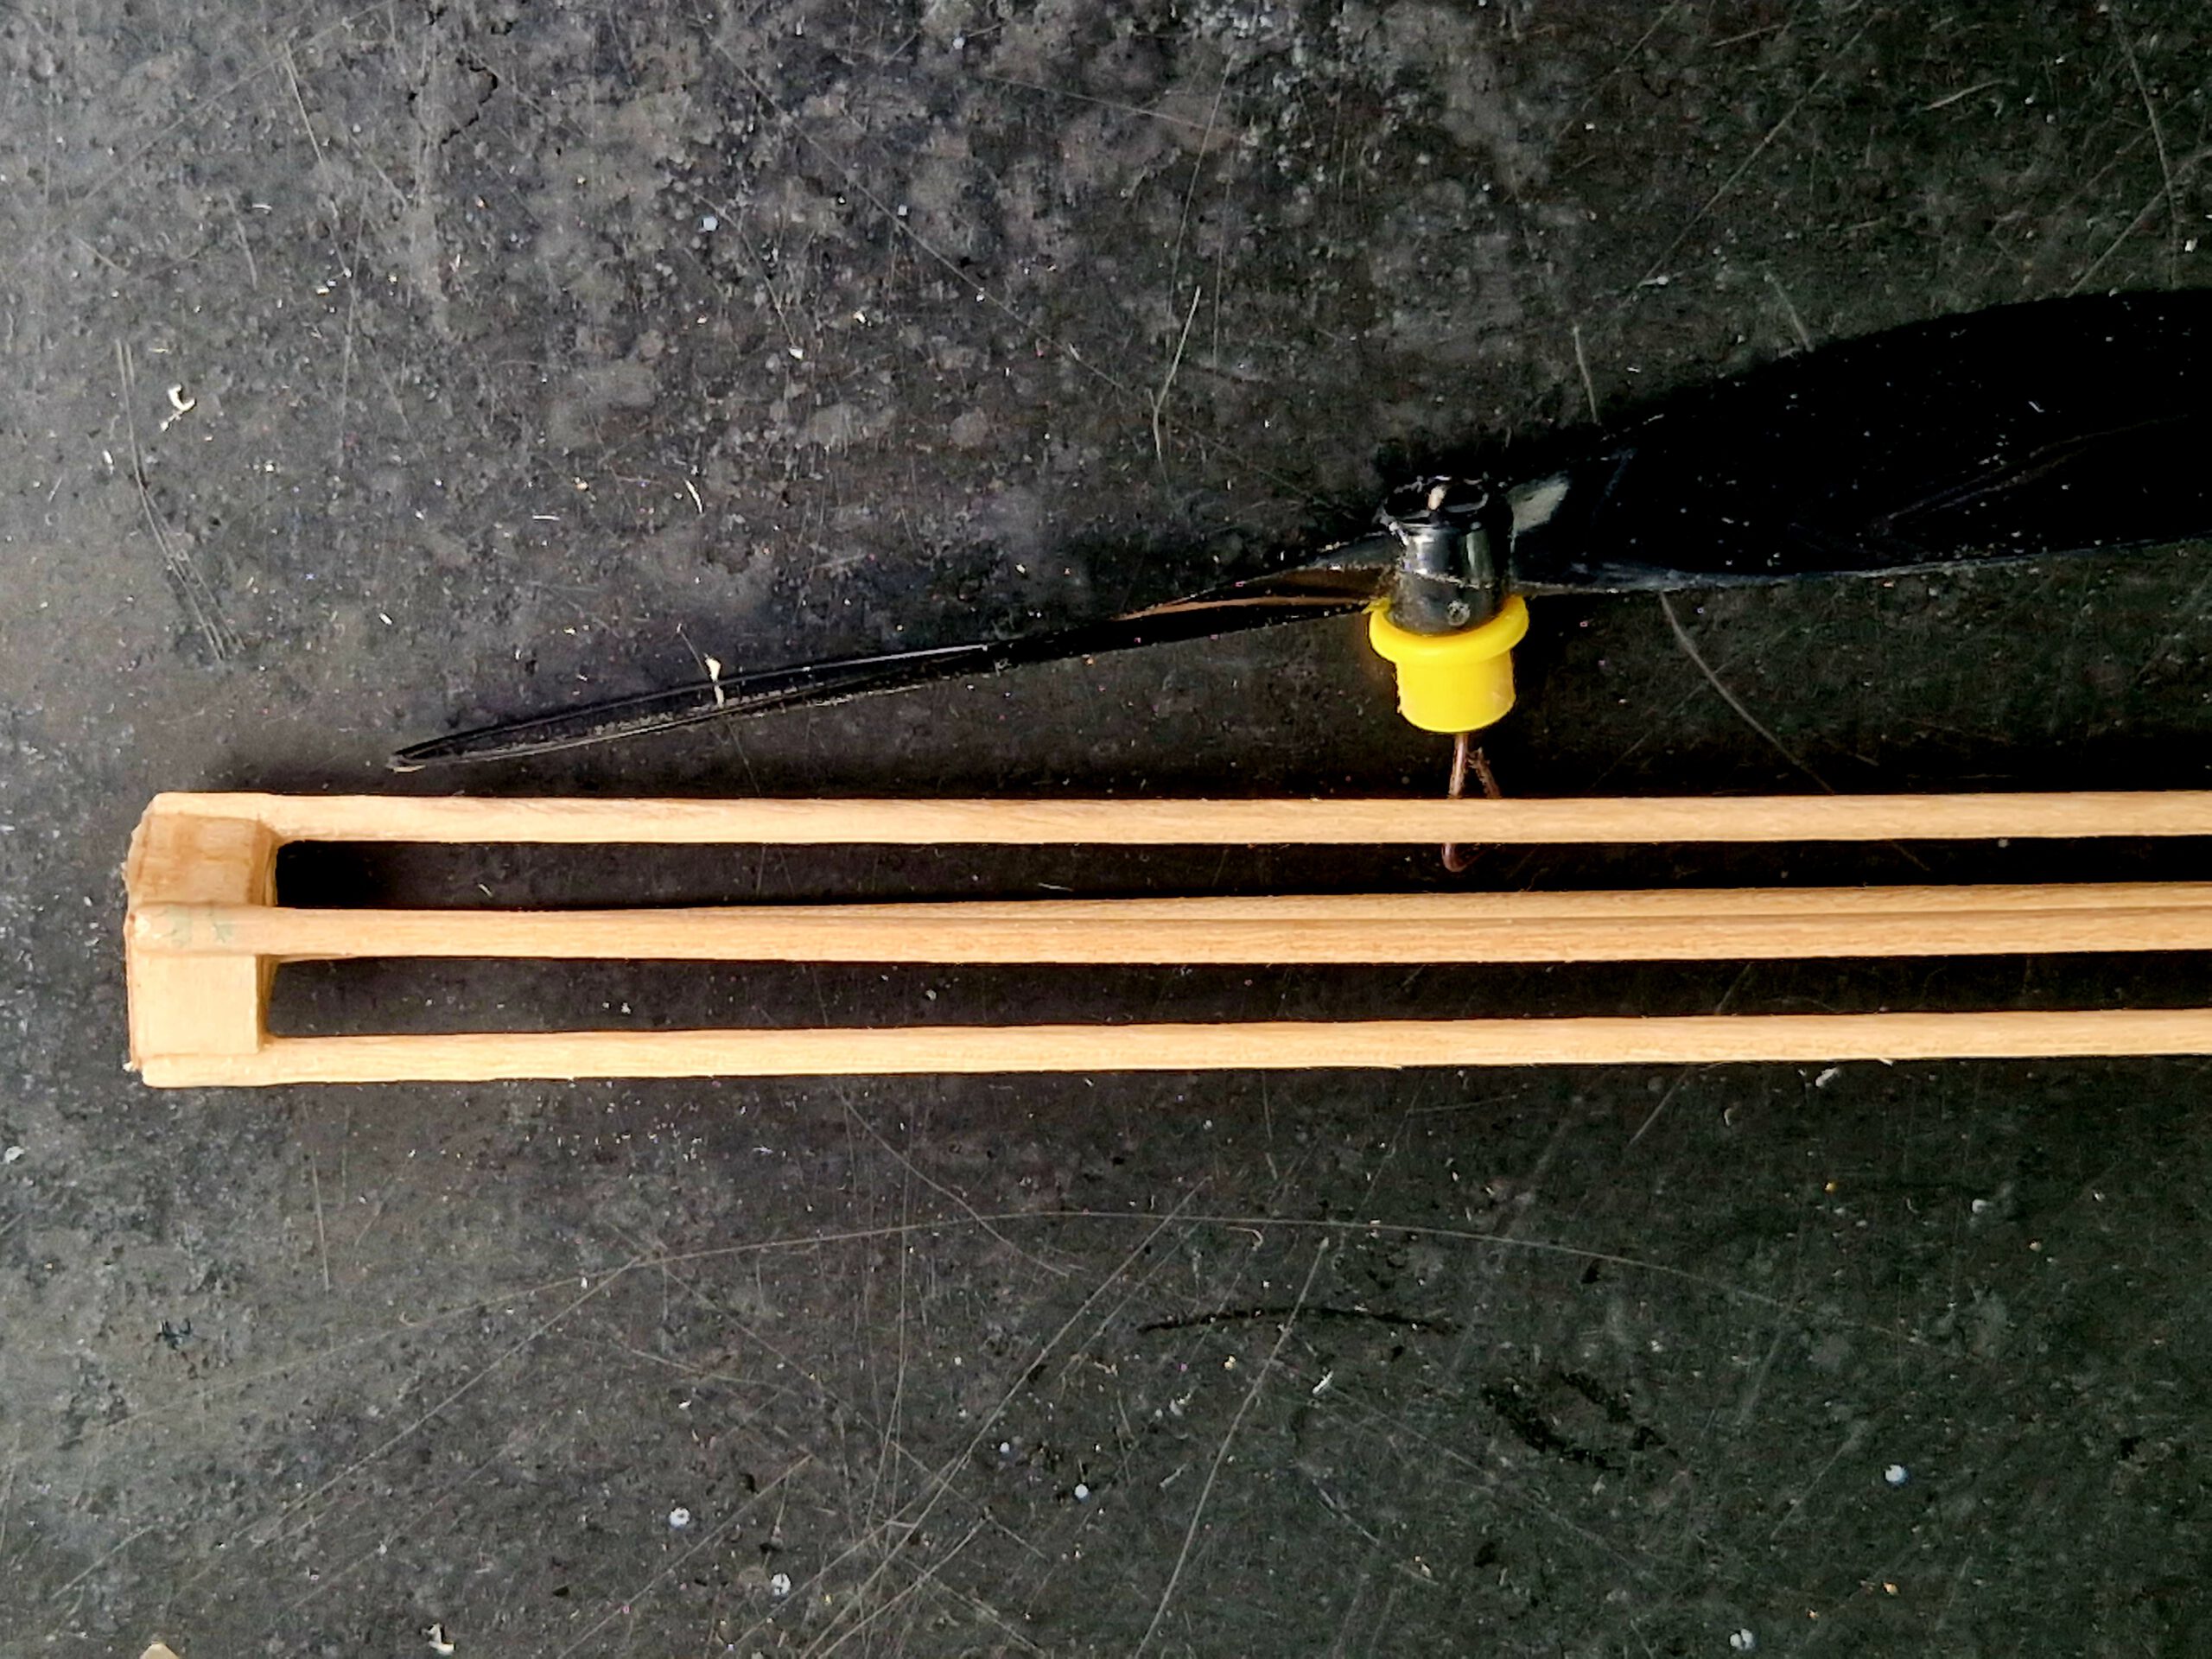
11. Final Assembly:
Insert prop mount and airscrew. Add the rubber strand. Your module is complete.
Building the RPU 40 Unit
Introduction
The final section describes the RPU 40 assembly process, detailing materials and steps specific to this larger, bamboo-reinforced version.
Materials Needed
- Two bamboo sticks (400 × 9 × 3 mm)
- Scratch balsa: B 5 and B 1
- Scratch ply: 0.8 mm / 1/32 in
- Piano wire: 1.2 or 1.5 mm diameter
- Two self-adhesive Velcro tape pieces
Assembly Instructions
1. Cut and Prepare:
Cut out balsa and ply parts according to plan. Sand all parts well.
2. Stick Marking:
Mark bamboo stick positions on B 5 endplates.
3. Base Frame:
Fix one stick to plan with needles. Cement B 5 endplates onto ends. Ensure symmetry and 90° angles. Let dry.
Cement second stick on top of the endplates. Let dry.
4. Reinforce with B 1:
Cement six B 1 parts (three per side) as shown. Ensure crosswise grain direction. Let dry.
5. Endplate Finish:
Sand endplates and cement 0.8 mm ply plates on both ends. Let dry. Sand entire module.
6. Wire Hook:
Drill holes and bend wire to hook shape. Insert and secure the U-shaped end. Cement thoroughly.
7. Prop Mount Slot:
Drill and file slot for the prop mount on the opposite end.
8. Velcro Attachment:
Select fuselage attachment side. Cement Velcro pieces onto that side.
9. Final Assembly:
Insert the prop mount with airscrew. Add the rubber strand. Your RPU 40 is ready.
Wishing you many successful flights!
Mnogo uspješnih letova! Ha mange vellykkede flyreiser!
Let me know if you’d like this formatted for print or web layout.
Leave a Reply