

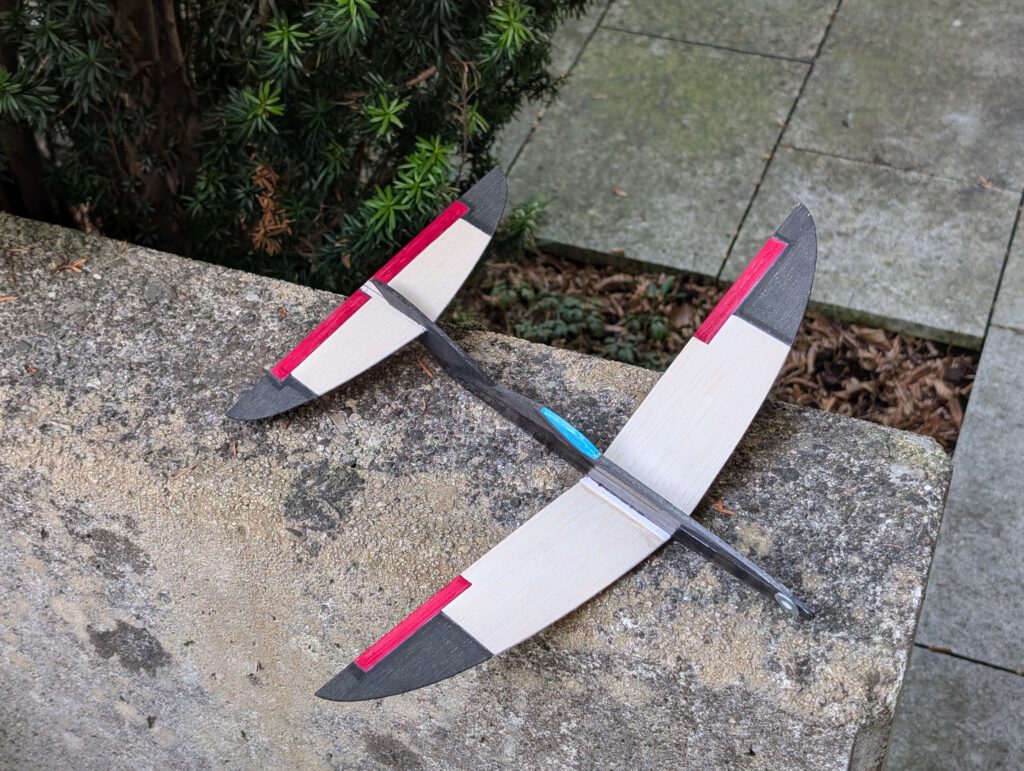
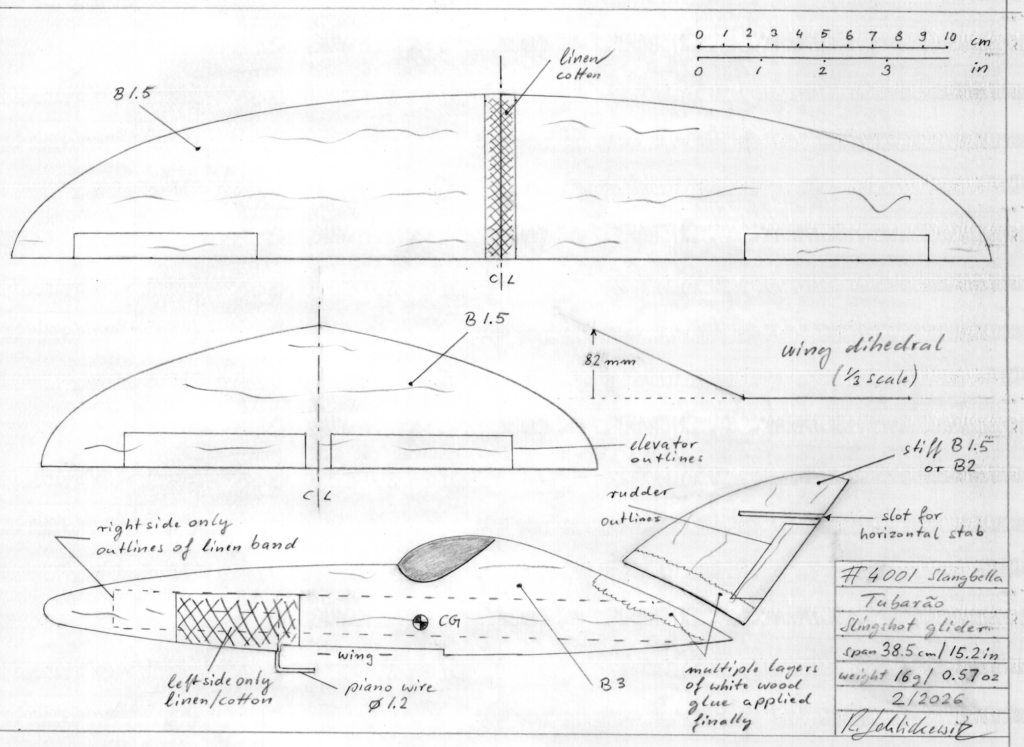
Span 38.5 cm / 15.2 in
Weight 16 g / 0.57 oz
Specifics:
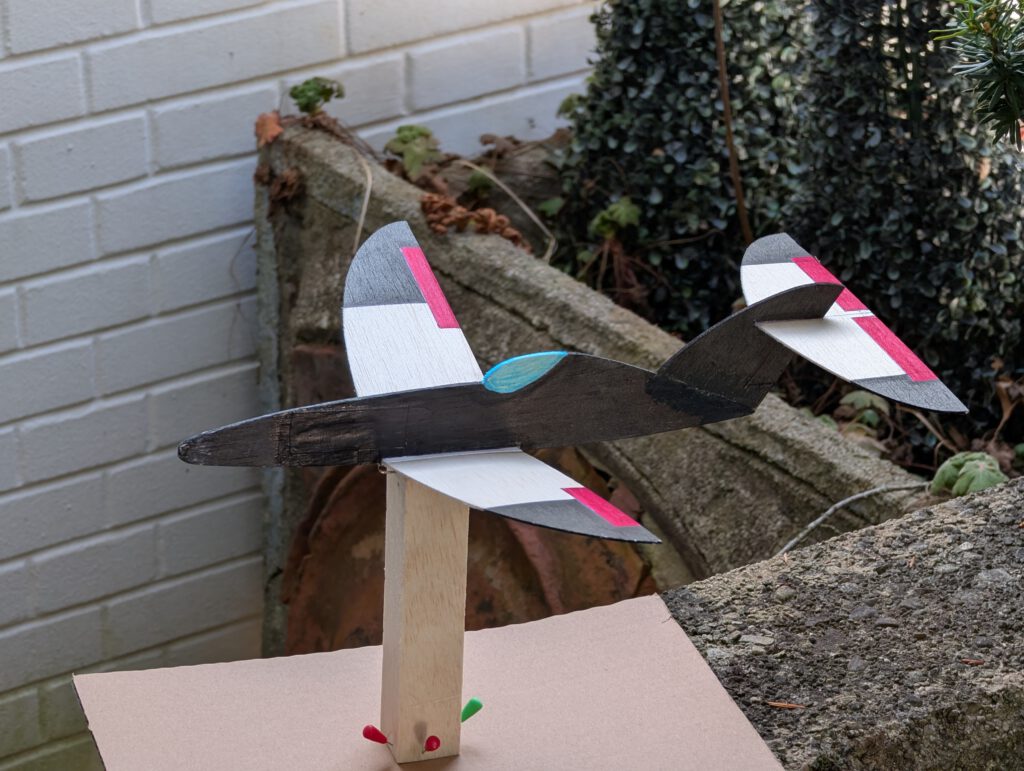
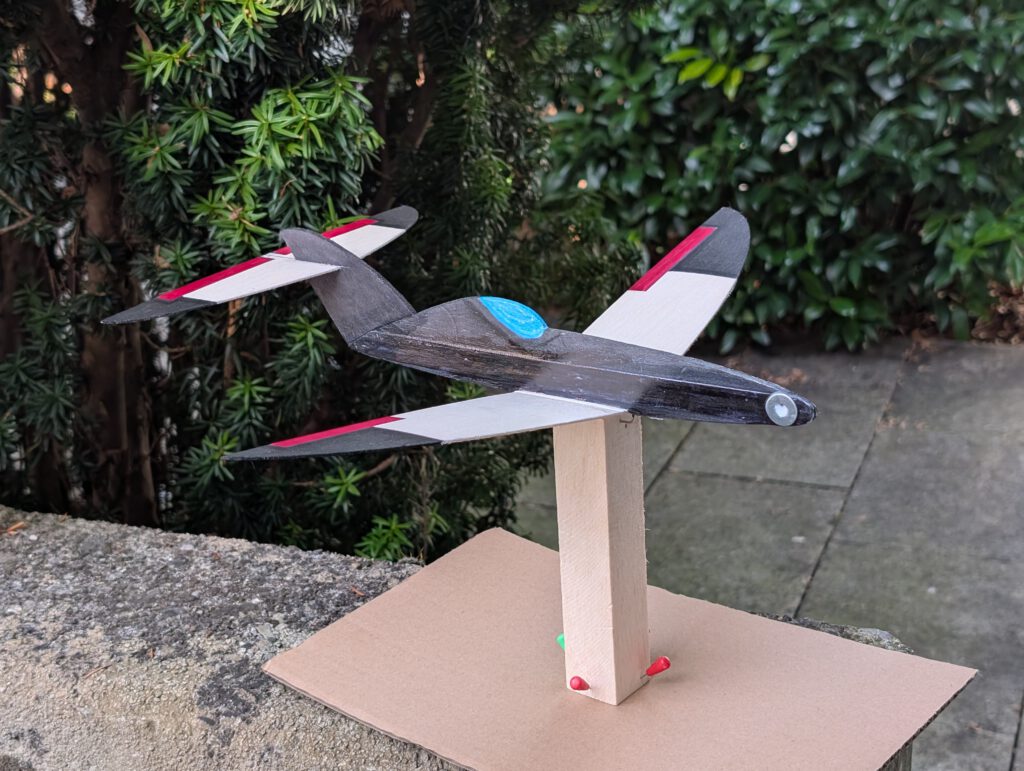
• Catapult-start model
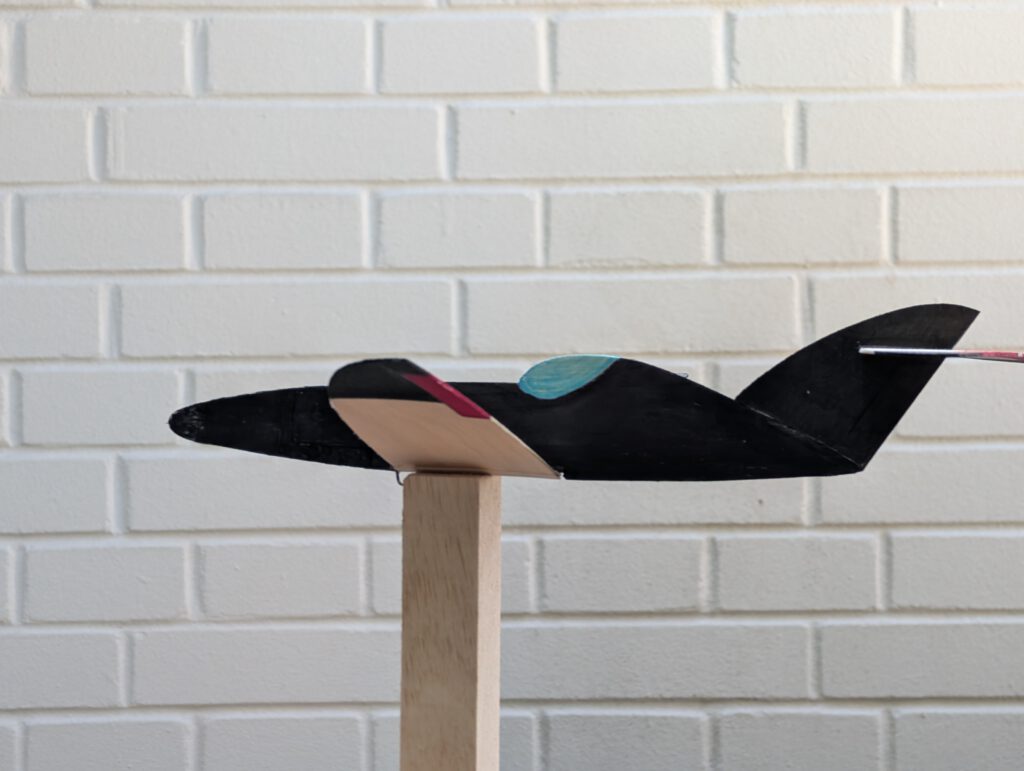
• Shark fin like wing and empennage outlines
• Solid yet light construction
• Good gliding performance
• Easy to build
• Few parts
Name
Name is Portuguese (Brazilian) and means: SHARK
(tubarão is singular and tubarões plural)
The rear end of this and my other Tubarão models was drawn up in accordance with the rear of the famous French sport coupé Panhard CD from 1963. This being probably one of the best sport cars ever considering weight, speed and miles per gallon.
General notes on beginner.zone slingshot/Slangbella models:
Be on the secure side. If the Balsa you intend to use for your fuselage is too soft or too light – reinforce it with an additional 12 mm / ½ in linen band glued along the whole fuselage on one side.
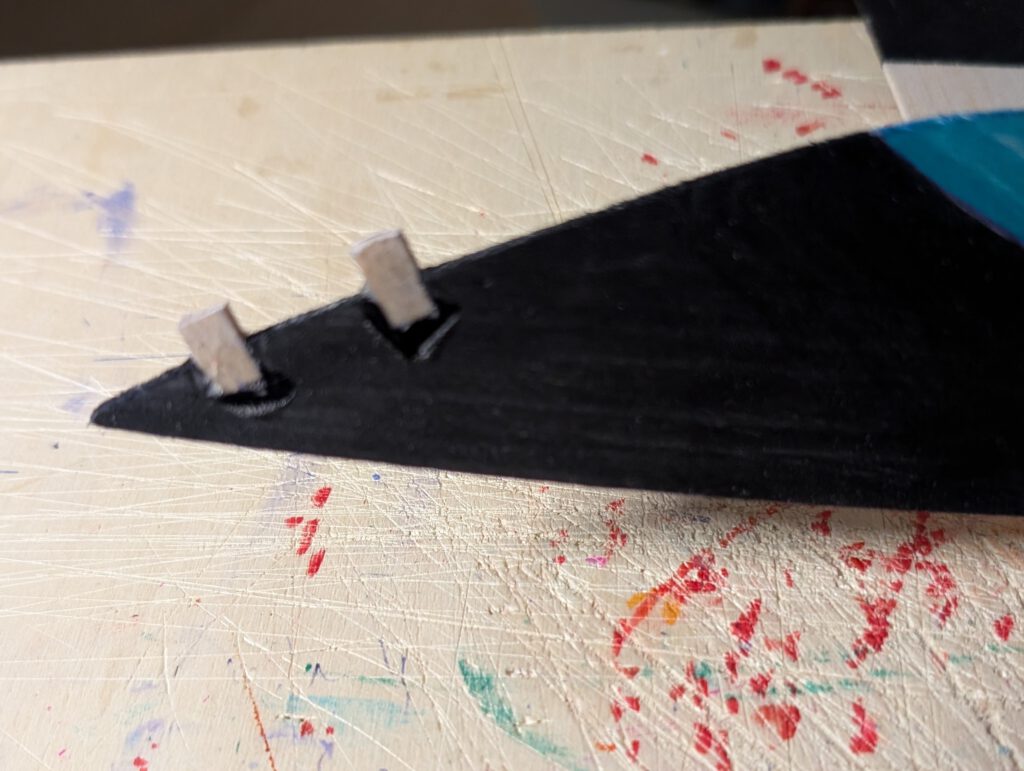
Fins should generally be cemented with acrylic glue on fuselages and hardwood “teeth” between fuselage and fin are one more option to ensure a durable and strong connection.
When you start your model, hold it with outstretched arms as far away from your eyes as possible!
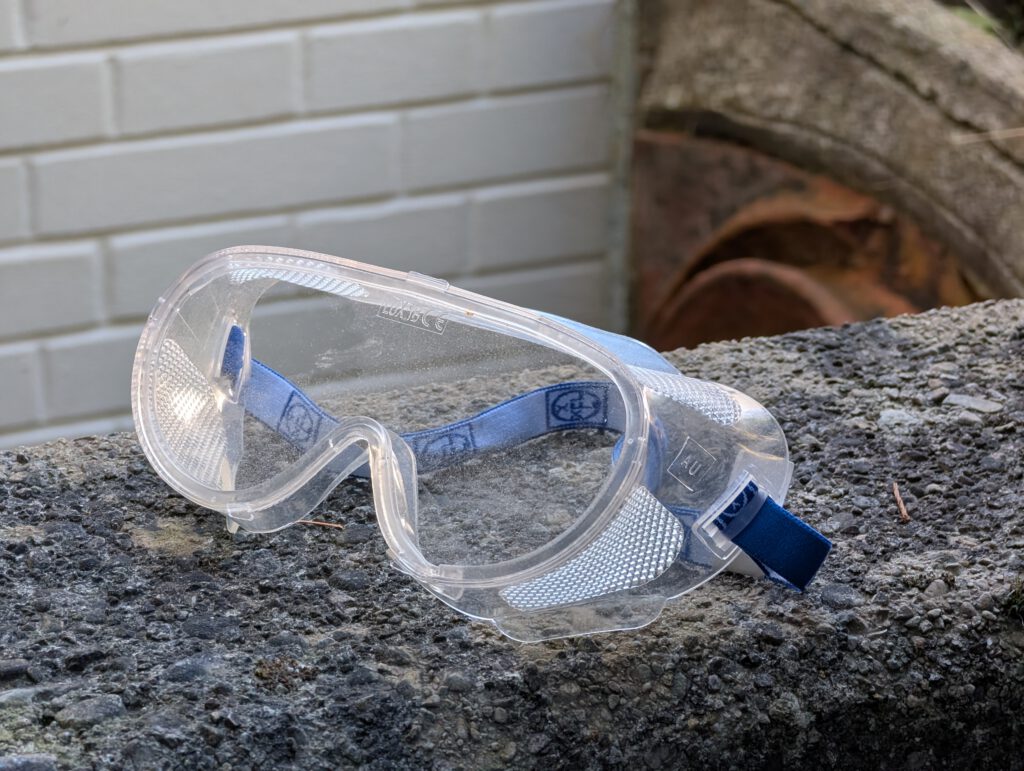
Why not put on safety goggles when you fly your model as a rubber sling can store and release massive energy.
Help prevent preventable accidents.
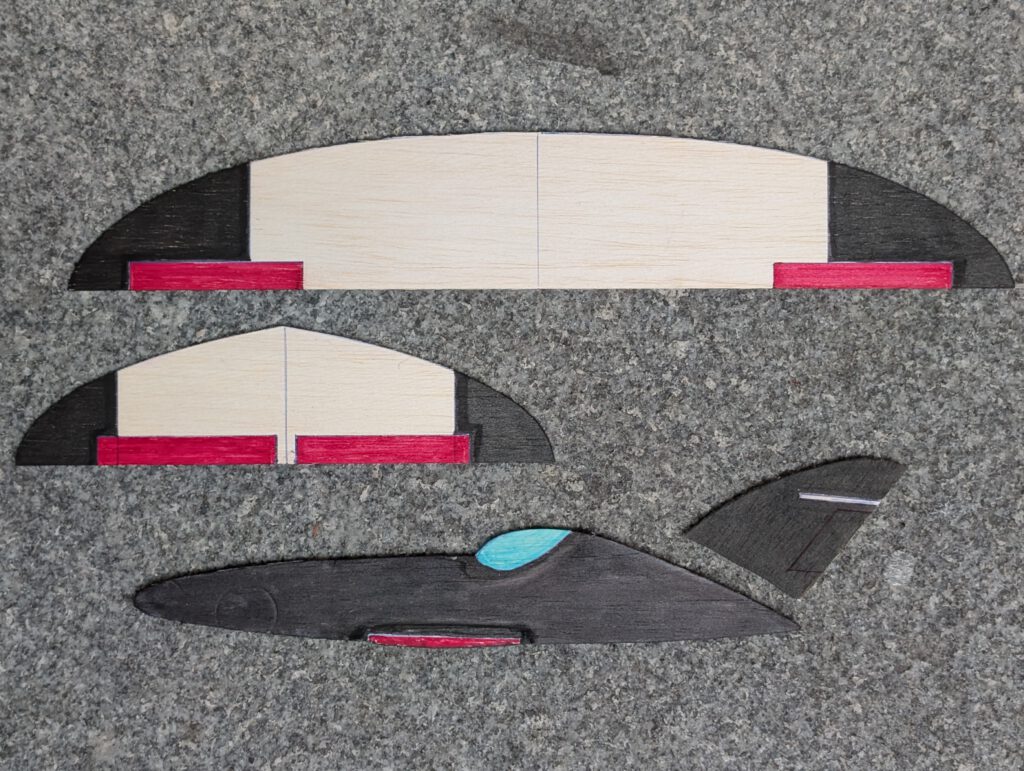
Building the balsa sheet catapult glider Slangbella Tubarão
Materials
Fuselage: B 3; wings: B 1.5; horizontal stab: B 1.5; fin: stiff B 1.5 or B 2; two small pieces of hardwood 2 or 2.5; piano wire 1.2 diameter; linen/cotton band width ½ in = 12 mm; ballast: piece of steel or lead.
Assembly
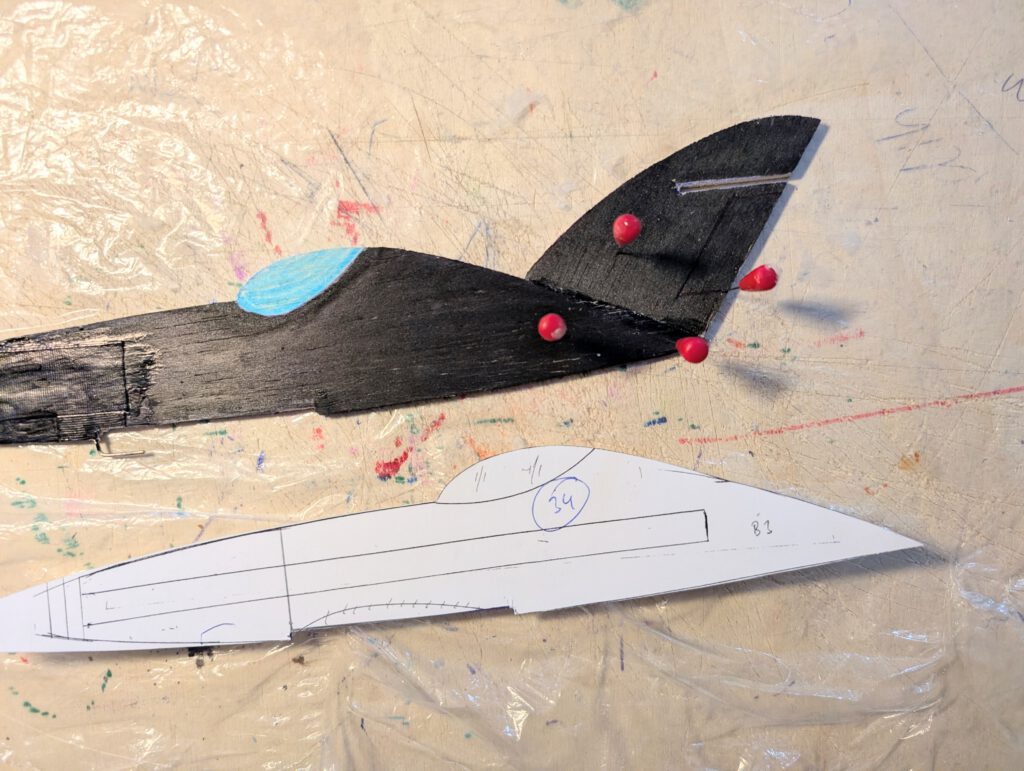
Cut out all balsa parts according to plan. Sand meticulously. Transfer outlines of cockpit, rudders and elevators from paper to balsa parts. If desired paint left side of fuselage and/or wings and/or horizontal stab now.
Fuselage.
Pin fuselage on building board, right side up. Cement long linen band along the fuselage. Let dry.
Make cutout for wing into fuselage.
Bend piano wire into hook form just as shown on plan. Carve out bed for hook on left side of fuselage using a sharp knife and a round file. Insert hook and epoxy it. When dry use Balsa Putty to fill possible irregularities. Let dry. Sand area smoothly. Cement a sufficiently large piece of cotton or linen over the area as on plan. When dry sand left and right side smoothly.
Renew color on left fuselage side and newly paint right side.
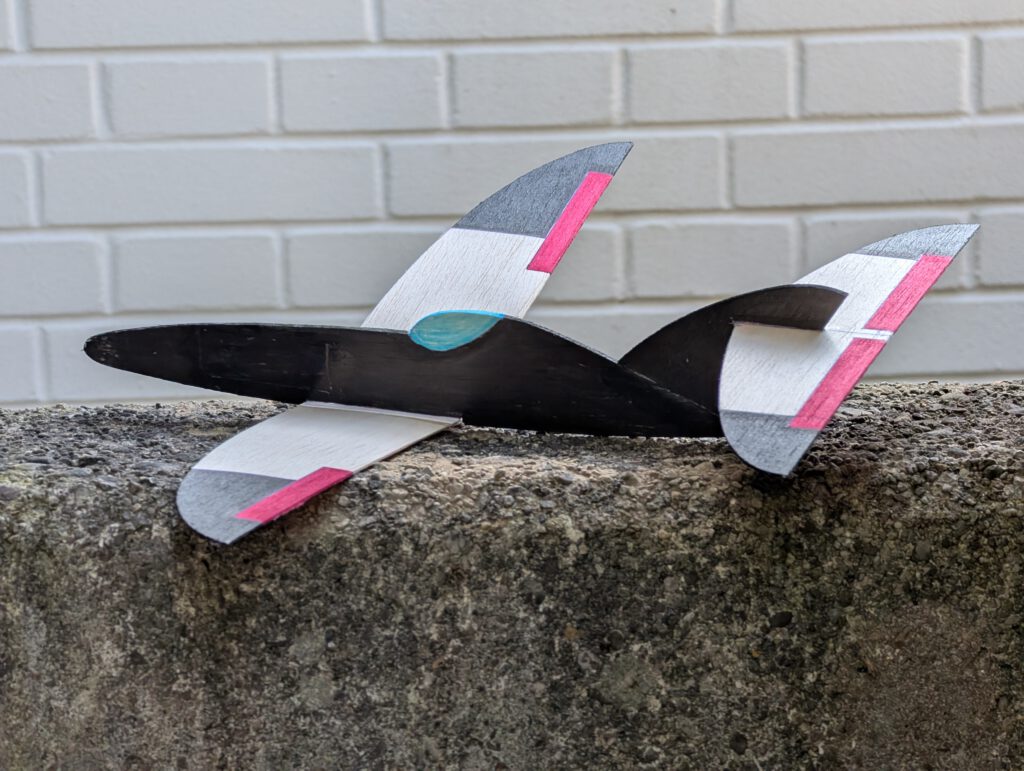
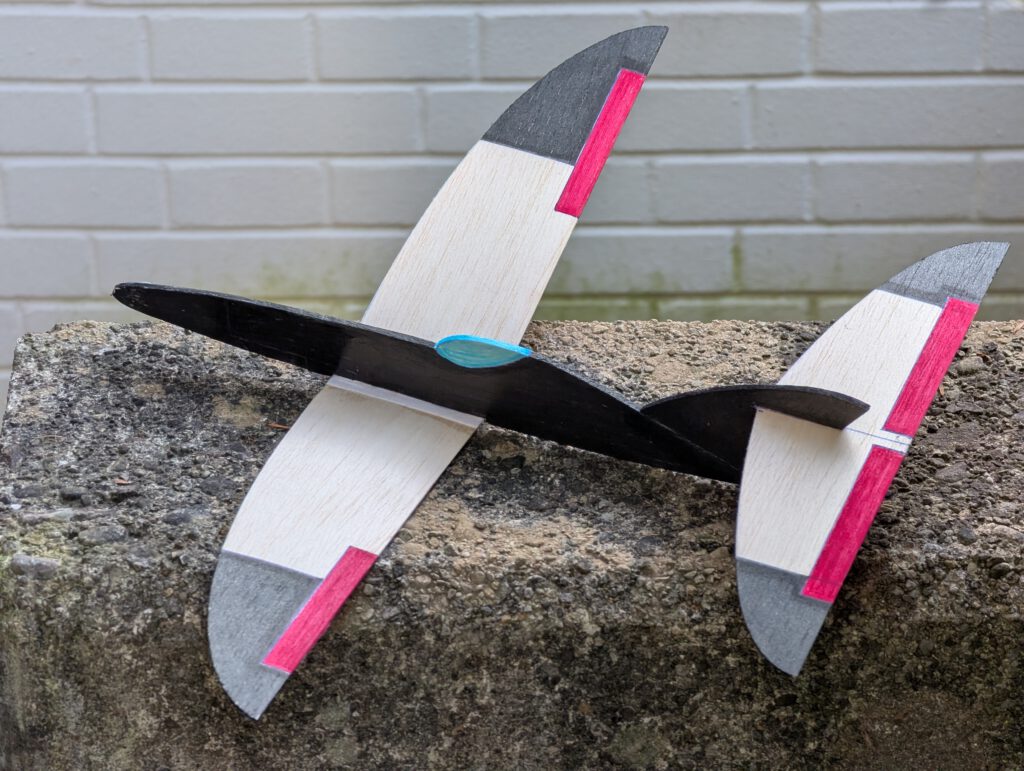
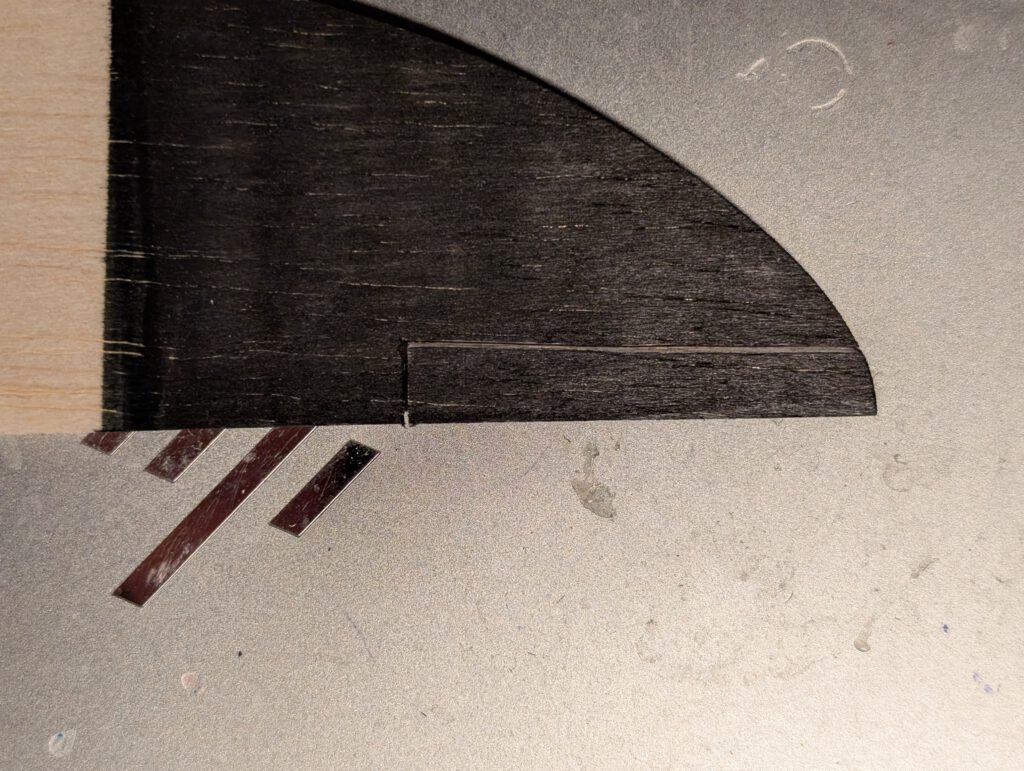
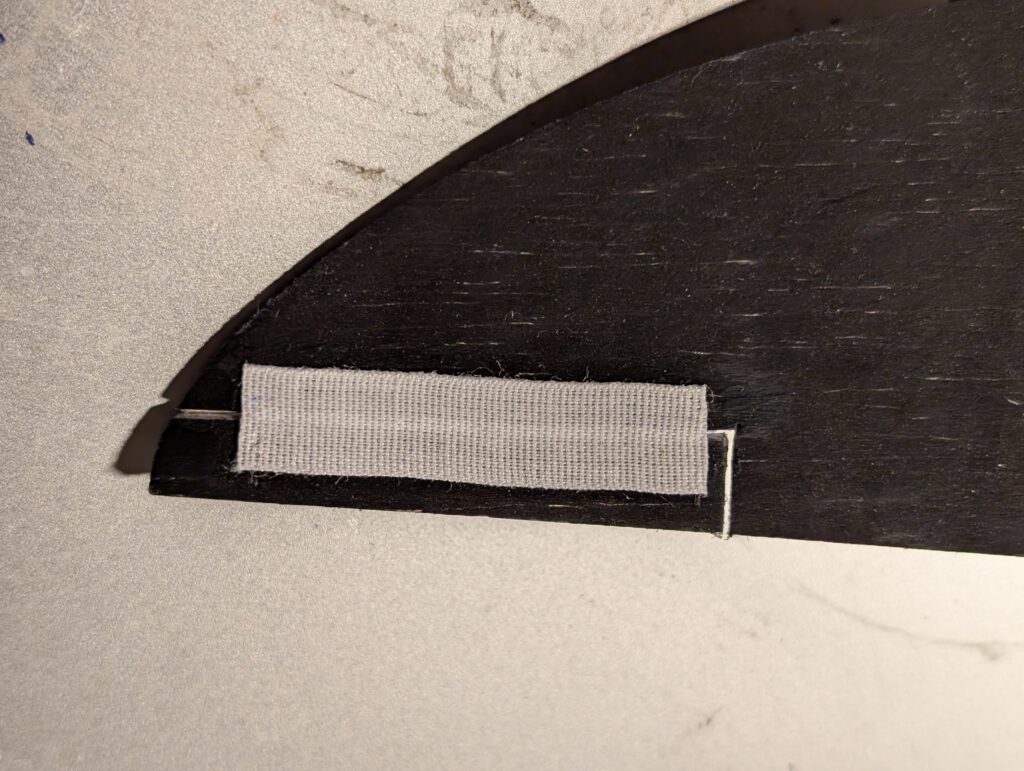
Fin.
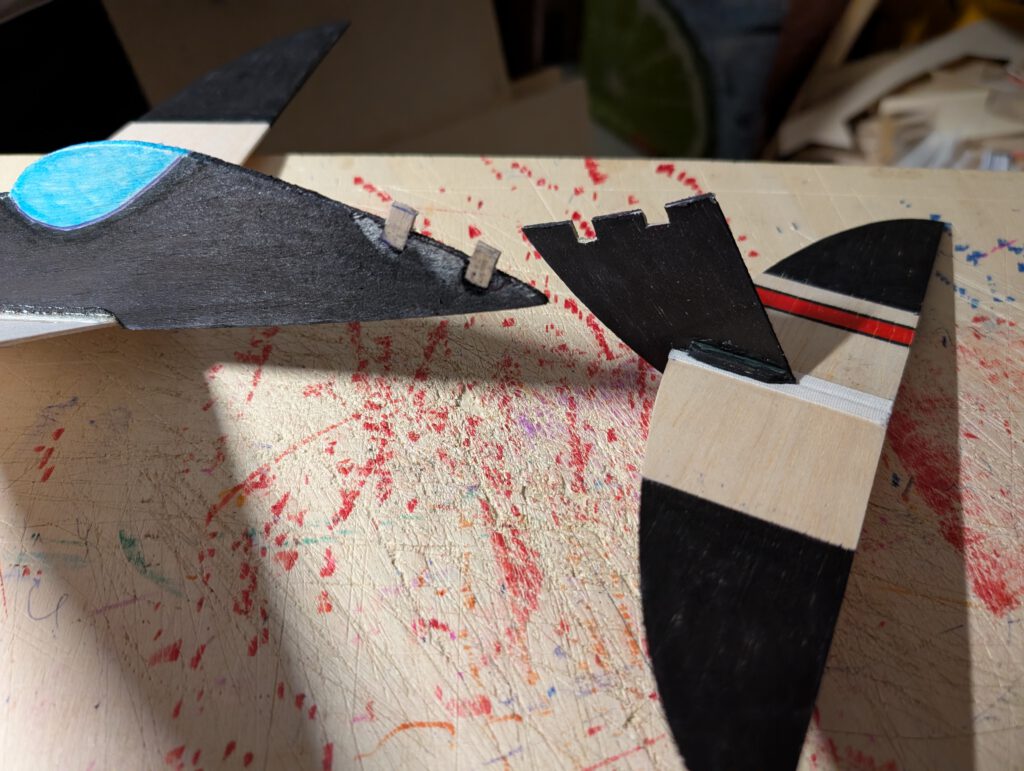
Epoxy fin on fuselage as on plan and let dry. Use hardwood teeth for a more durable connection between fuselage and fin or cover contact area with linen band on both sides amply using cement or cover contact area with multiple layers of white wood glue after epoxy is dry.
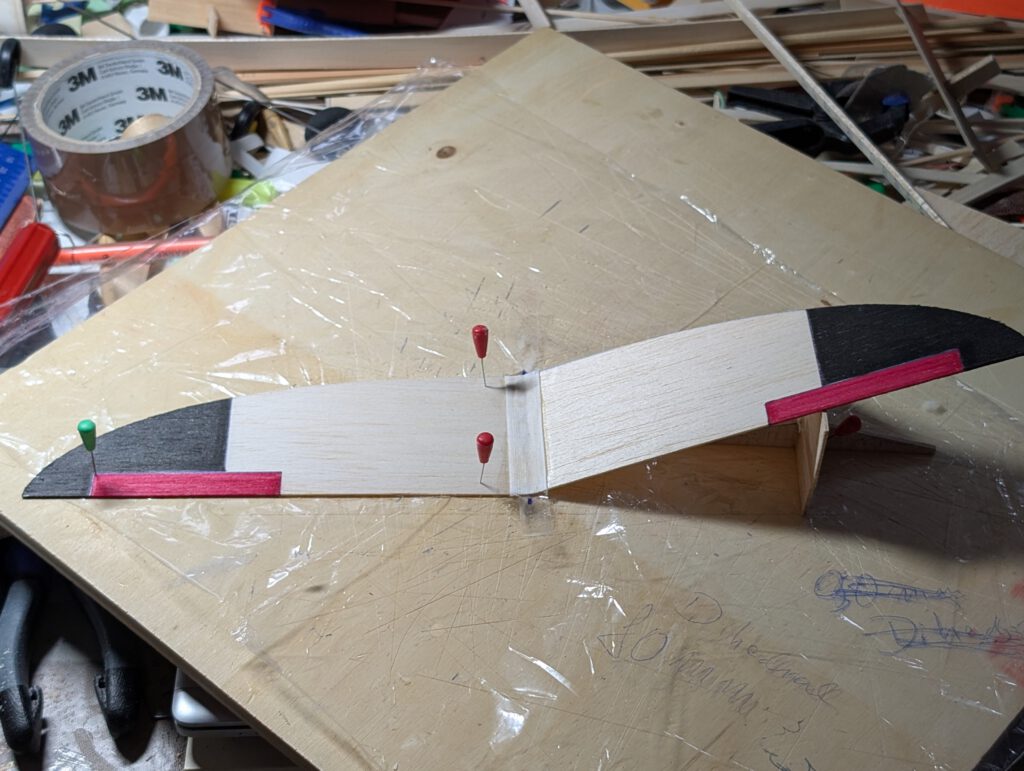
Wings.
Pin one wing half on building board. Underlay other half’s tip according to dihedral given on plan and cement both halves (photo). Visual check for best possible symmetry. Let dry. Use linen/cotton band for reinforcing wing half joints on top and on bottom (photo).
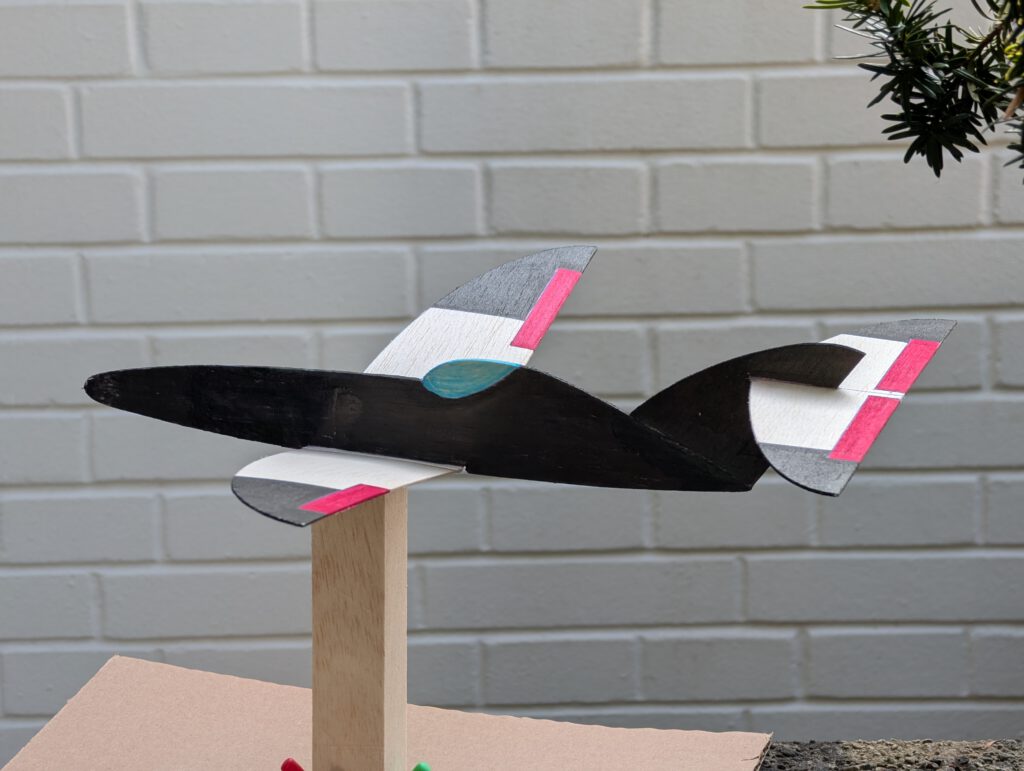
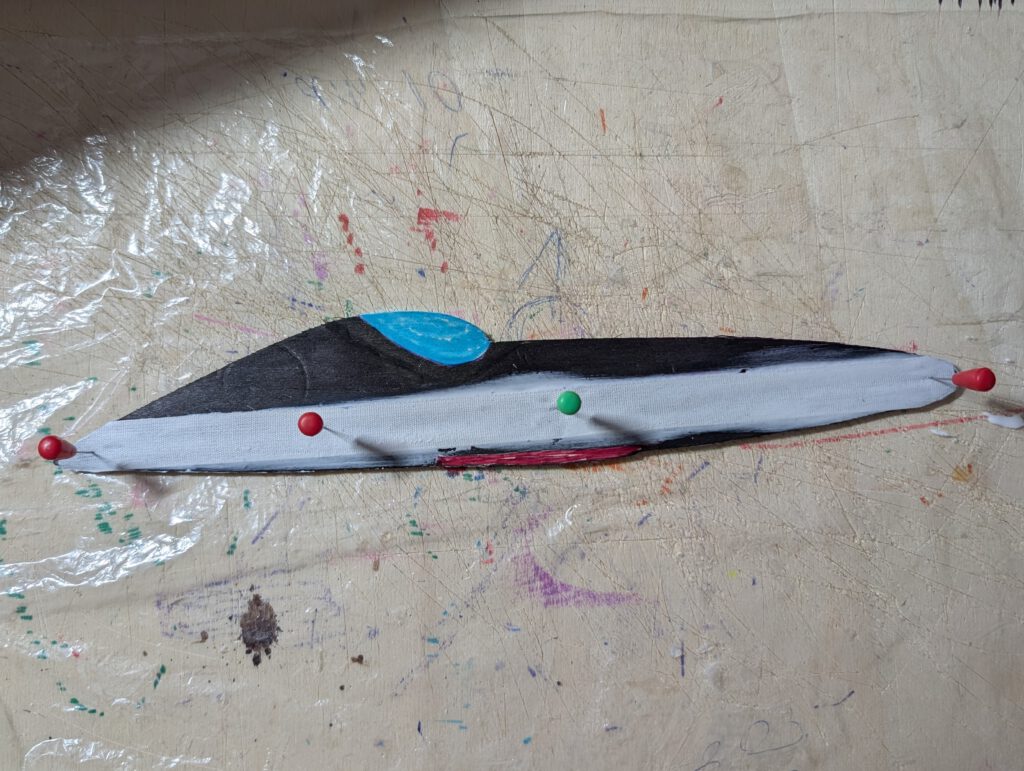
Final assembly.
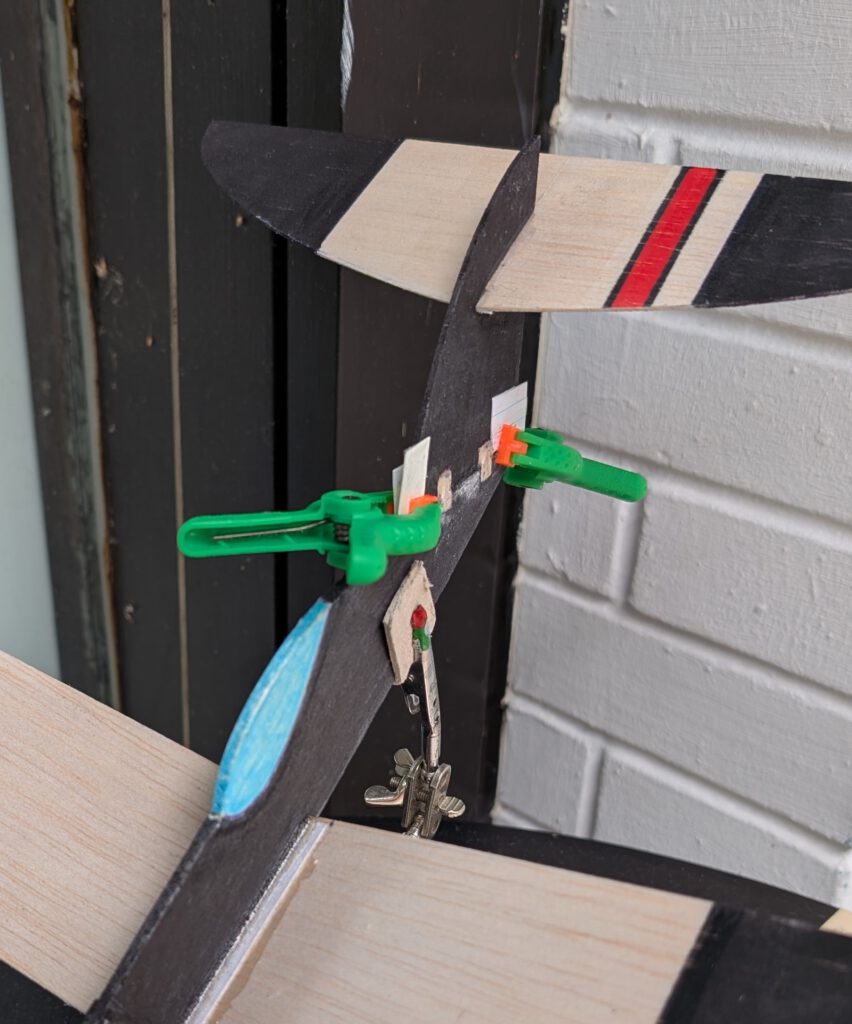
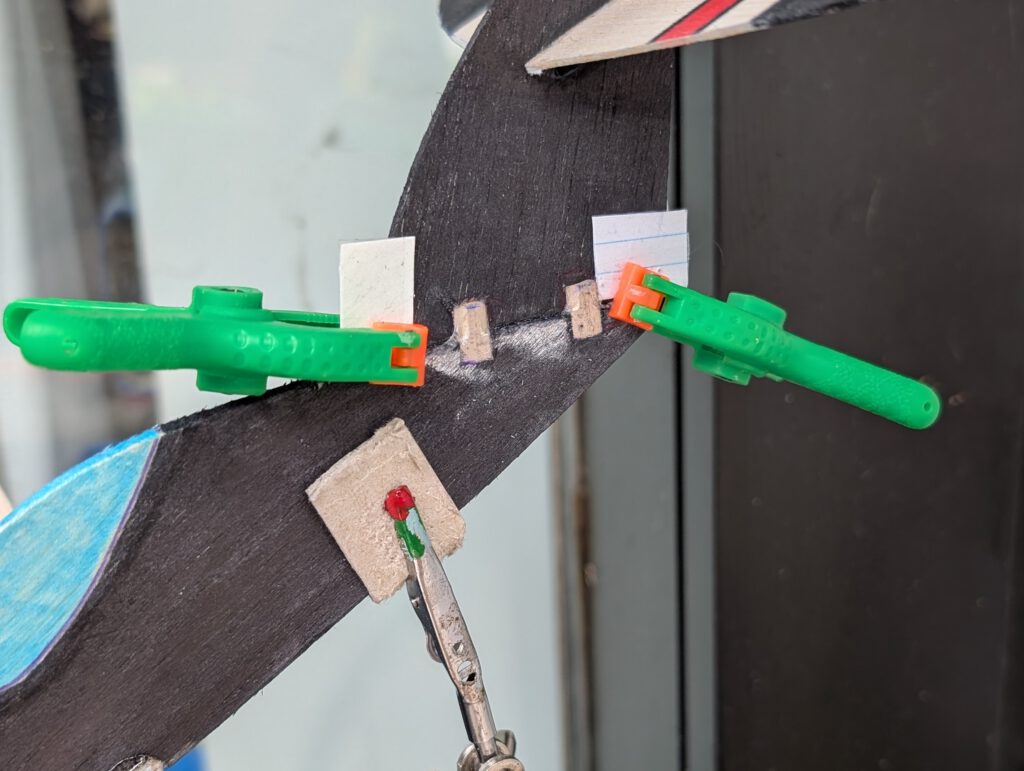
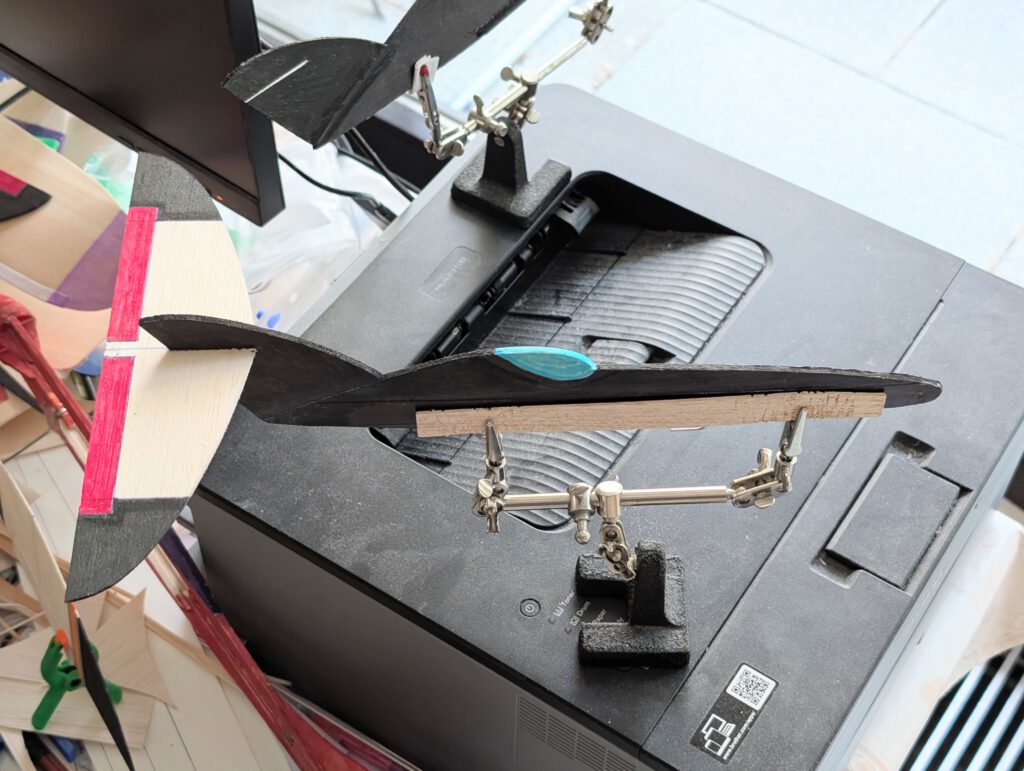
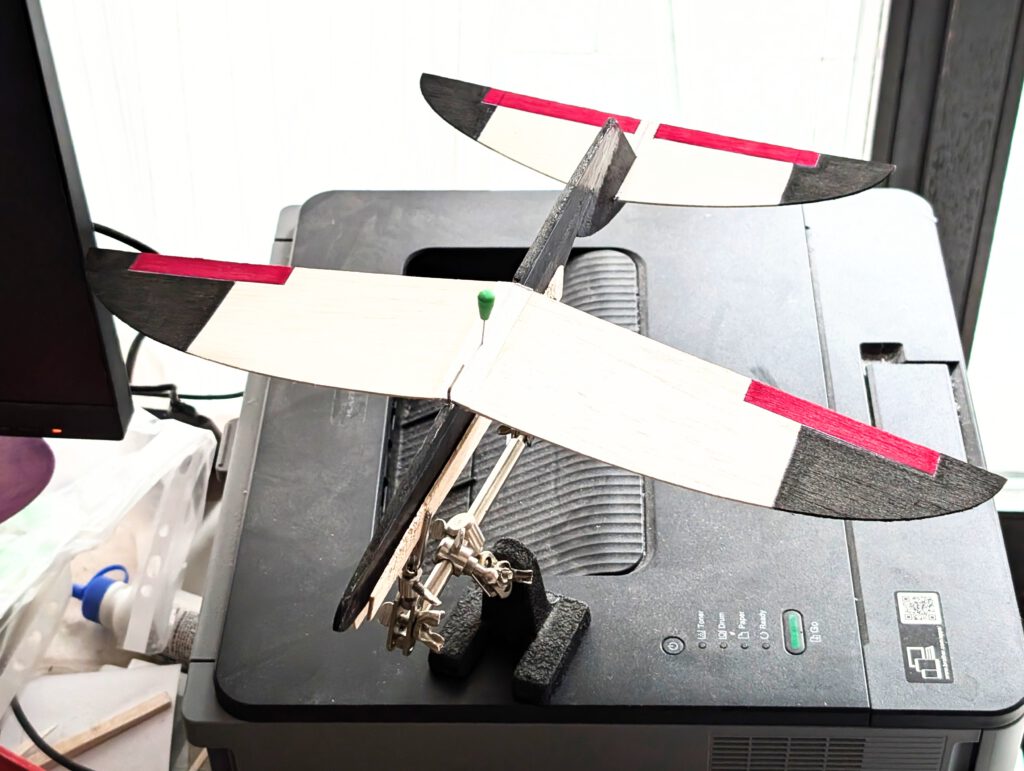
Fix fuselage on a so called third hand. Glue horizontal stab into its position in fin using pins to hold in place (photo). Remember to double check symmetry. When dry turn fuselage around and fix it again on third hand (photo). Repeat same procedure for wing. Let dry.
Balance at given C/G. Make first test glides over tall grass.
Να έχετε ευχάριστες πτήσεις! (Have pleasant flights!)
Leave a Reply